


Manage Action1 Keys
How to create a new key
You may need to create an Action1 Key in the following cases:
- You are an Enterprise Admin and do not have an Action1 Key yet.
- You need to create an Action1 Key for a newly configured Action1 Enterprise.
- A requested Action1 Key has not been approved, so you want to create a new one to retry the approval.
NOTE: The first Action1 Key created during initial ETP setup becomes Active without approval from another administrator. Keys created for additional administrators require approval from an Enterprise Admin who already has an Active Action1 Key.
Use the wizard to create your new Action1 Key as described below. If approval is required, complete both stages. However, if you already have an Action1 Key with the Active status, you can only change it, as described in “How to change your Action1 Key”.
Step 1: Create Your Key
Action1 Deployer is implemented as a management service that runs on a Windows server inside your network, usually on the administrator’s computer or a dedicated server. Action1 Deployer automatically scans your Active Directory to discover workstations and servers that reside in an Active Directory domain or an organizational unit (OU). Having discovered the new computers, it deploys Action1 agents to patch them.
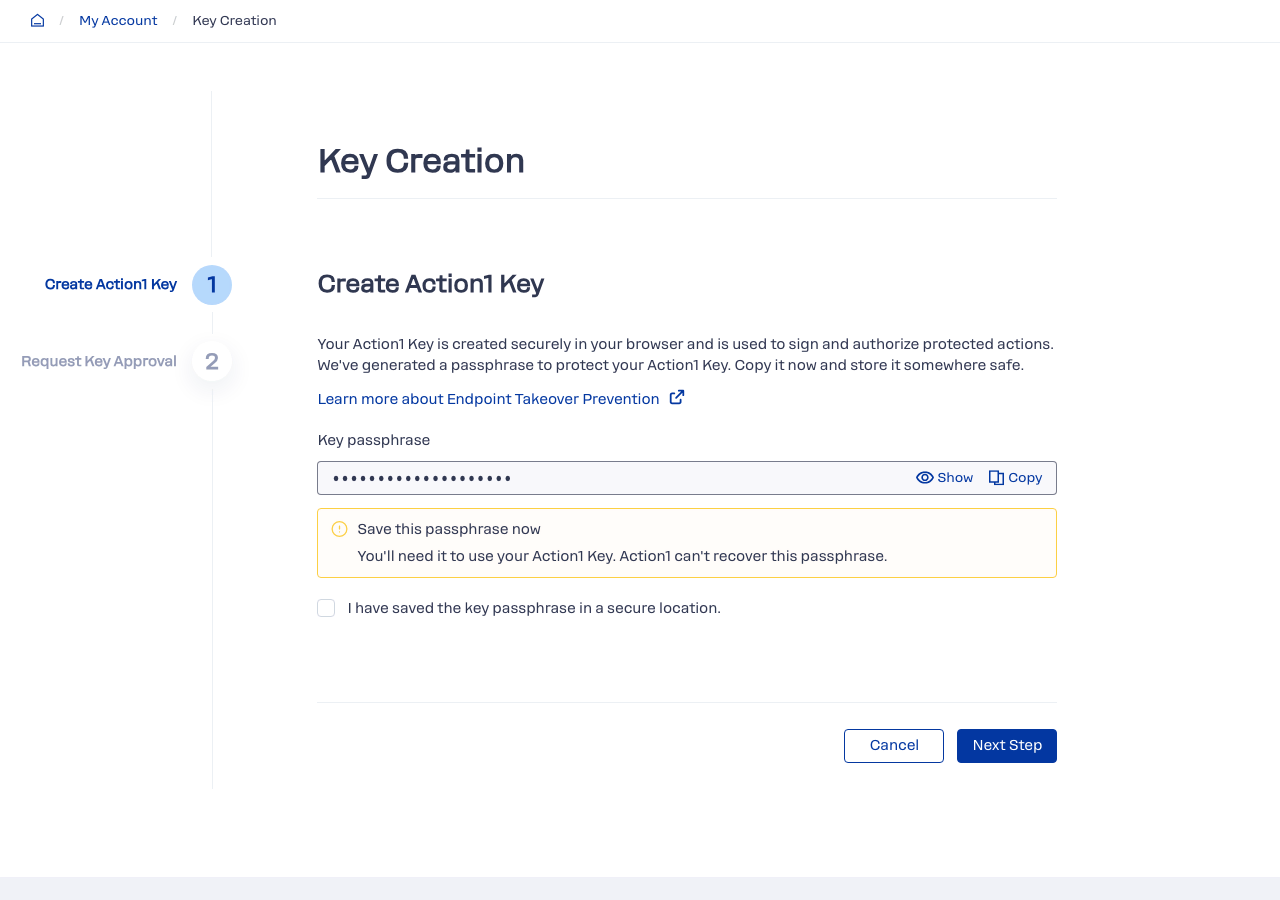
- By default, your Action1 Key is stored encrypted in Cloud Storage. Action1 generates the Key passphrase automatically. Copy it and store it securely. You will need it to confirm creation of your Action1 Key.
If you use Local Storage, click Download Action1 Key File. Your Action1 Key will be downloaded as an Action1 Key file in PEM format. Check your Downloads folder to ensure the file is present, then store this file in a separate secure location (not the one where your Key passphrase is stored).
- Next, you must confirm creation of your Action1 Key: enter the Key passphrase you have copied, then click Confirm. If you use Local Storage, you will need to provide the Action1 Key file first.
Step 2: Get Confirmation code and request Action1 Key approval
This step applies to Action1 Keys that require approval. Before using the new Action1 Key, have it approved by another Enterprise Admin who already has an Active Action1 Key. The approving administrator needs a Confirmation code generated for your key.
- Copy the Confirmation code and store it securely.
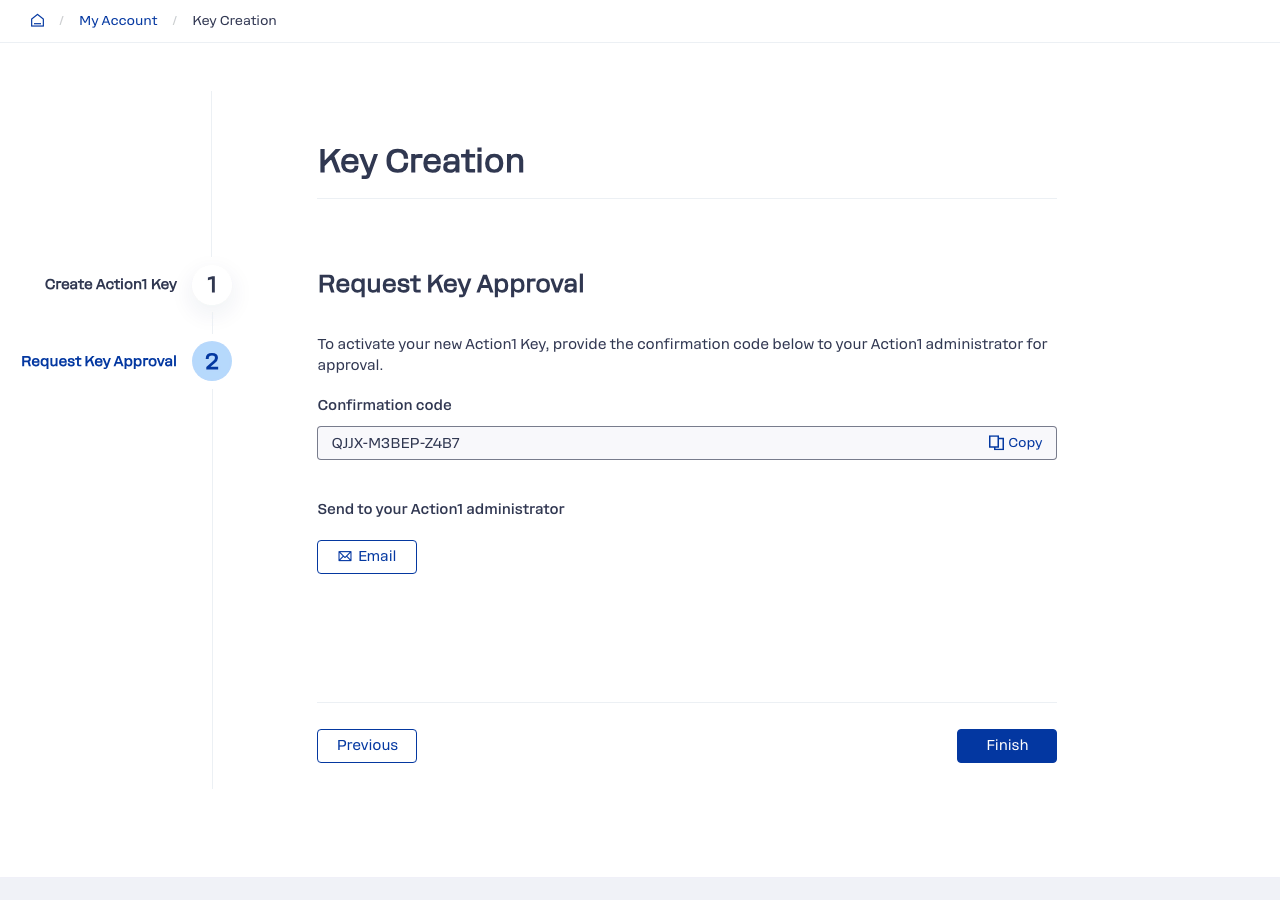
- Send it to another Enterprise Admin for approval through a secure channel outside of Action1. You can, for example, send it by Email.
NOTE: Usually, the approving administrator is the person who invited you to work with Action1 and assigned you the Enterprise Admin role.
- Click Finish.
After the new Action1 Key is created, the initiator’s account will be displayed on the My Account and Users & API Credentials pages with the Action1 Key status set to Waiting for approval. See “How to approve a key” for details.
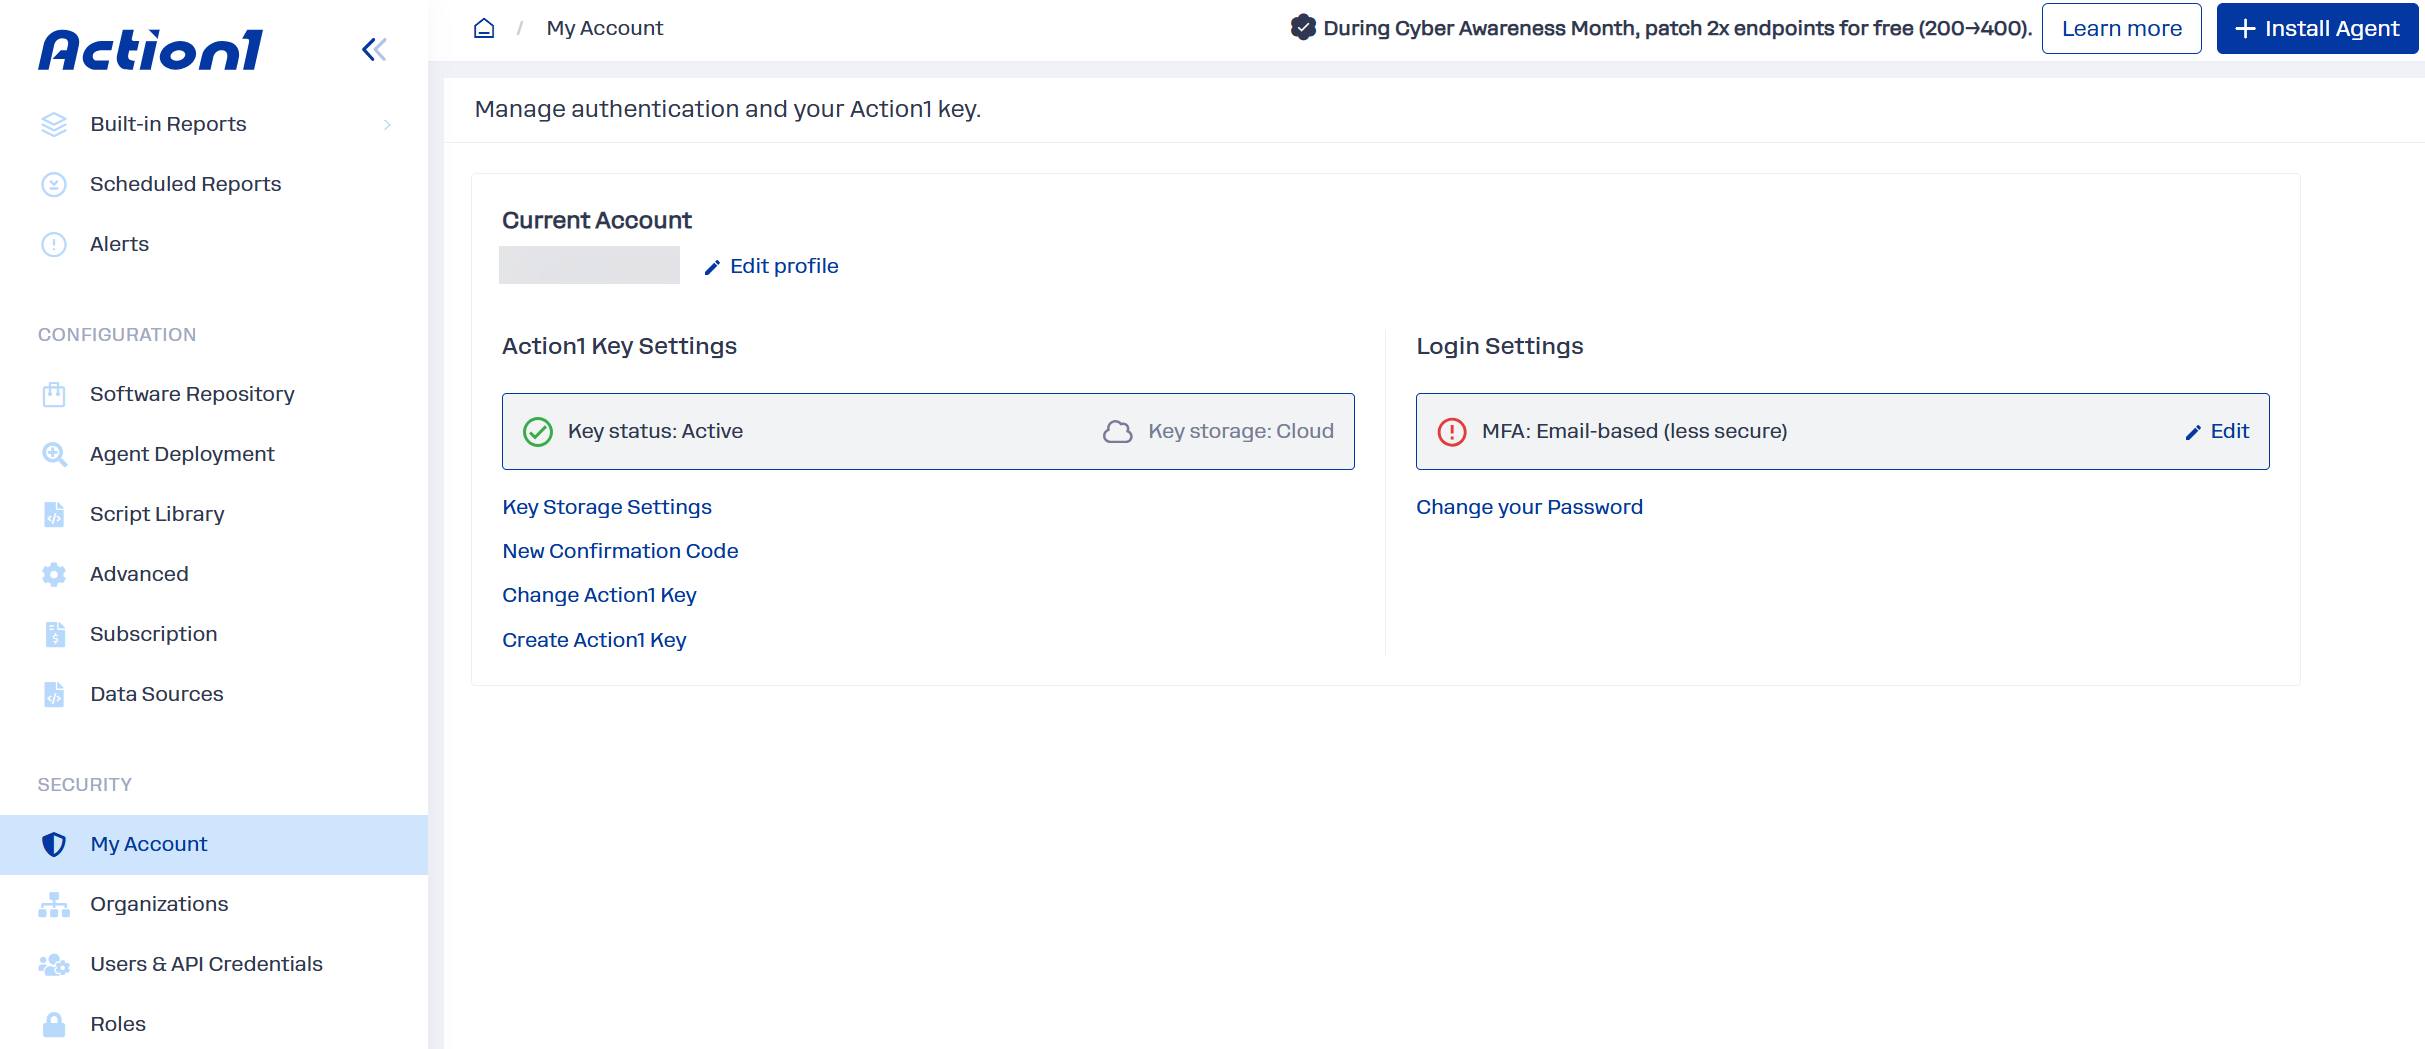
Tip: If you have no access to your Confirmation code at the moment you need approval, you can click New Confirmation Code on My Account page.
How to approve a key
If you are an Enterprise Admin with an Active Action1 Key, you can approve the new Action1 Keys of other users upon their request.
- On the Users & API Credentials page, select the user whose Action1 Key status is Waiting for approval.
- From Actions, select Approve key to start the wizard.
- Examine the Action1 key information, including the requesting account name, email address, and Action1 Key creation date. Enter the Confirmation code you obtained from the requesting administrator.
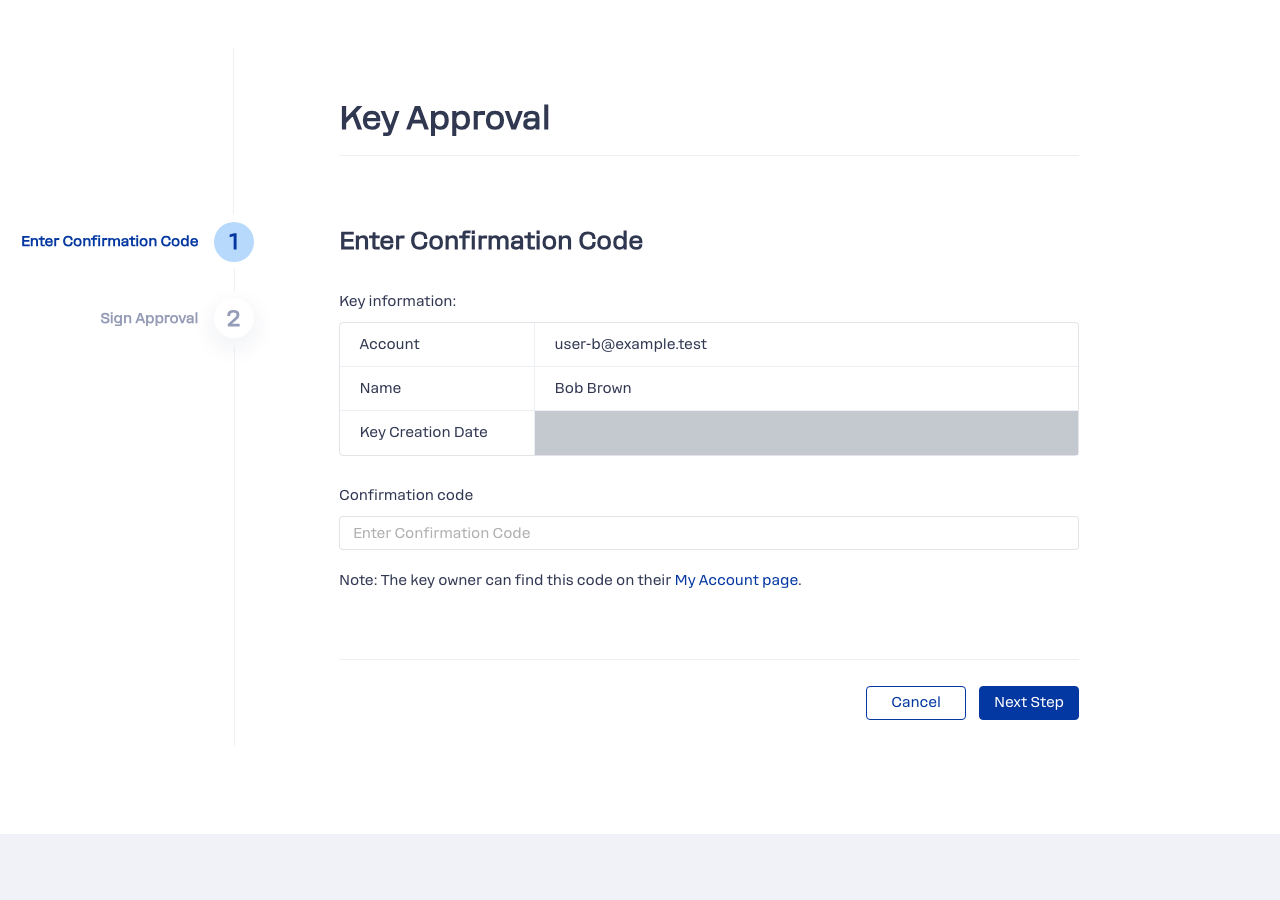
- Next, provide your Key passphrase (if you use Local Storage, also select your Action1 Key file), then click Sign.
- The Action1 Key status for the requesting user will change to Active, and the Action1 Key can be used to sign protected actions.
How to change a key
You may need to change your Action1 Key, for example, for rotation purposes, or if you lost access to the current passphrase or key, or if either is compromised.
The Key Change wizard replaces your current Action1 Key and generates a new Key passphrase. The procedure depends on whether you still have access to your current Action1 Key.
- If you have access, you can replace the Action1 Key yourself and sign the affected configurations using the new Action1 Key. Follow Scenario A below.
- If you no longer have access, another Enterprise Admin must approve the new Action1 Key before it becomes Active. Affected configurations can be signed again during approval or after activation. Follow Scenario B below.
Important! If no Enterprise Admin has access to an Active Action1 Key, Action1 cannot recover the existing Action1 Key. You will need to redeploy all Action1 agents. Contact Action1 Support for recovery assistance.
- On the My Account page, select Change Action1 Key to start the wizard.
- Select the reason that matches your situation and follow the corresponding scenario below.
NOTE: After replacing your Action1 Key, configurations signed with the previous Action1 Key (scripts, automations, etc.) should be signed again using the new Action1 Key.
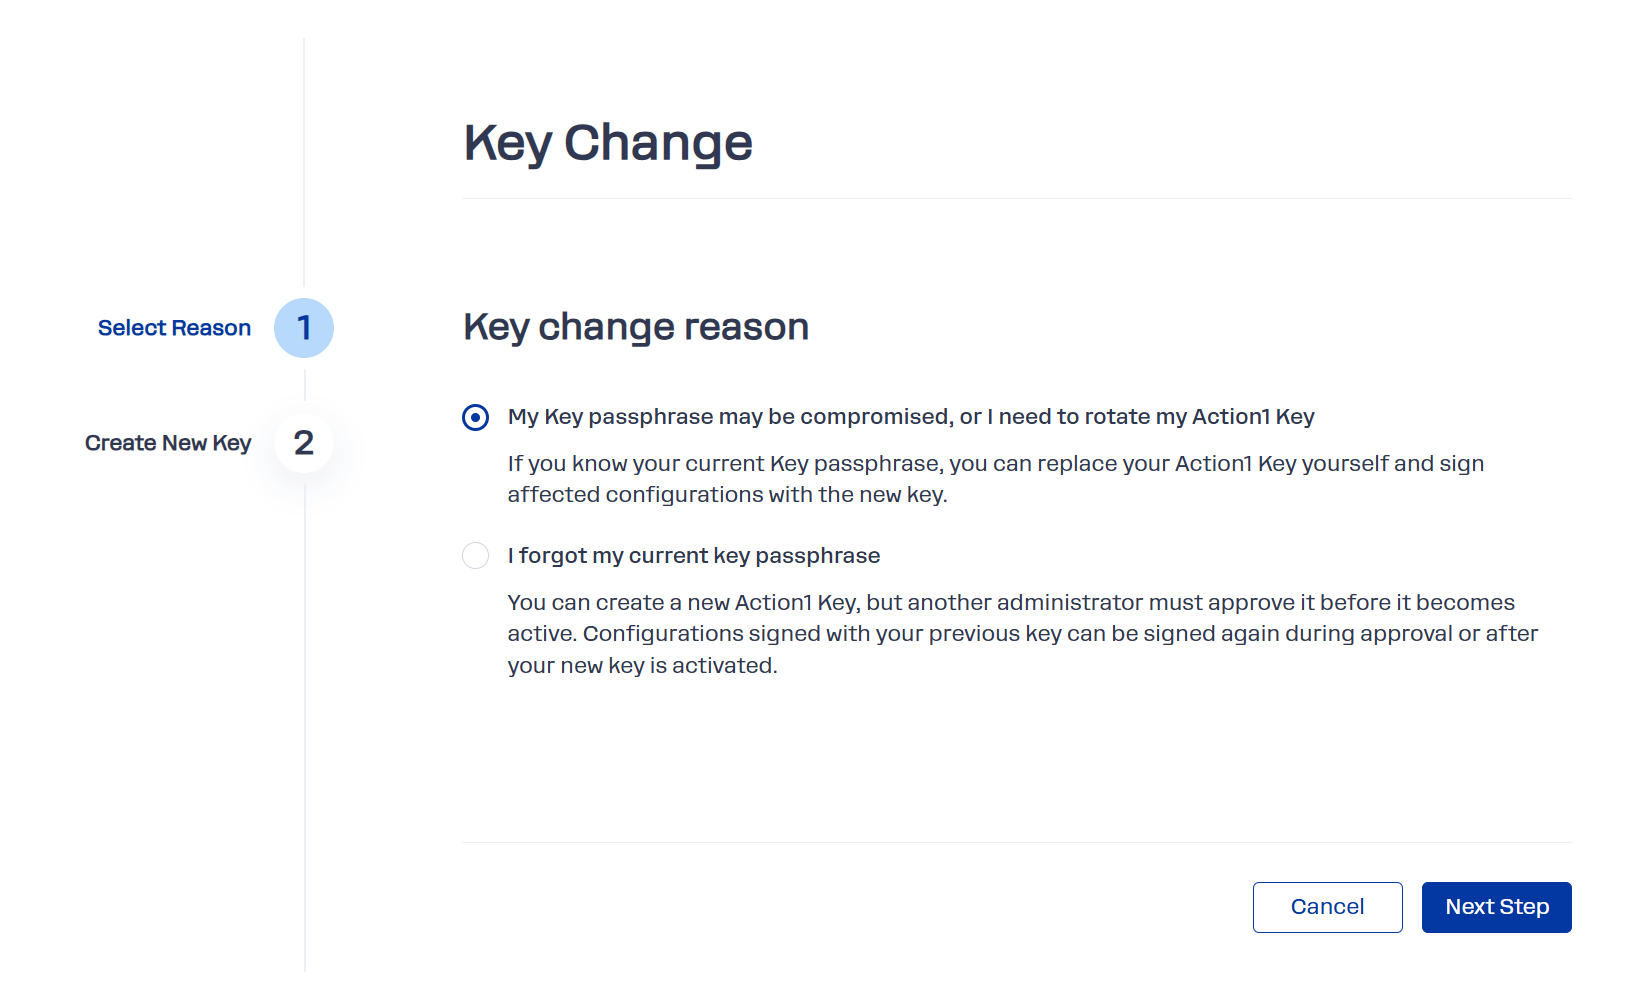
Scenario A: key rotation
- In the Key Change wizard, select My Action1 Key may be compromised, or I need to rotate my Action1 Key, then click Next Step.
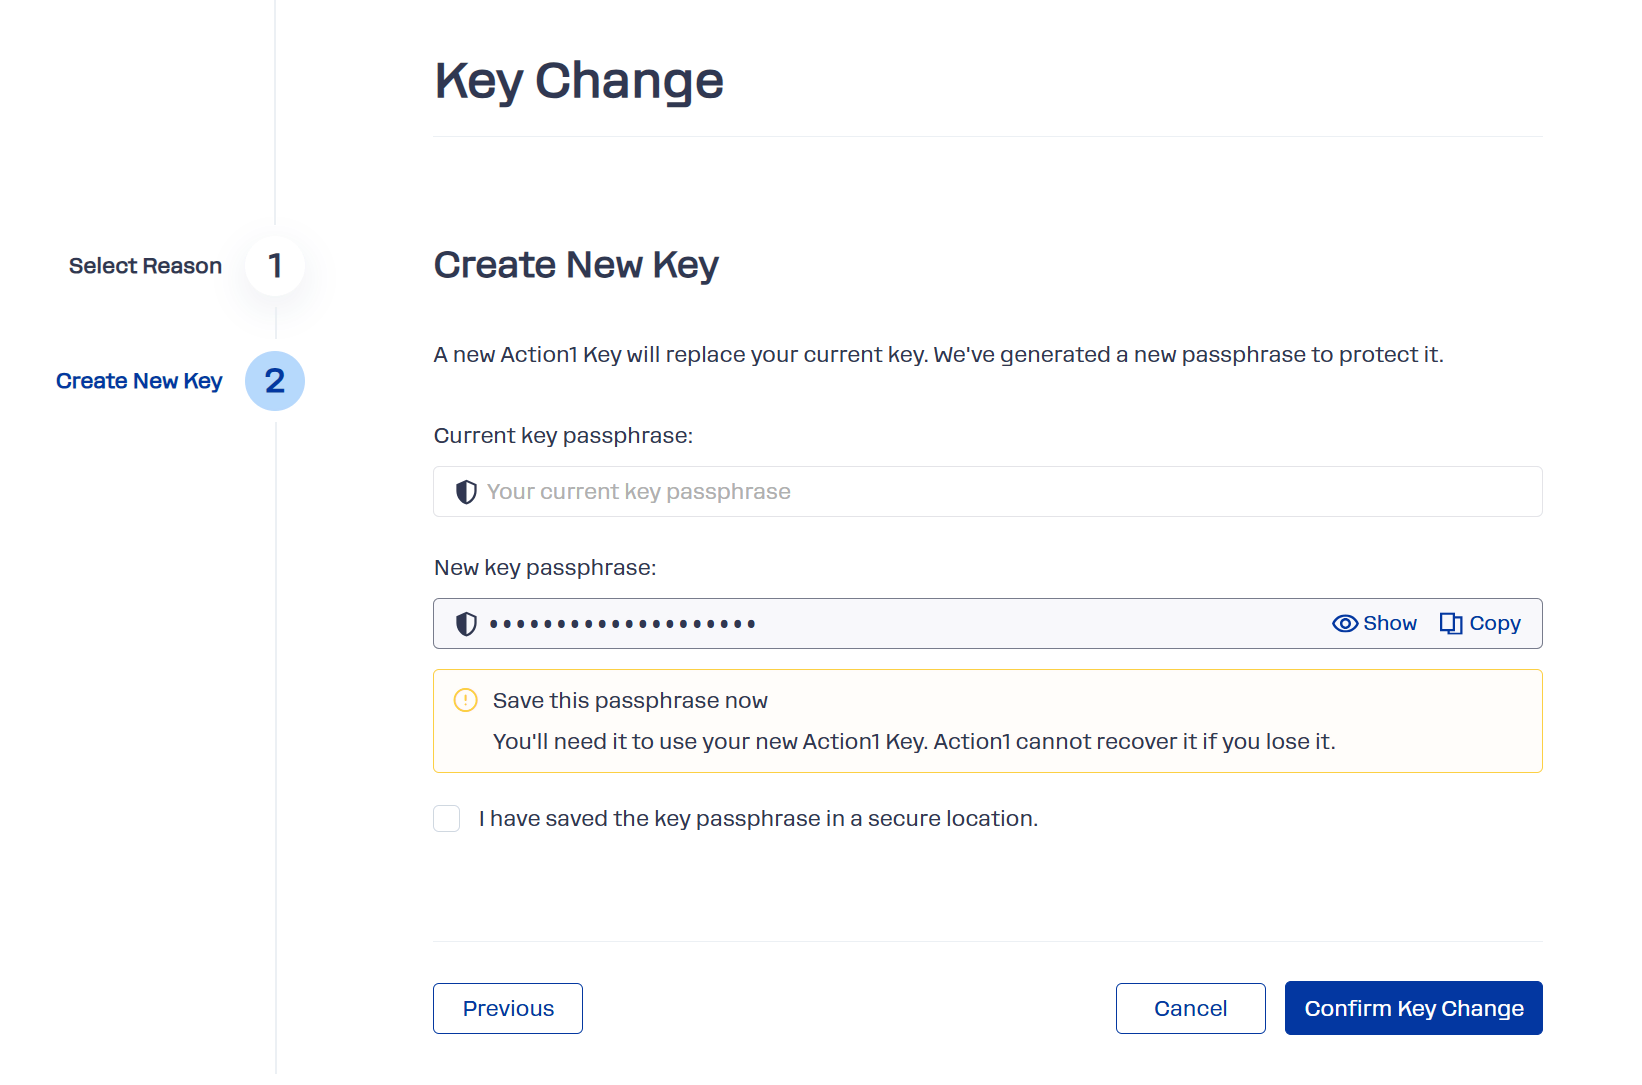
- On Create New Key, provide your current Key passphrase. If you use Local Storage, also select your current Action1 Key file.
- Copy the newly generated Key passphrase and store it securely. Select the checkbox confirming that you have saved it.
- If you use Local Storage, click Download Action1 Key File and store the new Action1 Key file securely, separately from the new Key passphrase.
- Click Confirm Key Change.
- In the Confirm Changing the Key dialog, enter your new Key passphrase. If you use Local Storage, also select your new Action1 Key file. Click Confirm.
- In the New Signatures Required dialog, review the configurations previously signed with your old Action1 Key. Select the configurations you want to sign again using your new Action1 Key.
- Click Sign Selected to sign the selected configurations.
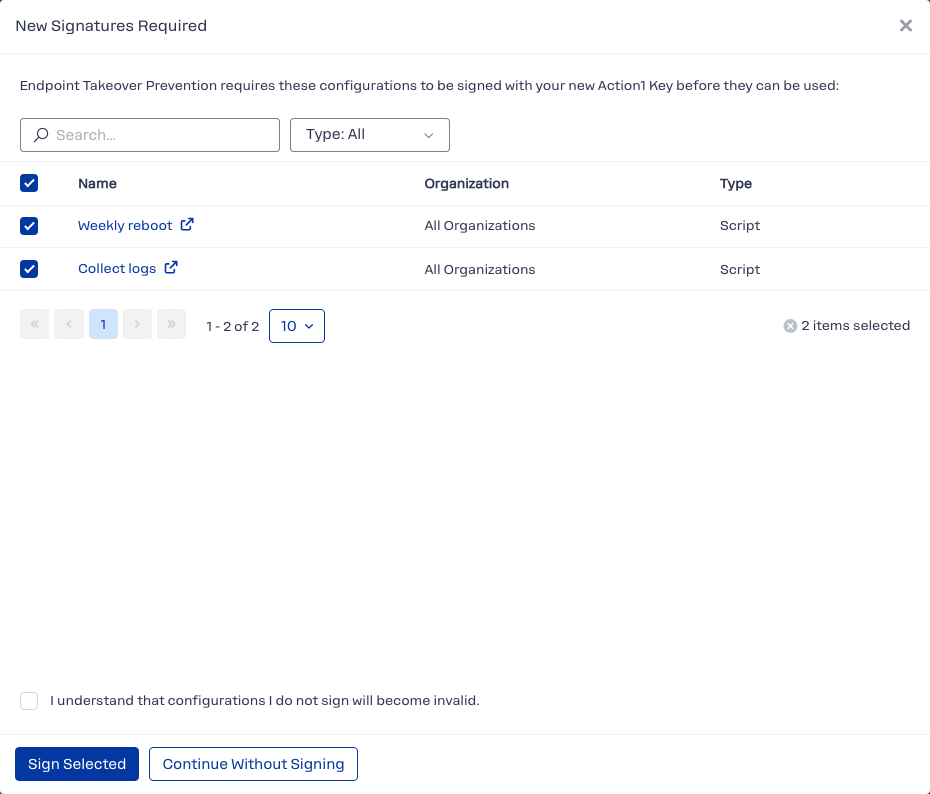
Important! Configurations you do not sign will become invalid. To continue without signing, select I understand that configurations I do not sign will become invalid, then click Continue Without Signing.
Scenario B: lost access
Another Enterprise Admin with an Active Action1 Key must approve your replacement Action1 Key before you can use it.
-
In the Key Change wizard, select I don’t have access to my current Action1 Key, then click Next Step.
Important! New passphrase/Action1 Key generation in case of access loss is possible only if you have another Enterprise Admin with an active Action1 key. This person will approve the newly created key.
- On Create New Key, copy the generated Key passphrase and store it securely. Action1 cannot recover it if you lose it.
- Select the checkbox confirming that you have saved the Key passphrase.
- Click Download Action1 Key File and store the downloaded Action1 Key file securely, separately from the Key passphrase. Click Next Step.
- On Request Key Approval, copy the Confirmation code and send it securely to another Enterprise Admin with an Active Action1 Key.
- Have that administrator approve your replacement Action1 Key as described in “How to approve an Action1 Key”.
NOTE: Configurations signed with your previous Action1 Key can be signed again during approval or after your replacement Action1 Key becomes Active.
How to revoke a key
Before you start, consider the following:
- It is strongly recommended to keep at least 2 Enterprise Admins with Active Action1 Keys at all times.
- You cannot revoke your own Action1 Key. To revoke it, ask another Enterprise Admin with an Active Action1 Key to perform the procedure below.
- After revocation, the Action1 Key can no longer be used to sign configurations. You can sign the affected configurations again using your own Action1 Key during the revocation process. Configurations you do not sign will become invalid.
To revoke an Action1 key:
- In the Users & API Credentials page, select the user whose Action1 Key you want to revoke.
- From the Actions, select Revoke key, then click Revoke.
- In the New Signatures Required dialog, review the configurations previously signed with the Action1 Key being revoked. Select the configurations you want to sign again using your own Action1 Key.
- Click Sign Selected to sign the selected configurations.
Important! Configurations you do not sign will become invalid. To continue without signing, select I understand that configurations I do not sign will become invalid, then click Continue Without Signing.
How to switch between Local Storage and Cloud Storage?
To switch to Local Storage
NOTE: Before you start, check your browser settings to ensure that file downloads are allowed.
- Navigate to Security | My Account and click Key Storage Settings.
- In the dialog displayed, click Switch to Local Key Storage.
Your Action1 Key will be downloaded to the default location as an Action1 Key file with KEY extension. Confirm the download and save the file securely, separately from your passphrase.
To switch to Cloud mode
- Navigate to Security | My Account and click Key Storage Settings.
- In the dialog displayed, provide your Action1 Key file and click Switch to Cloud Key Storage.