Migrating Between Regions
To support data protection laws and compliance standards enforced in your country, Action1 enables customers to choose where to store the endpoints and associated data. Currently, Action1 data centers are located in the following regions:
- North America
- Europe
- Australia
To ensure data integrity and compliance, consider moving your account and endpoints to a relevant region. This article explains how to migrate your account and endpoints manually, and provides step-by-step instructions. Automated migration will be available later.
NOTE: Groups, user accounts, automations, custom applications, scripts, data sources, and reports cannot be transferred and should be moved manually.
Step 1: Create a New Action1 Account
Start by registering a new Action1 account with the same email address, make sure to specify a different region, e.g., Europe.
- Free subscription: complete verification of a new account
- Paid subscription: contact support to transfer your license to a new region. As soon as the license is transferred to the new account, the subscription of the initial account will expire in a month.
Step 2: Prepare Endpoints for Migration
Before you start migrating endpoints, complete the following tasks in your initial account. For each organization:
- Sign in to the initial account.
- Make sure endpoints are online.
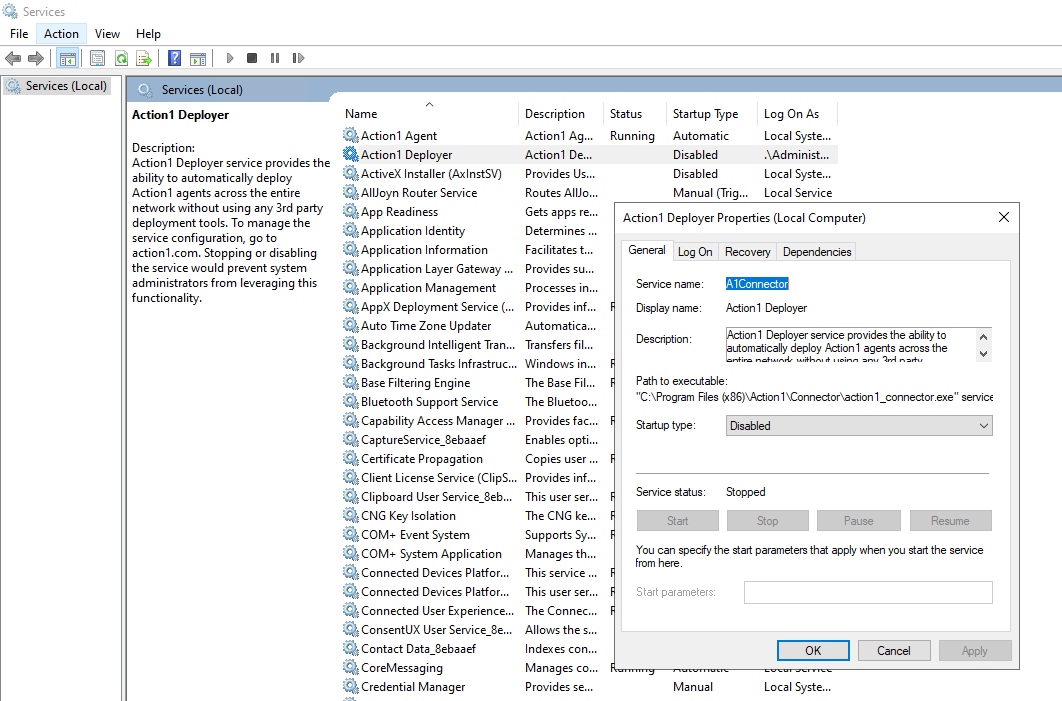
- Disable Action1 Deployer. Follow to the endpoint where Action1 Deployer is installed, open Services snap-in, stop and disable the appropriate service.
- Navigate to Configuration > Agent Deployment and ensure Deployer doesn’t manage your endpoints.
- Disable all automations.
- Make sure there are no automations running against the endpoints.
Step 3: Create New Organizations
In your new account:
- Re-create the organizations you had in your initial account.
- For each organization, download the Action1 agent.
Step 4: Create the Agent Migration Package
Note: Below are the steps for migrating a single organization. Multiple organizations should be migrated one by one, following the same steps for each organization.
For an organization, create the zip archive:
- Download migration_v1.20.zip
- Add the agent installer (MSI file) from a respective new organization to this ZIP archive.
As a result, the ZIP archive should include the following files:
- action1_agent(My_Organization).msi
- launcher.ps1
- migration.ps1
Step 5: Create Apps for Migration
In your initial account, create a software package for the migration_v1.20.zip file. This package will update endpoints from a respective initial organization and move them to an organization in your new account.
- Navigate to Software Repository and select + Add to Repository.
- In the Name field, enter
Agent_Migration, in the Vendor field enterAction1and specify Description. Select Windows from the list of platforms. - Save the settings.
- Then click Add Version.
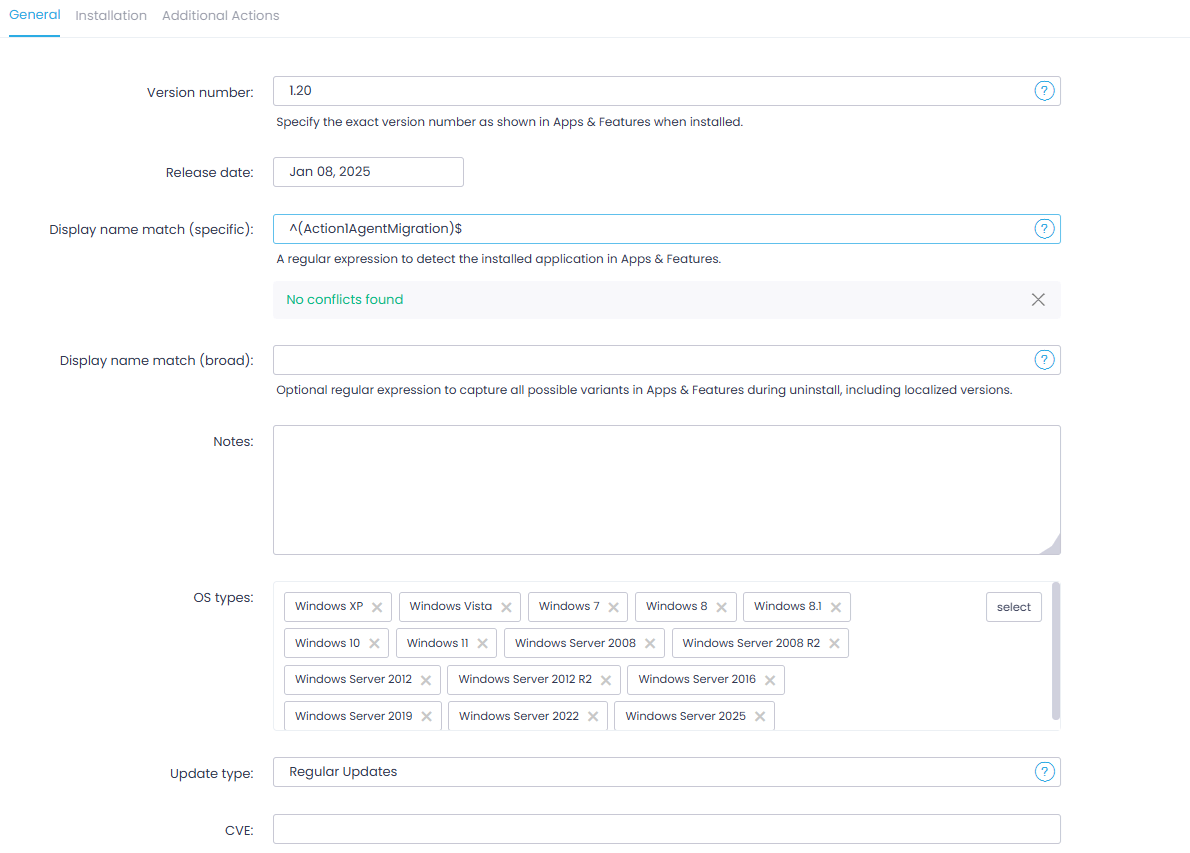
- On the General tab:
- In the Version number, enter 1.20
- In the Display name match (specific), enter ^(Action1AgentMigration)$
- Save the settings.
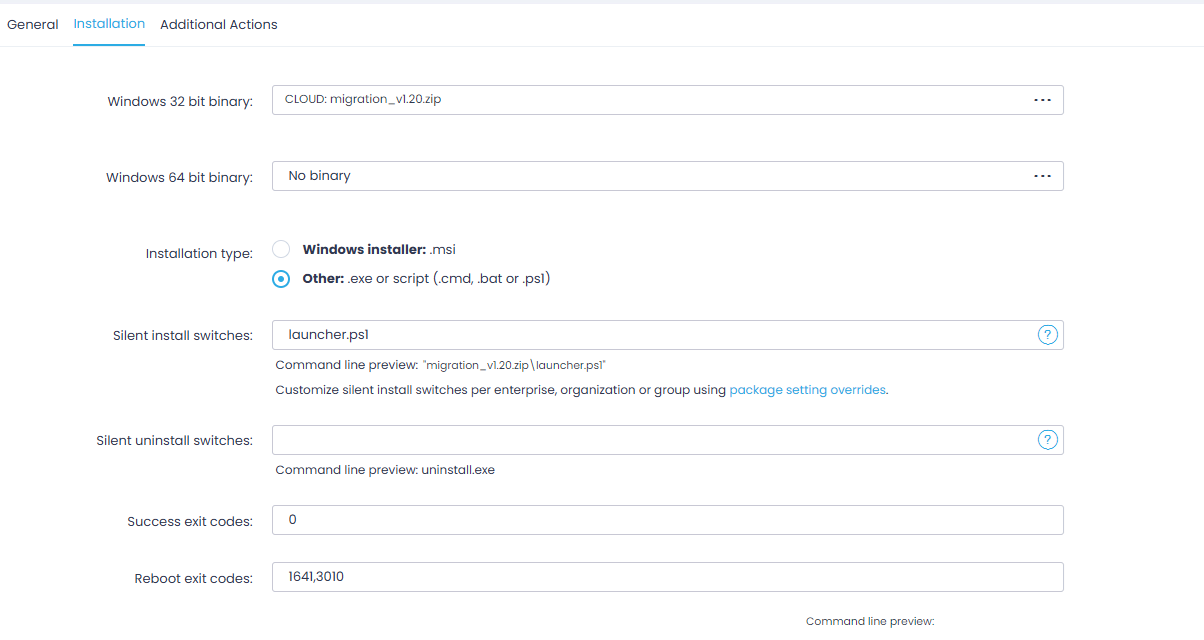
- On the Installation tab:
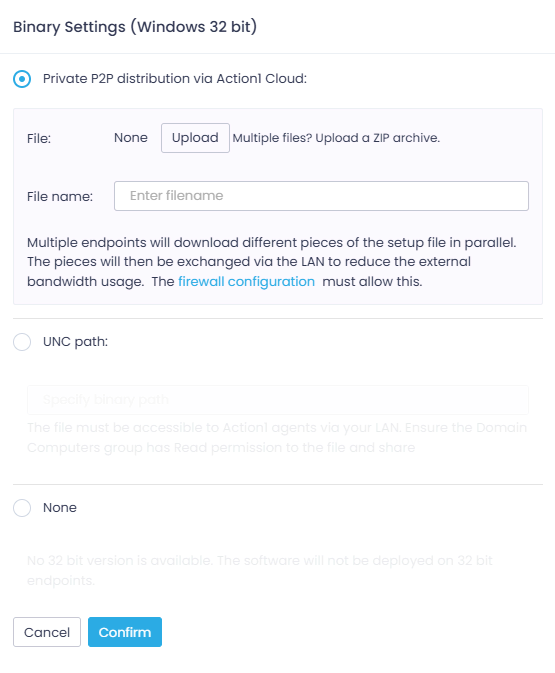
- Select Windows 32 bit download
- In the Binary Settings dialog that opens, select Private P2P distribution via Action1 Cloud option and upload the .zip file with the Action1 agent. Click Confirm to apply the changes and close the dialog.
- Back on the Installation tab, make sure the value for Silent install switches is set to launcher.ps1
Step 6: Test Deployment
In your initial account, test a single endpoint migration. For that:
- Navigate to the Endpoints view.
- Select an endpoint and install the Agent_Migration software package on it.
- After execution, check that automation is completed without errors.
- Navigate to your new account and verify that the endpoint was added to a proper organization.
Step 7: Move Endpoints
In your initial account, create an automation for the organization. This automation should install the migration software package (Agent_Migration) to all endpoints within the organization.
Step 8: Close the Initial Account
Once all your endpoints are up and running in their respective organizations within a new account, you can close your original tenant.
- Free subscription: in Action1 console, navigate to Subscription and select Close Account.
- Paid subscription: contact Support to finalize the migration of your subscription to a new region. Once it is finalized, in Action1 console, navigate to Subscription and select Close Account.
NOTE: The subscription associated with the old account will stay valid for 30 days, then it will be removed automatically.
TIP: To maintain multi-region topology, you can keep both accounts. Paid customers are advised to contact their Sales representative for an updated quote.


