Creating Custom Reports
When you are creating a report, you are working with report definitions. As a result, a new custom report definition is created.
As said, each report definition is a per-Enterprise entity; thus, creating a new one requires the Manage Reports permission with Enterprise scope. See also Permissions in Detail.
To create a custom report:
- Navigate to Real-Time Reports & Alerts | Custom Reports.
- Click +Add to start the Report Wizard.
Step 1: General
- Select the data source that will provide data for the report. A data source is a granular piece of your infrastructure, such as a disk volume or local group assignments. Action1 provides built-in data sources (script templates) to help you query your infrastructure and retrieve data from managed endpoints in a structured way.
Tip: If you want to use a new custom data source, click Create New and follow the Data Source Wizard. To learn more, see Data Sources.
- Specify a name and description for the new report.
Step 2: Columns
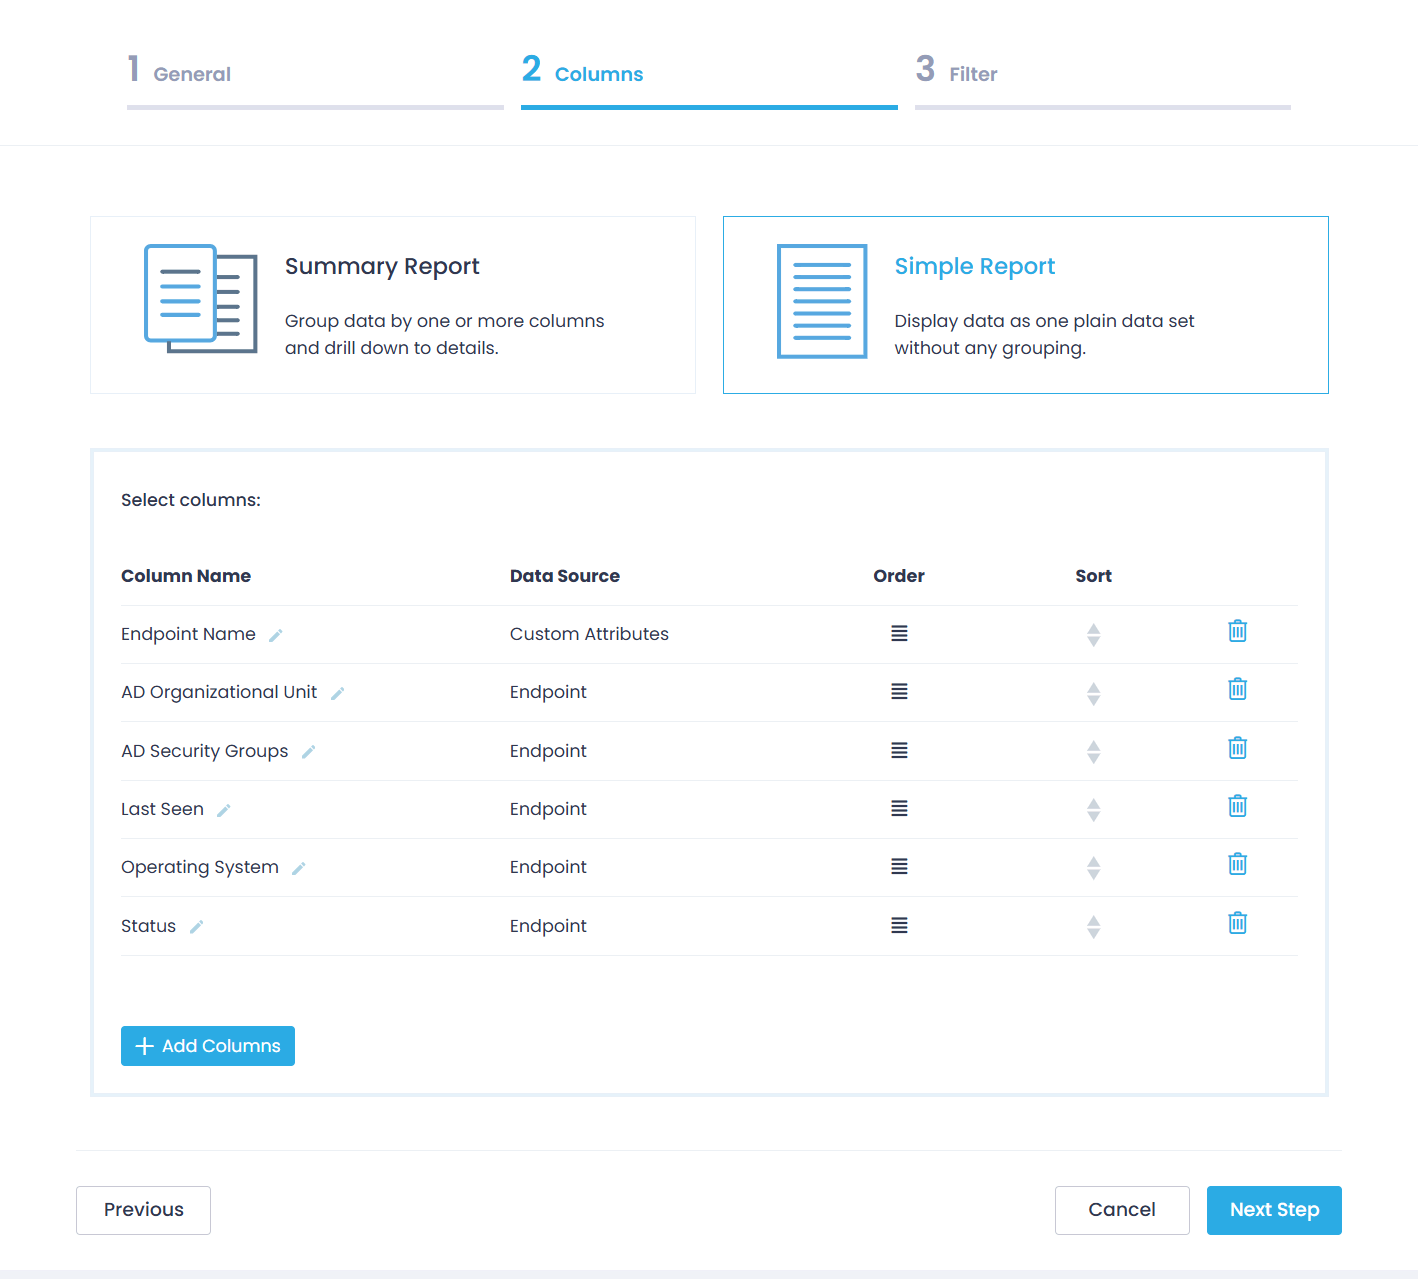
Define your report’s look & feel by adding columns and applying sorting and grouping.
- Specify the report type.
- Summary report enables you to group entries and lets you expand details for additional information.
- Simple report lists all entries one by one in a plain view.
- Select columns to include in your report.
- The list of available columns depends on the data source.
- If you are creating a Summary report, first select the high-level columns (they will be displayed in a collapsed view) and then pick the columns you will see when you expand the details.
Tip: You can add or delete columns, change their order, or apply sorting.
Step 3: Filter
Pre-filter data for your custom report.
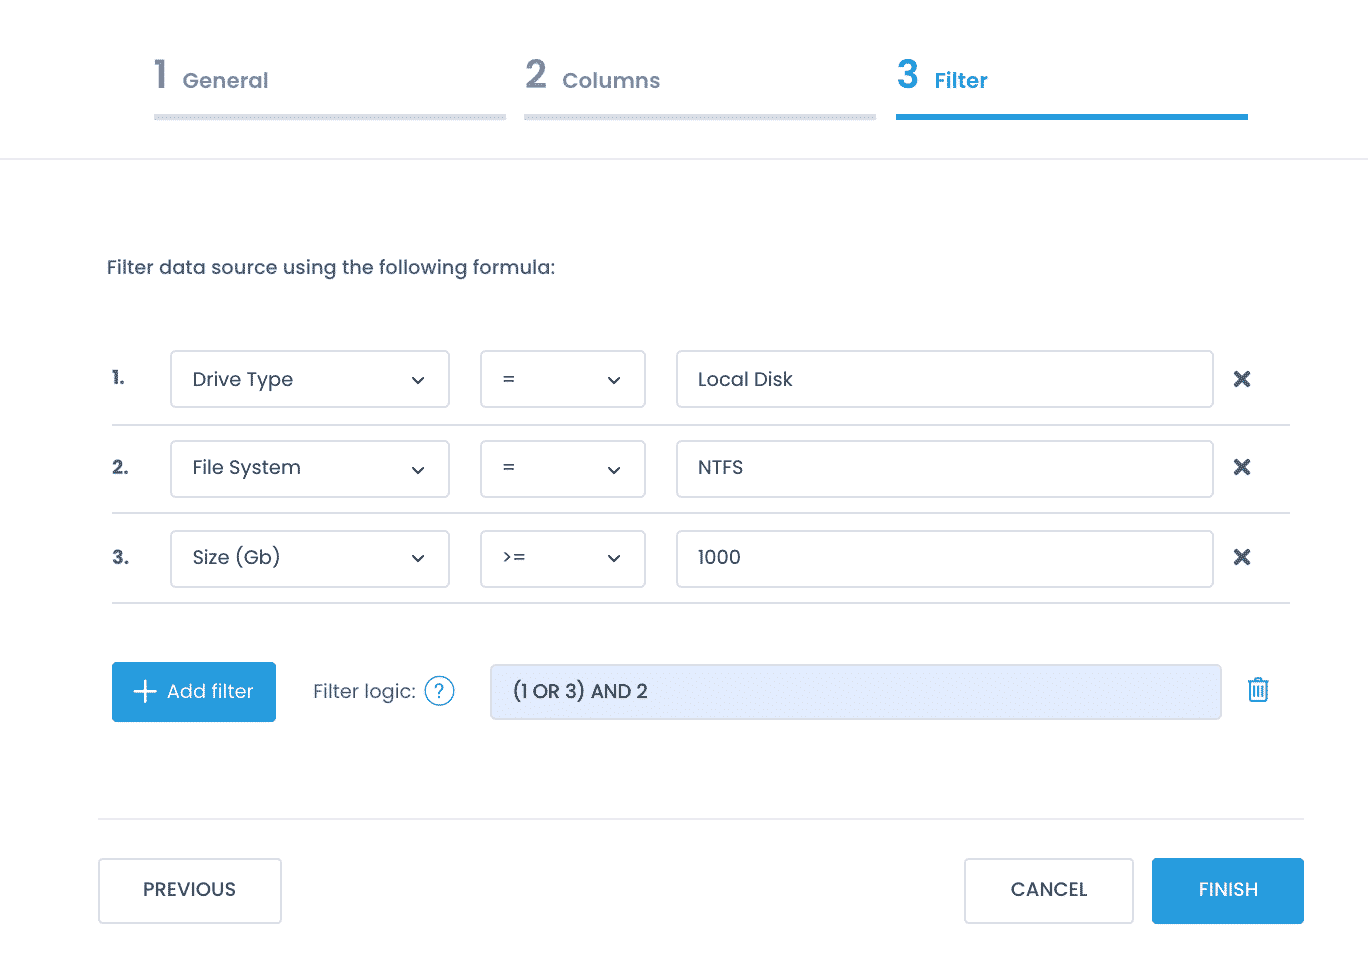
- Click + Add filter. Configure a filtering formula using:
- Column to filter data by
- Logical operator, e.g., equals (=) or more than (>=)
- Value
For example, you may want to look for drive types that are local.
- If you have multiple filters, define the filter logic.
By default, the filters are applied using AND logic (1 AND 2 AND 3). To adjust it, click Add logic, then provide the required formula.- Supported operators are AND and OR.
- To define the priority of operations, use parentheses.
Example
You need to query all endpoints that run on local drives OR have more than 1000 GB capacity. In both cases, the file system must be NTFS.
Then your filter logic formula should be (1 OR 3) AND 2.


