Prepare Custom Packages for macOS
To facilitate application distribution and delivery, Action1 enables you to create custom software deployment packages, upload them to Action1 Software Repository and then deploy to your managed endpoints. Standard process for creating a custom deployment package for macOS app includes the following steps:
- Download the application setup provided by the vendor. Supported file types are PKG, DMG, ZIP.
- Prepare a bash script that will perform the installation. The script must be named install.sh.
- Pack the script and application setup into a single deployment package.
- Upload the package into Action1 Software Repository and distribute it automatically to the managed endpoints.
Deployment package structure
Deployment packages for macOS applications in the Action1 Software Repository comprise the following files:
- Application setup file (obtained from the software vendor) of DMG, PKG, or ZIP type.
- install.sh – a bash script that performs the installation and interacts with Action1 agent. You need to modify this file when you customize the package.
- common.sh – a script that implements checks and other operational functions. This file always stays the same for all packages.
Install.sh script
The install.sh installation script has certain external named parameters; it receives their values from Action1 before starting the installation. For example:
- -m update parameter value instructs the script to operate in the update mode for the application that already exists.
- -s error parameter value will trigger an error if the script detects the application is open during the installation.
Parameter name
Description
Values
update
kill (default)
ignore
WARN
INFO (default)
DBG
- In a simple scenario, you can provide, for example, the -s parameter value using Action1 console, as described in the next section.
- In the advanced scenario, you will need to define the internal parameters and specify their values, as described later in this document.
Simple scenario: customization with UI
In a simple customization scenario, you just clone the existing built-in software package and modify its install.sh external parameter values using Action1 web console.
For example, out of the box, the installation script works as follows: it checks whether the application is open during the installation; if yes, it stops the application and installs the update. However, you may want to change this behavior and instruct the script not to install the update but just display an error message without stopping the application. For that, take these steps:
- In Action1 console, clone the existing built-in deployment package.
- Go to this new package and select the required version.
- In the Installation settings, enter the following in the Silent install switch:
-s error - Click Save.
Advanced scenario: template-based customization
In this scenario, you can use the corresponding built-in software package as a template and customize the installation script parameters manually. Steps for customization are always the same:
- Use the software setup obtained from the vendor.
- Modify the install.sh file that corresponds to the software setup type.
- Pack these two files and common.sh file into a single ZIP archive.
- Upload the archive to Action1 Software Repository.
Before you begin
It is recommended to use the following built-in packages as templates:
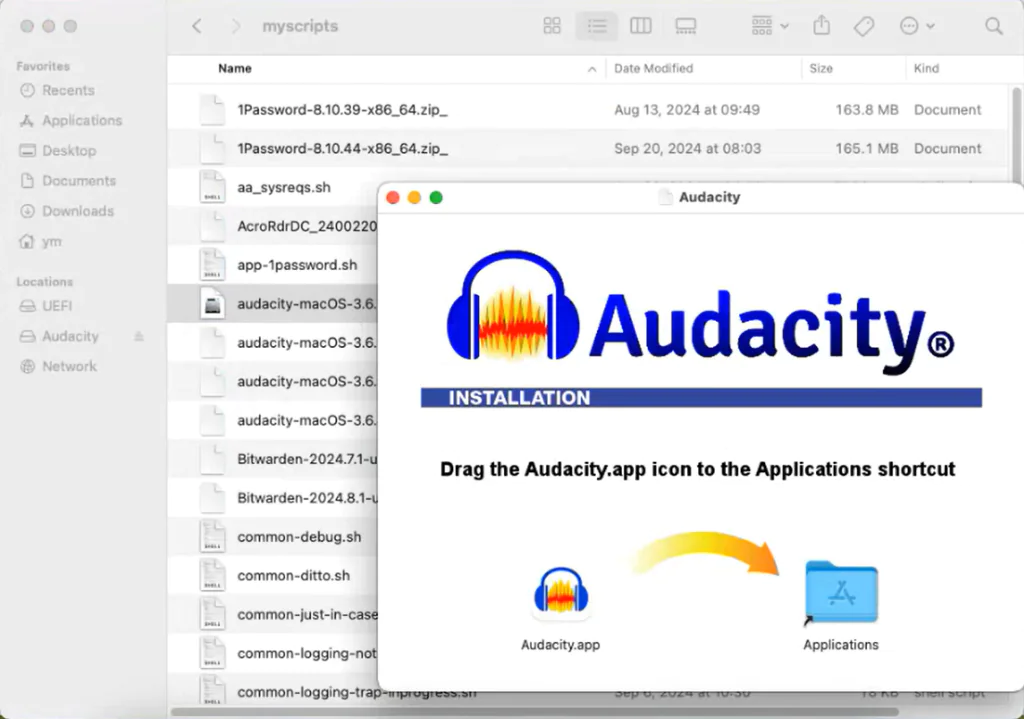
- For DMG files – use the Audacity package
- For PKG files – use the Microsoft Teams package
- For ZIP files – use the 1Password package
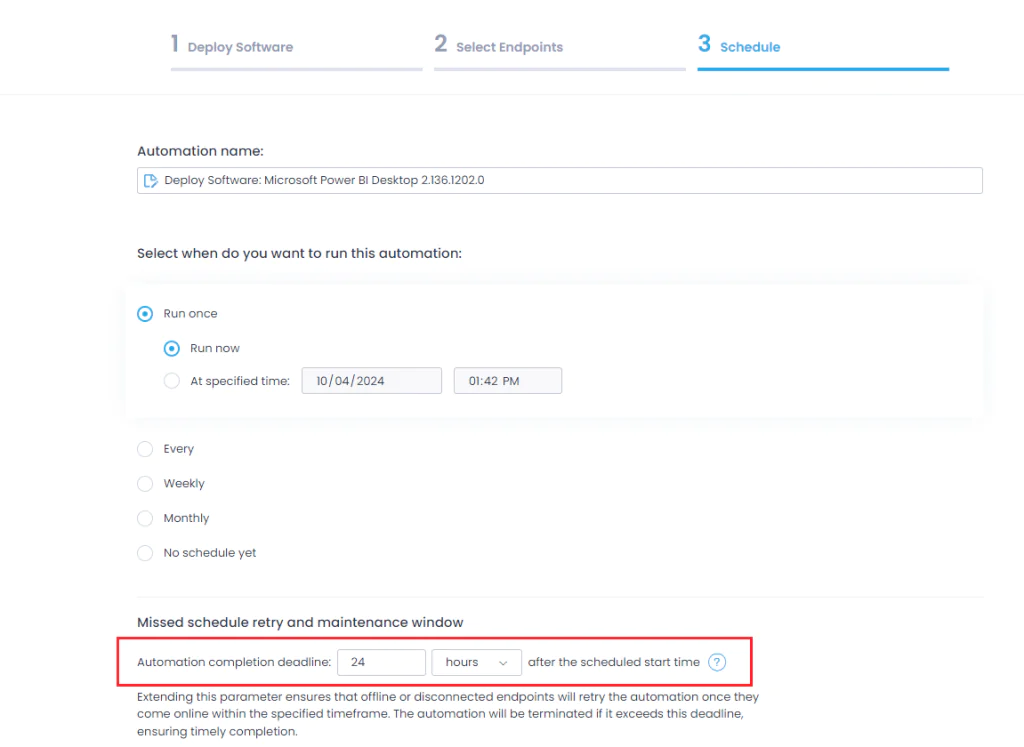
Before you start using a package as a template, you should ensure it has a reasonable lifetime value so that you have enough time to access its content. For that, check the Automation completion deadline – this parameter is set when you click Deploy for the package version and configure the Schedule. It specifies how long this package will be stored on the target endpoints after distribution.
Default time interval is 24 hours. See Deploy Software to learn more about automations.
- Deploy the package using Action1 to the target endpoint.
- On the target endpoint, browse for /var/local/action1/downloads.
- Locate the most recent downloaded archive using the timestamps. Inside the archive you should see install.sh, common.sh, and software setup file (PKG, DMG, or ZIP).
- Copy these files from the archive to a directory of your choice, for example, /Users/user_name/testapp.
Customizing installation script
Depending on your setup file extension, you should configure a different set of parameters in the install.sh script. You can open the script using your editing tool and locate function main () to examine them.
The biggest set of parameters is used by the install.sh script designed for DMG setup.
Parameter name
”Description
Syntax
Example
Example 1: DMG setup type
Use the Audacity software package as a template.
After cloning, open the install.sh file for the new package and modify the following parameter values as described in the table above:
- display_name
- proc_names
- default_app_folder
- dmg_root_folder
- binary_path
After you have configured these install.sh parameters, you can save the file and include it in the ZIP archive together with common.sh and the application setup (DMG file).
How the install.sh works for DMG files?
- It mounts the DMG file to the predefined mount point.
- Then it checks the application target architecture.
- It checks if there is an application process running. If found, it terminates the process.
- It copies the content of the mounted DMG into the application folder, replacing the existing files.
- Finally, it unmounts the file from the mount point.
Example 2: ZIP setup type
Use 1Password software package as a template.
After cloning, open the install.sh file for the new package and modify the following parameter values as described in the table above:
- display_name
- proc_names
- src_app_folder – here it is the top-level folder in the unpacked ZIP software package you downloaded from the vendor (see the screenshot below).
- binary_path – you can get it by browsing the src_app_folder (within the ZIP); typically, the setup binary is located under Contents / MacOS.
After you have configured these install.sh parameters, you can save the file and include it in the ZIP archive together with common.sh and the application setup.
How the install.sh works for ZIP files?
- It looks for the software setup file within the ZIP you obtained from the vendor.
NOTE: Make sure that ZIP contains only one software setup file. - It unpacks this ZIP file.
- Then it checks the application target architecture.
- It checks if there is an application process running. If found, it terminates the process.
- It copies the content of the unpacked ZIP into the application folder, replacing the existing files.
Example 3: PKG setup type
Use the Microsoft Teams software package as a template.
After cloning, open the install.sh file for the new package and modify the following parameter values for function main():
- display_name
- proc_names
- default_app_folder
After you have configured these install.sh parameters, you can save the file and include it in the ZIP archive together with common.sh and the application setup.
How the install.sh works for PKG files?
- It checks if there is an application process running. If found, it terminates the process.
- It installs the application in the specified app folder, using the macOS installer utility.
How can I debug my customized install.sh script?
For that, you can run your install.sh using bash command. This will eliminate the need to pack the files into software package, deploy and unpack them back and forth.
NOTE: Running install.sh requires root privileges, so use sudo to elevate your account privileges.
- To test the script operation, use bash command, for example:
bash install.sh -m install -p /Applications
This command will run the script in the install mode to help you test a new installation. - To test the upgrade mode, run a command like this:
bash install.sh -m upgrade -p /Applications -f Audacity.app - To maximize the logging level, use -v “DBG2” parameter value:
bash install.sh -m install -p /Applications -v “DBG2”


