Action1 Deployer
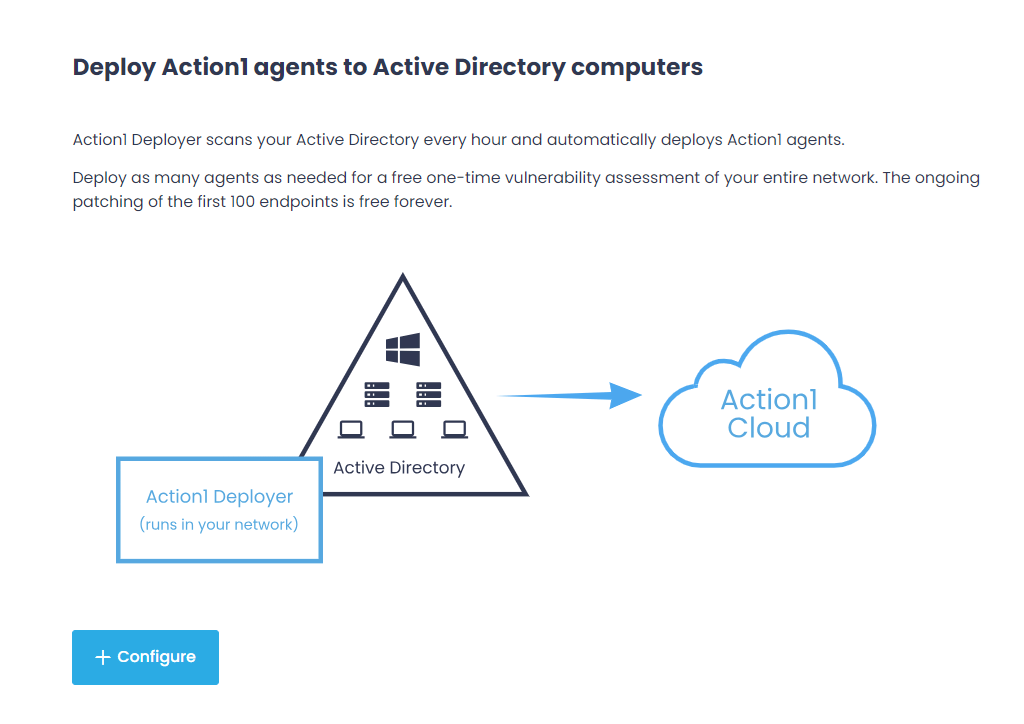
Action1 Deployer is an optional component designed to simplify bulk Action1 deployment on multiple endpoints in the infrastructures managed via Active Directory. It enables you to automatically detect networked endpoints, deploy Action1 agents, and keep them up-to-date.
NOTE: The recommended method that helps you automatically detect and join the endpoints to Action1 is deployment using GPO. If deployment with GPO is not possible for some reason, you can use Action1 Deployer.
How It Works
Action1 Deployer is implemented as a management service that runs on a Windows server inside your network, usually on the administrator’s computer or a dedicated server. Action1 Deployer automatically scans your Active Directory to discover workstations and servers that reside in an Active Directory domain or an organizational unit (OU). Having discovered the new computers, it deploys Action1 agents to patch them.
NOTE: Computers from a workgroup can also be added to the Action1 Deployer scope.
Once you specify the Deployment Scope for this service (described later in this section), which can be an Active Directory domain or list of computers, the Action1 Deployer will do the following:
- Automatically reach out to each managed computer.
- Copy the Action1 agent executable into \\computername\admin$\Action1 folder (which maps to %WinDir%\Action1 locally).
- Create and start the Action1 agent service.
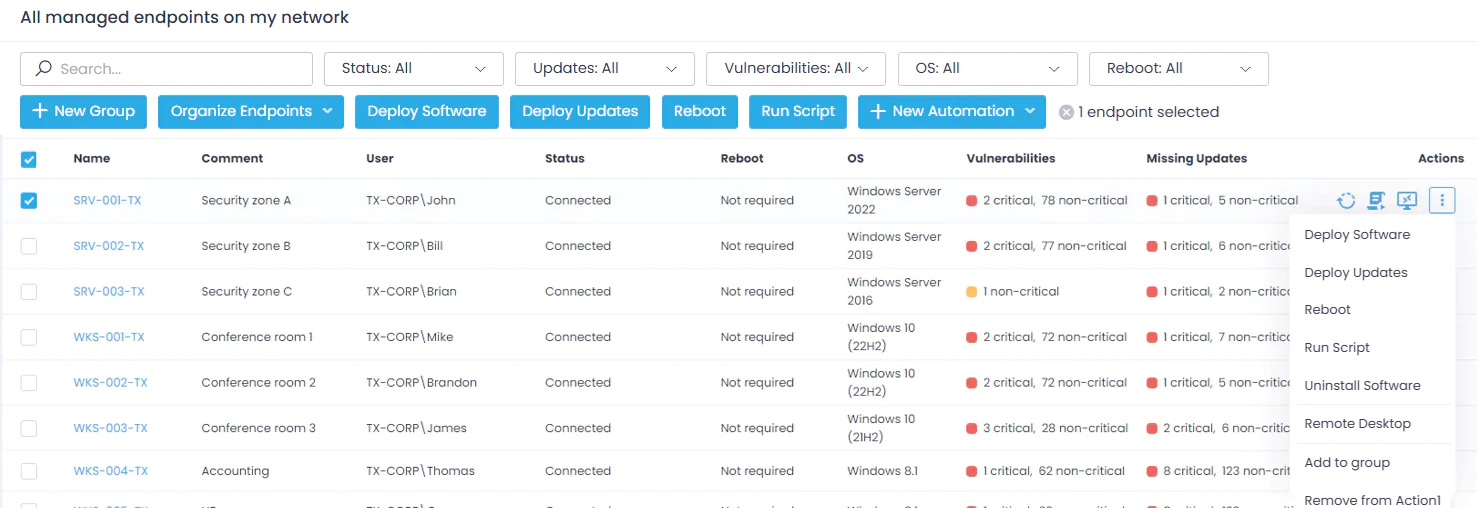
The Action1 agents then connect to Action1 Cloud bypassing the Action1 Deployer; discovered devices appear in the Endpoints list in the Action1 console.
Prerequisites
System Requirements
The server where you plan to install Action1 Deployer should meet the following requirements:
- Operating system: Windows 8.1 or later. Action1 Deployer supports both 32- and 64-bit systems.
- Memory: minimum 100 MB of available physical memory, 50 MB of disk space.
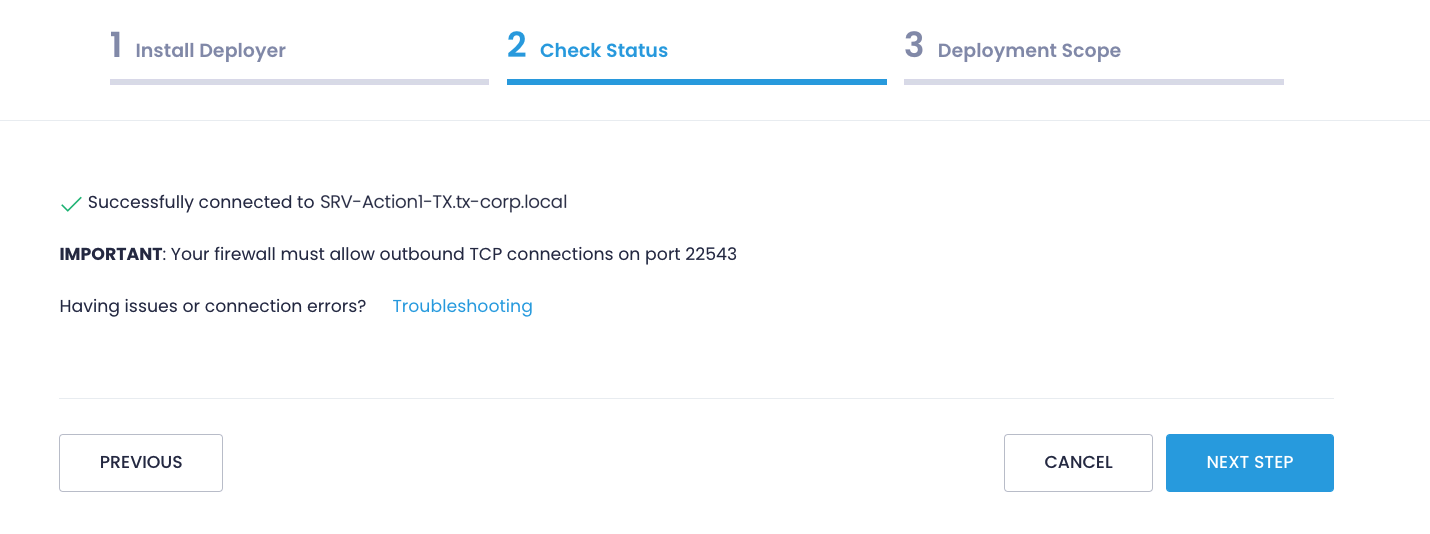
- Protocols and ports: your firewall must allow outbound TCP connections on port 22543.
- Server availability: since the Action1 Deployer service will be responsible for managing agents running on your remote endpoints, make sure this server is enabled 24/7.
Required Permissions
By default, the Action1 Deployer service will use the Administrator account. Alternatively, to minimize the account privileges, you can create a dedicated domain account for the Action1 Deployer service and assign its rights and permissions as described below.
NOTE: This dedicated account will not require any domain administrative rights to Active Directory, only local permissions will be needed.
How to create a dedicated domain account for Action1 Deployer?
- On a domain controller, start Active Directory Users and Computers and navigate to your domain / Users.
- Create a new user for the Action1 Deployer service, e.g., “Action1Deployer”.
The following is required for the service account:
- Read-only access to the Active Directory domain.
- Logon as a service right on the local computer. The installer will attempt to automatically grant this right to the specified account.
- Membership in the local Administrators group on the server where Action1 Deployer service resides.
You can add a dedicated domain account to local Administrators groups manually. - Membership in the local Administrators group on all of your managed endpoints.
You can add a dedicated domain account to local Administrators groups manually, with a script, or via Group Policy.
Why does Action1 Deployer need these permissions?
Membership in local Administrators is required to copy executables to the \\machinename\admin$\Action1 folder and configure a Windows service called Action1 Update on all managed endpoints. This service in turn will install and update Action1 agents.
The Action1 Deployer WILL NOT send these credentials to Action1 Cloud or anywhere else outside of the Deployer installation. The only location where they will be stored is the local Service Control Manager (SCM) database maintained by the Windows operating system in the encrypted format and stored by the Windows operating system as an LSA secret and never leave your environment.
What is an LSA secret? A Local Security Authority (LSA) secret is a piece of data that is accessible only to SYSTEM account processes running on the local computer. Some of these secrets are credentials that must persist after reboot, and they are stored in encrypted form on the hard disk drive. Credentials stored as LSA secrets include account passwords for Windows services (including Action1 Deployer service) that are configured on the computer. This is the only place where your Active Directory password will be stored.
How to add the Action1 Deployer service account to the local Administrators manually?
Consider adding a service account to the local Administrators group manually if for some reason you don’t want to leverage a Group Policy or when you install the Deployer service for testing purposes. Perform the steps below on the server where you’re going to install the Action1 Deployer service and on the endpoints it should manage.
- Navigate to the Local Users and Groups / Groups.
- Locate the Administrators group and select Add to group.
- Enter the service account name (e.g, domain\Action1Deployer). Make sure to use a domain account.
How to add the Action1 Deployer service account to local Administrators via Group Policy?
Leverage Group Policy if you have multiple endpoints in your infrastructure and want to automate the agent delivery process.
- On a domain controller, start Active Directory Users and Computers and navigate to your domain.
- Create a domain global security group, e.g., “Action1LocalAdmins” and make Action1Deployer a member of this group.
- Start the Group Policy Management Console (GPMC).
- Locate an effective domain policy (most likely Default Domain Policy) or create a new Group Policy object that applies to the entire domain or just the needed OUs with your managed endpoints.
- Right-click a policy and select Edit.
- Navigate to Computer Configuration / Policies / Windows Settings / Security Settings / Restricted Group.
- Right-click an empty space and select Add Group. Specify the name of the group dedicated to Action1 Deployer (Action1LocalAdmins).
- Configure settings. In the Members of this group section, click Add and select the account you’ve created (Action1Deployer). In the This group is a member of section, click Add and select Administrators.
- To apply these changes, run `gpupdate /force` in the command prompt.
In case you plan on discovering endpoints that reside in a workgroup, make sure all workgroup computers leverage the same local user with the same password. Action1 Deployer must be set up under these credentials to access workgroup computers.
Action1 Deployer WILL NOT send its credentials to Action1 Cloud or elsewhere outside the Deployer installation. The only location where they will be stored is the local Service Control Manager (SCM) database maintained by the Windows operating system in the encrypted format and stored by the Windows operating system as an LSA secret that never leaves your environment.
What is an LSA secret?
A Local Security Authority (LSA) secret is a piece of data that is accessible only to SYSTEM account processes running on the local computer. Some of these secrets are credentials that must persist after reboot, and they are stored in encrypted form on the hard disk drive. Credentials stored as LSA secrets include account passwords for Windows services (including Action1 Deployer service) that are configured on the computer. This is the only place where your Active Directory password will be stored.
To set up Action1 Deployer in your environment, follow the instructions below.
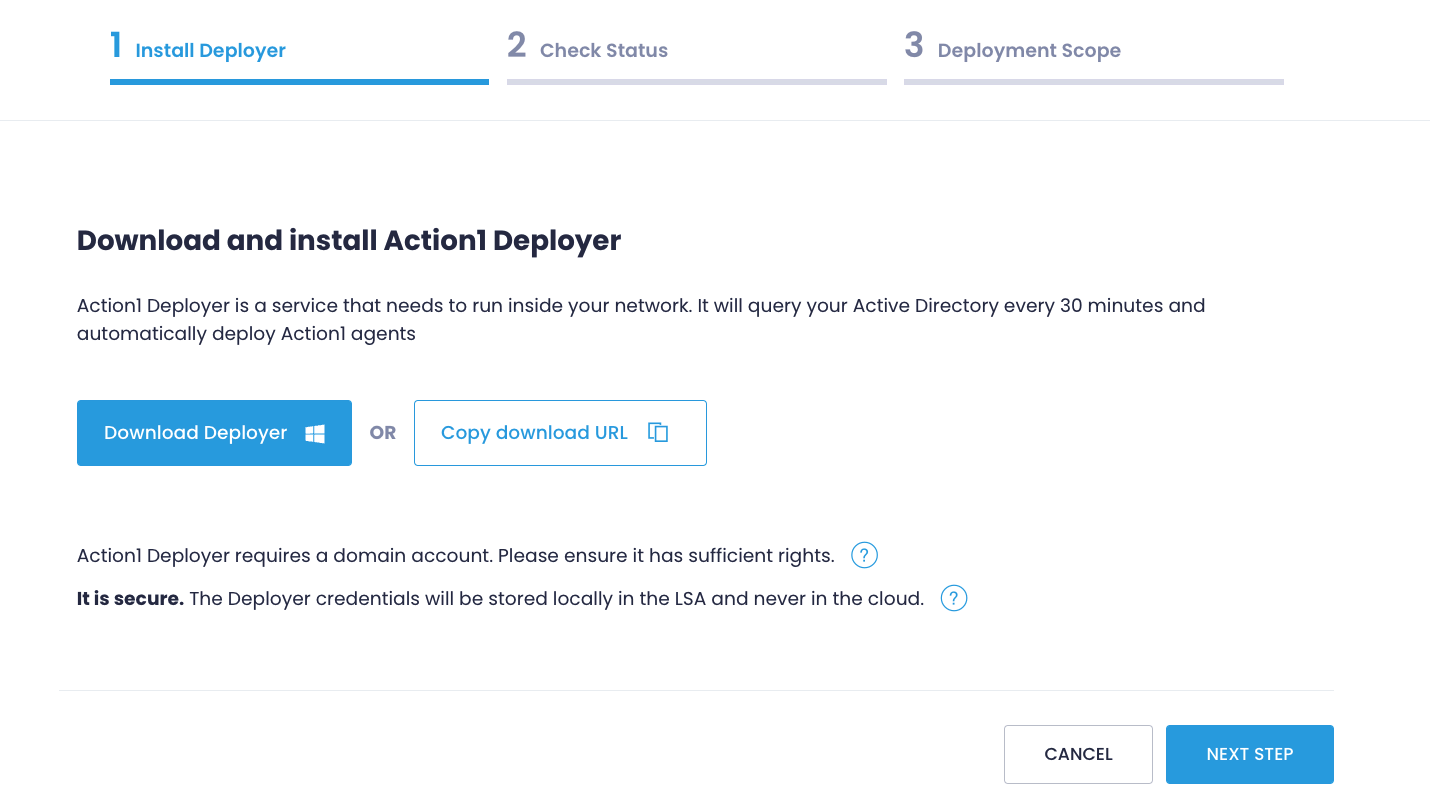
Step 1. Install the Action1 Deployer service
- Go to the Agent Deployment page in the Configuration section and select + Configure.
- On the Install Deployer step, download the installation package or copy a link. The installer name is unique and indicates your organization.
- Choose a proper server to install the Action1 Deployer service: since this service is responsible for managing agents running on your remote endpoints, it’s crucial for this server to be enabled 24/7.
- Right-click the Deployer installer and run it as administrator.
- Provide administrative credentials. They will be used to automatically deploy Action1 agents on your endpoints.
Depending on the type of the system, Action1 Deployer is installed into %ProgramFiles%\Action1\Connector or %ProgramFiles(x86)%\Action1\Connector folder.
Step 2. Check Deployer Status
After installation, the Action1 Deployer will securely connect to Action1 Cloud using embedded information about your organization that includes an authentication certificate for mutual authentication and a private encryption key, specific to your organization.
On the Check Status step, verify that Action1 Deployer has been successfully installed and connected to Action1 Cloud.
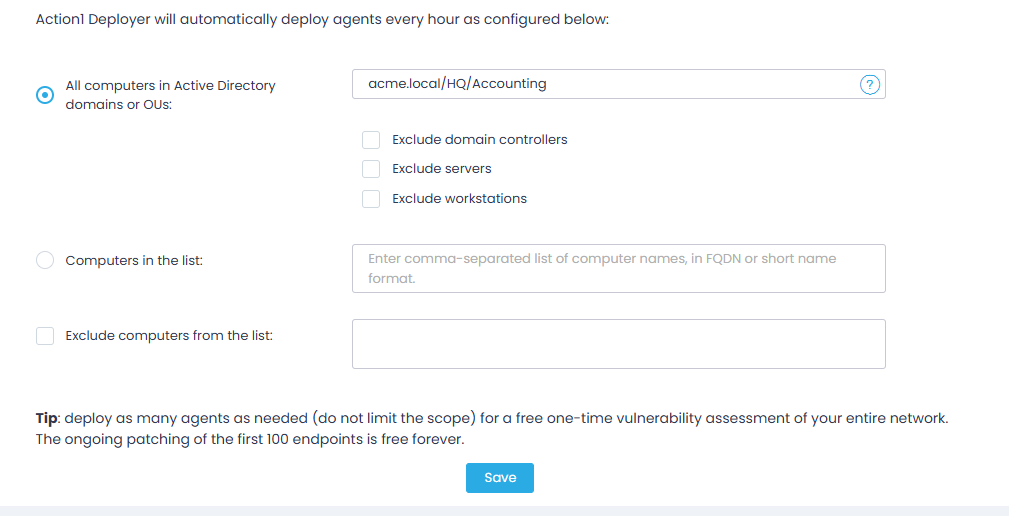
Step 3. Configure the Deployment Scope
Finally, specify where the Action1 agents will be deployed — that is, which computers will become managed endpoints:
- All computers in Active Directory domains or OUs—specify one or several domains or organizational units, separated by commas (e.g., widgets.local, organization.com/Servers). You can use additional options:
- Exclude domain controllers
- Exclude servers — exclude computers running Windows Server OS.
- Exclude workstations — exclude computers running Windows OS (non-Server).
- Computers in the list — deploy Action1 agent to specific computers only. Provide computer names, separated by commas. Note that you can add computers that reside in a workgroup, too.
- Additionally, you can select Exclude computers from the list and specify those that shouldn’t be connected to Action1 Cloud.
Action1 Deployer service will automatically reach out to each computer in the deployment scope, copy the Action1 agent executable into the local folder, and create and start the Action1 agent service. The agents then will connect to Action1 Cloud, and discovered endpoints will appear in the Action1 console under Endpoints.
To disconnect an endpoint from Action1 Cloud, refer to Removing Action1.
Installing Action1 Deployer in Multiple Organizations
If you manage multiple organizations, you should install the Action1 Deployer for each organization and configure settings individually.
