Creating a Role
To create a new role:
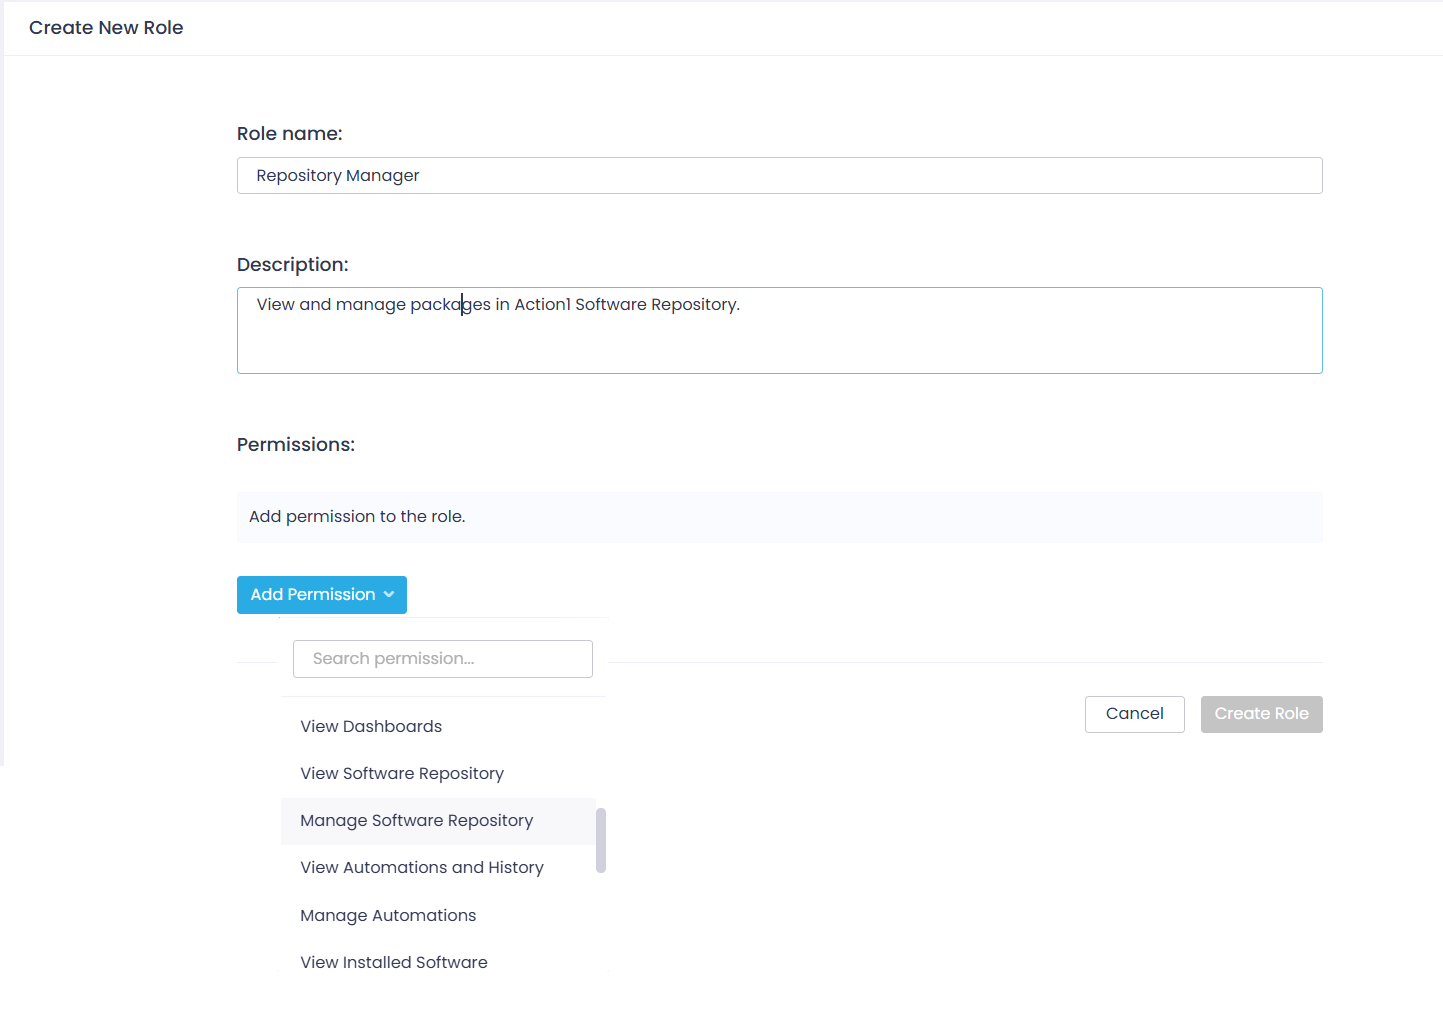
- Navigate to Configuration | Roles and click +New Role.
- Specify role settings:
- Role name and Description – enter a meaningful name (for example, Repository Manager) and provide a brief role description.
- Click Add Permission and select the permissions necessary for this role (for example, Manage Software Repository).
Tip: Use search to look for the permission you need.
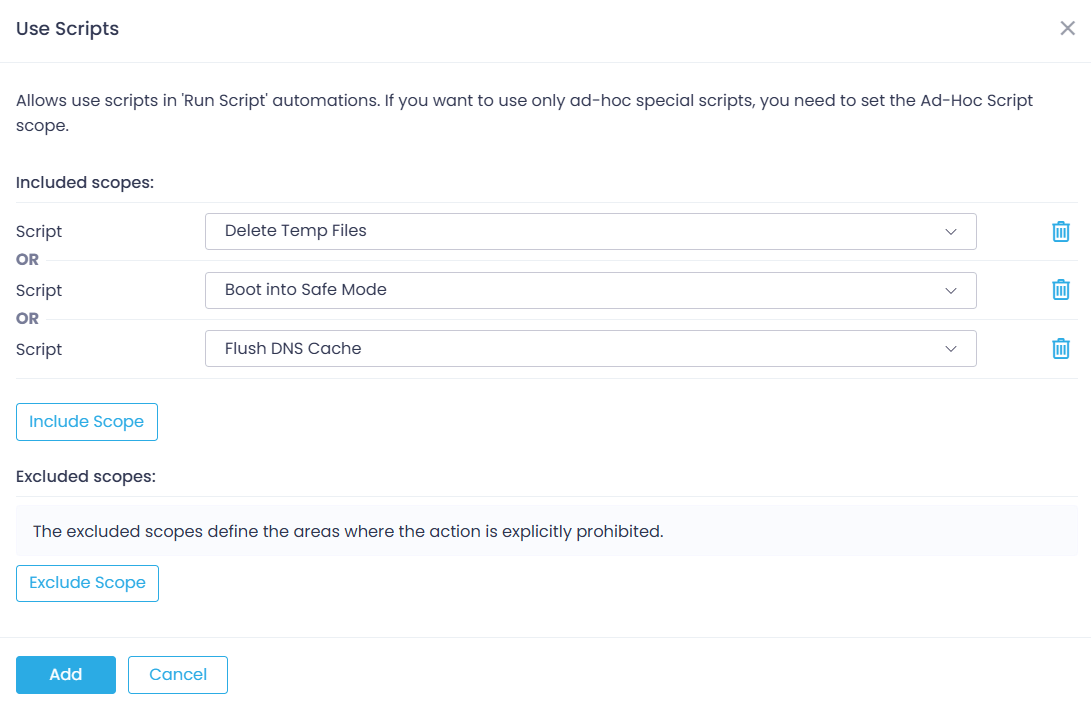
- Configure the permission scope:
- Use Include Scope to specify where the permission will be effective
- Use Exclude Scope to specify where the permission will be restricted
Include scope configuration options are applied using OR logic.
Exclude scope configuration options are applied using AND logic.
Scopes explained
Depending on permission type, you can include or exclude the following scopes:
- Enterprise – Action1 Enterprise
- Group – a group of managed endpoints
- Organization – Action1 Organization
- Report – this scope is available only for the specified built-in or custom report
- Script – this scope is available only for the specified predefined or custom script stored in the Script Library
- Ad Hoc Script – this scope is available only for creating “Run Script” automations with ad hoc script (a script entered by user when going through the automation wizard)
- Advanced Setting Template – this scope is available only for the specified advanced setting (like console logo or user prompt)
- When finished, click Add.
- Finally, click Create Role to save the role settings.
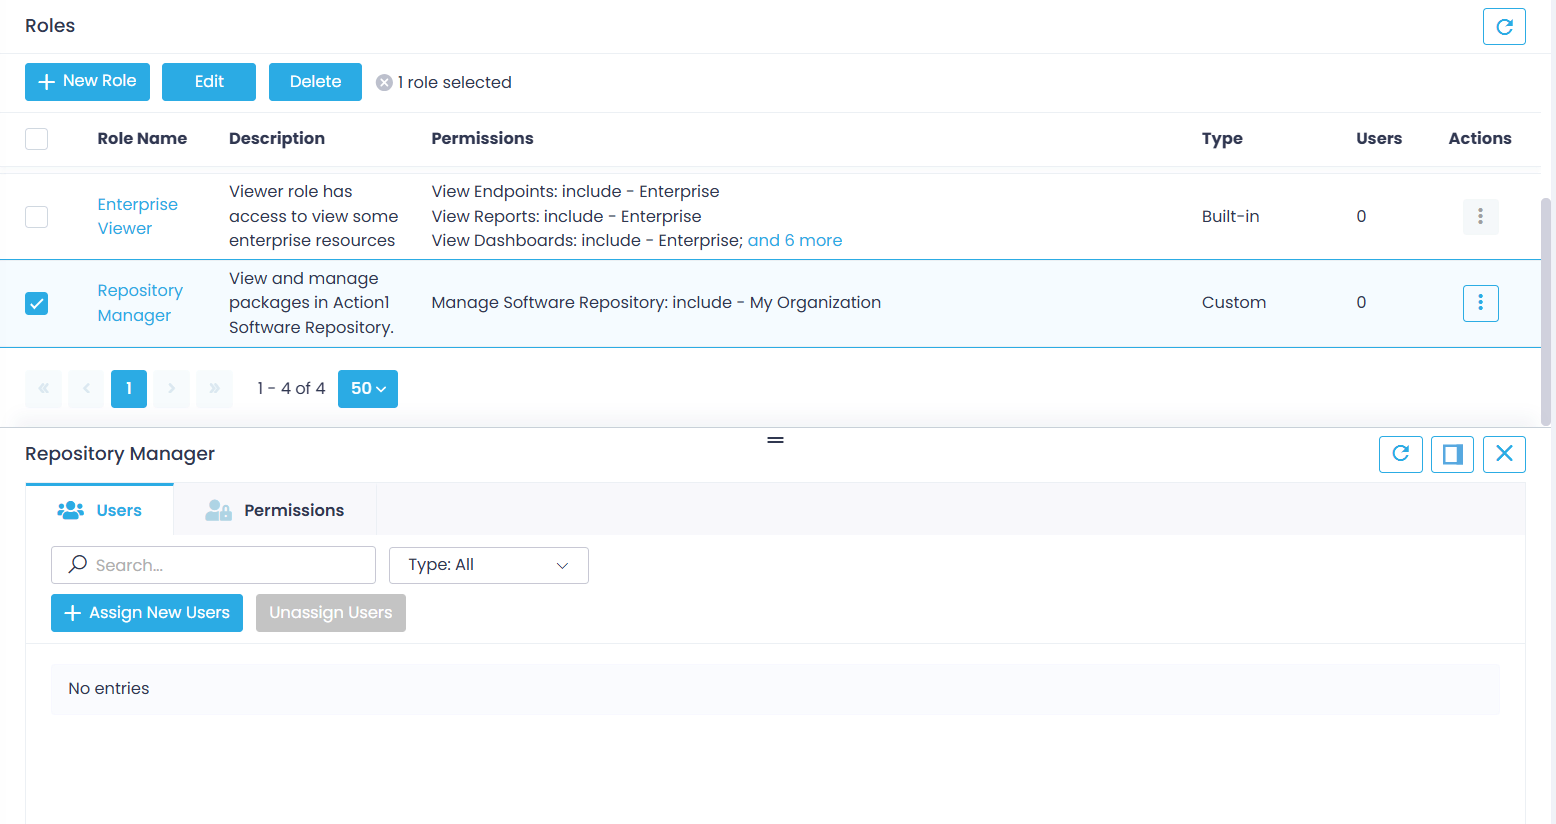
The new role will appear in the list of Roles.
Go to its Users property tab and proceed with the role assignment.
Example
A manager would like the helpdesk personnel to:
- be able to manage certain notebooks
- be able to deploy patches
- add a list of 5 applications upon request
- and run several scripts from the Script Library
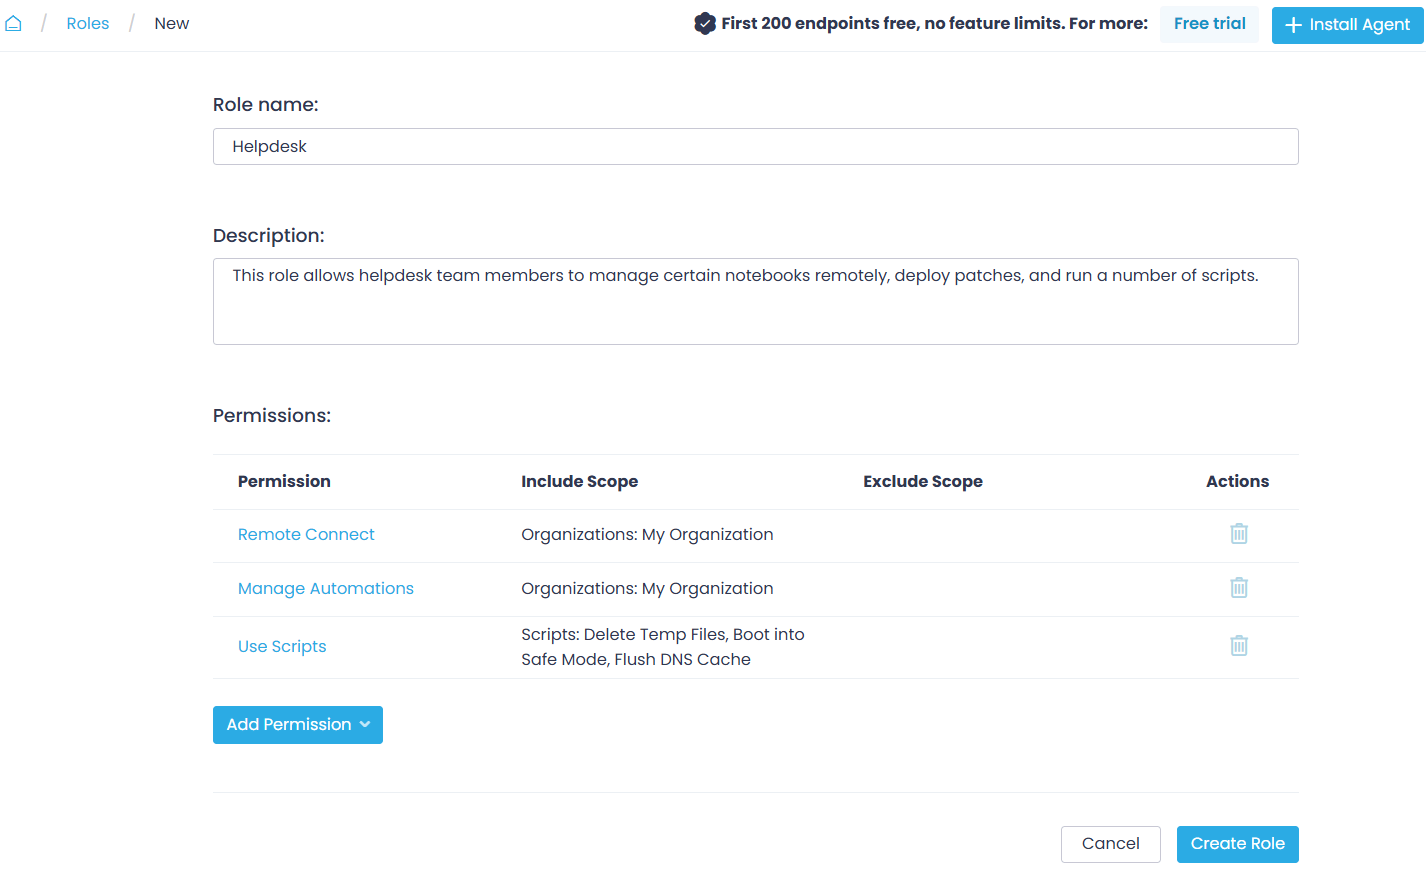
For that, a “Helpdesk” role can be created with the following settings:
- Role name – Helpdesk
- Description – This role allows helpdesk team members to manage certain notebooks remotely, deploy patches, and run a number of scripts.
- Permissions – Remote Connect, Manage Automations, Use Scripts


