Installation on Windows Endpoints
Before You Begin
First, make sure that the endpoints you plan to manage with Action1 meet the requirements listed in this section.
The instruction below describes the agent deployment on a Windows-based endpoint (both 32- and 64-bit).
The agent is installed under the LOCAL SYSTEM account; its default location is %WinDir%\Action1. It works as a service named Action1 Agent.
Step 1. Download the Action1 Agent Installer
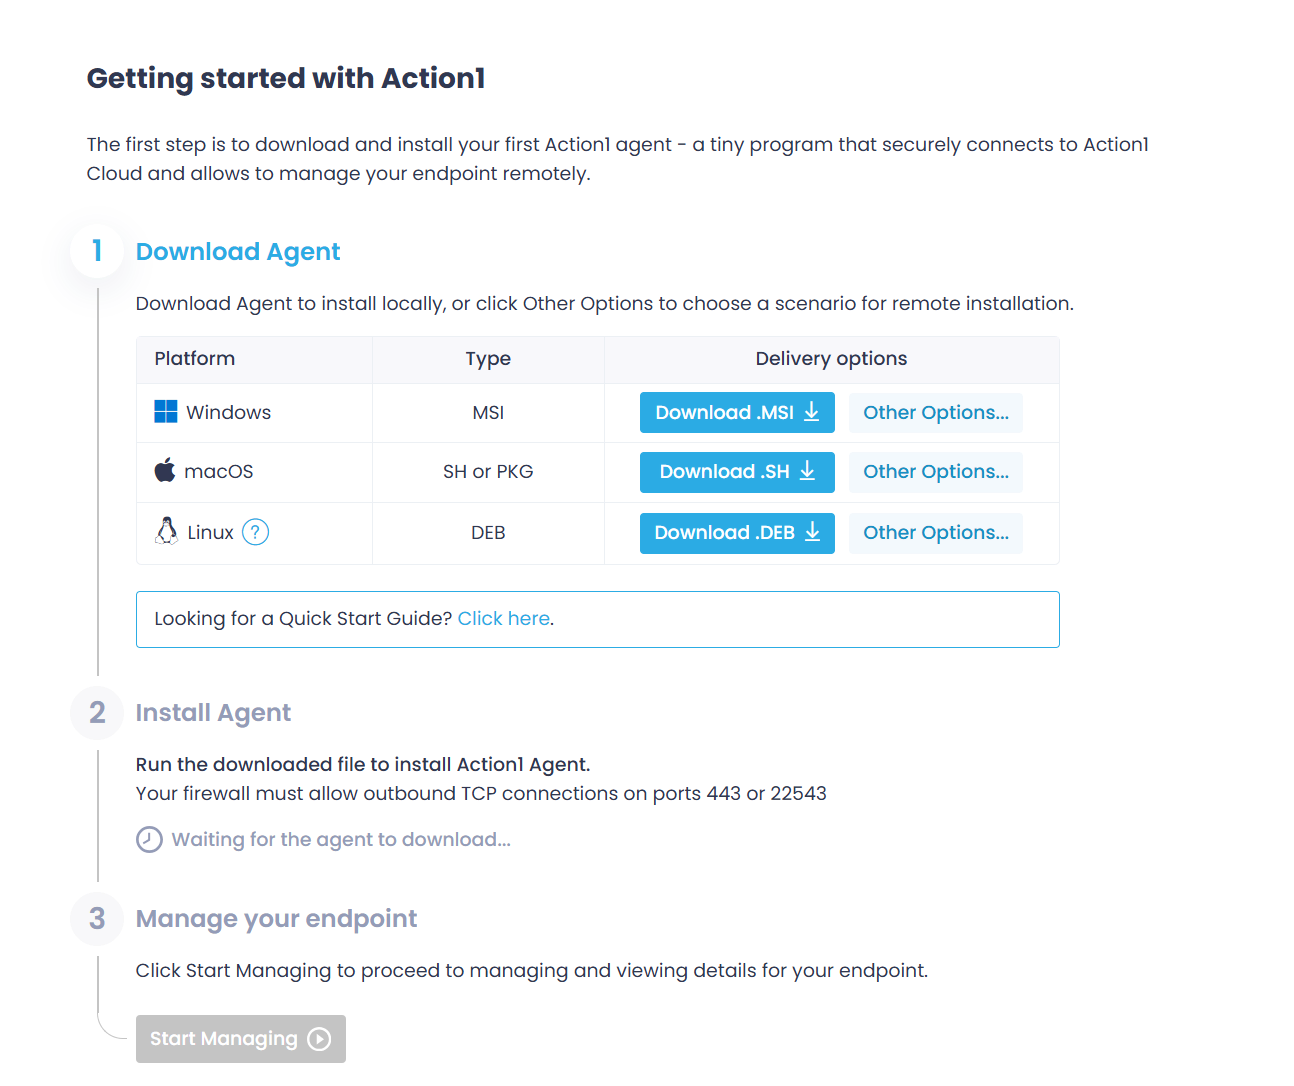
- In Action1 console, click Install Agents in the top-right corner to open the Getting started wizard.
- On the Install Agent step, either download the Action1 agent installer (.MSI file), or click Other Options if you plan to install the agent on another machine or run an unattended installation.
Step 2. Install the Agents
Use one of the following scenarios:
- Interactive, UI-based installation
- Unattended installation (no UI)
- Direct download for deployment using tools like Microsoft Intune, SCCM, GPO, or other
NOTE: No Action1 login is required to run the agent installation.
Scenario 1: Interactive installation
This option is recommended for first-time users.
- Copy the installation command to your endpoints. The following line will be copied:
curl -o "action1_agent(My_Organization).msi" "https://app.action1.com/agent/<id>/Windows/agent(My_Organization).msi"
Here:curl– cURL (Client for URL) utility for the file download.-o– a parameter that instructs cURL to save the downloaded MSI file with the same name as in the URL.id– a unique ID associated with a downloadable agent setup for your organization.
- Run this command as Administrator on the target endpoints and follow the setup wizard.
Tip: You can share this command with the endpoint owners and instruct them to launch the installer themselves.
Scenario 2: Unattended installation
This option is recommended for advanced users who want to install the Action1 agent on a local or remote endpoint in unattended (silent) mode.
- Copy the corresponding command and run it on your target endpoints as Administrator. The following line will be copied:
curl -o "action1_agent(My_Organization).msi" https://app.action1.com/agent/<id>/Windows/agent(My_Organization).msi" && msiexec /i "action1_agent(My_Organization).msi" /quiet /qnIn addition to the parameters described above, it includes- quietand-qnswitches for installation with no UI. - The command will download and launch the agent installer in unattended (silent) mode.
NOTE: Action1 agent supports a machine-wide installation and requires administrative privileges. Since unattended installation mode does not display any user prompts, running the setup under non-elevated privileges will silently fail. Make sure you are using the Administrator account. See also: Action1 Requirements.
Scenario 3: Direct download for deployment tools
This option is recommended to those who need to download the agent installer for use with deployment tools like Microsoft Intune, GPO, SCCM, and so on.
Copy the corresponding URL and use it with your deployment tool:https://app.action1.com/agent/<id>/Windows/agent(My_Organization).msi
Here id – a unique ID associated with a downloadable agent setup for your organization.
