

The vulnerability management lifecycle is a repeatable process that IT and security teams use to identify, prioritize, remediate, and verify security vulnerabilities across every device in their IT environment. It has six stages: asset discovery, vulnerability identification and assessment, risk-based prioritization, remediation or mitigation, verification, and reporting and continuous improvement, with a planning stage that comes first. With more than 92,000 CVEs recorded in the NVD from January through October 2026, running vulnerability management as a quarterly scan-and-patch exercise is the fastest way to data breaches, successful cyberattacks, and regulatory penalties.
This guide breaks down each stage and explains why it matters, with sample remediation SLAs, the key metrics to track and how to calculate them, and which parts of the process you can safely automate.
Key Points
- Continuous process: The vulnerability management lifecycle is a continuous process that repeats endlessly to protect your IT systems and the corporate data stored on them. It starts with planning and governance, then moves through six stages, including asset discovery and inventory, vulnerability identification and assessment, risk-based prioritization, remediation or mitigation, verification and continuous monitoring, and comprehensive reporting and improvement.
- Asset discovery and inventory: Accurate asset discovery and a continuously updated inventory are essential for effective vulnerability management, especially for companies with remote or hybrid workforces where endpoints rarely connect to your office network.
- Risk-based prioritization: Combine CVSS scores with exploit data from CISA KEV and EPSS, along with business impact and asset criticality. This shows you the level of risk each security weakness brings to your company, so you can focus on the ones that matter most before moving on to the rest.
- Ownership and SLAs: Every finding needs an owner and a target date for vulnerability resolution. Set your SLA windows based on your own risk and compliance obligations, since there’s no industry rule that says every critical vulnerability has to be fixed in 24 hours.
- Automation: Manual scanning and patching can’t keep up with how fast new vulnerabilities appear. Automate discovery, patching, and monitoring, but keep risk acceptance and business context decisions with your team.
- Vulnerabilities you can’t patch: If there’s no fix available, document your mitigation or risk acceptance, and set a review or expiration date so it doesn’t get forgotten.
- Verification: Don’t mark a vulnerability as resolved until you’ve confirmed the fix actually worked. Include those verification results with your risk and remediation metrics in your reports. That way, you get a true picture of your security outcomes and can make even smarter improvements for the next vulnerability management cycle.
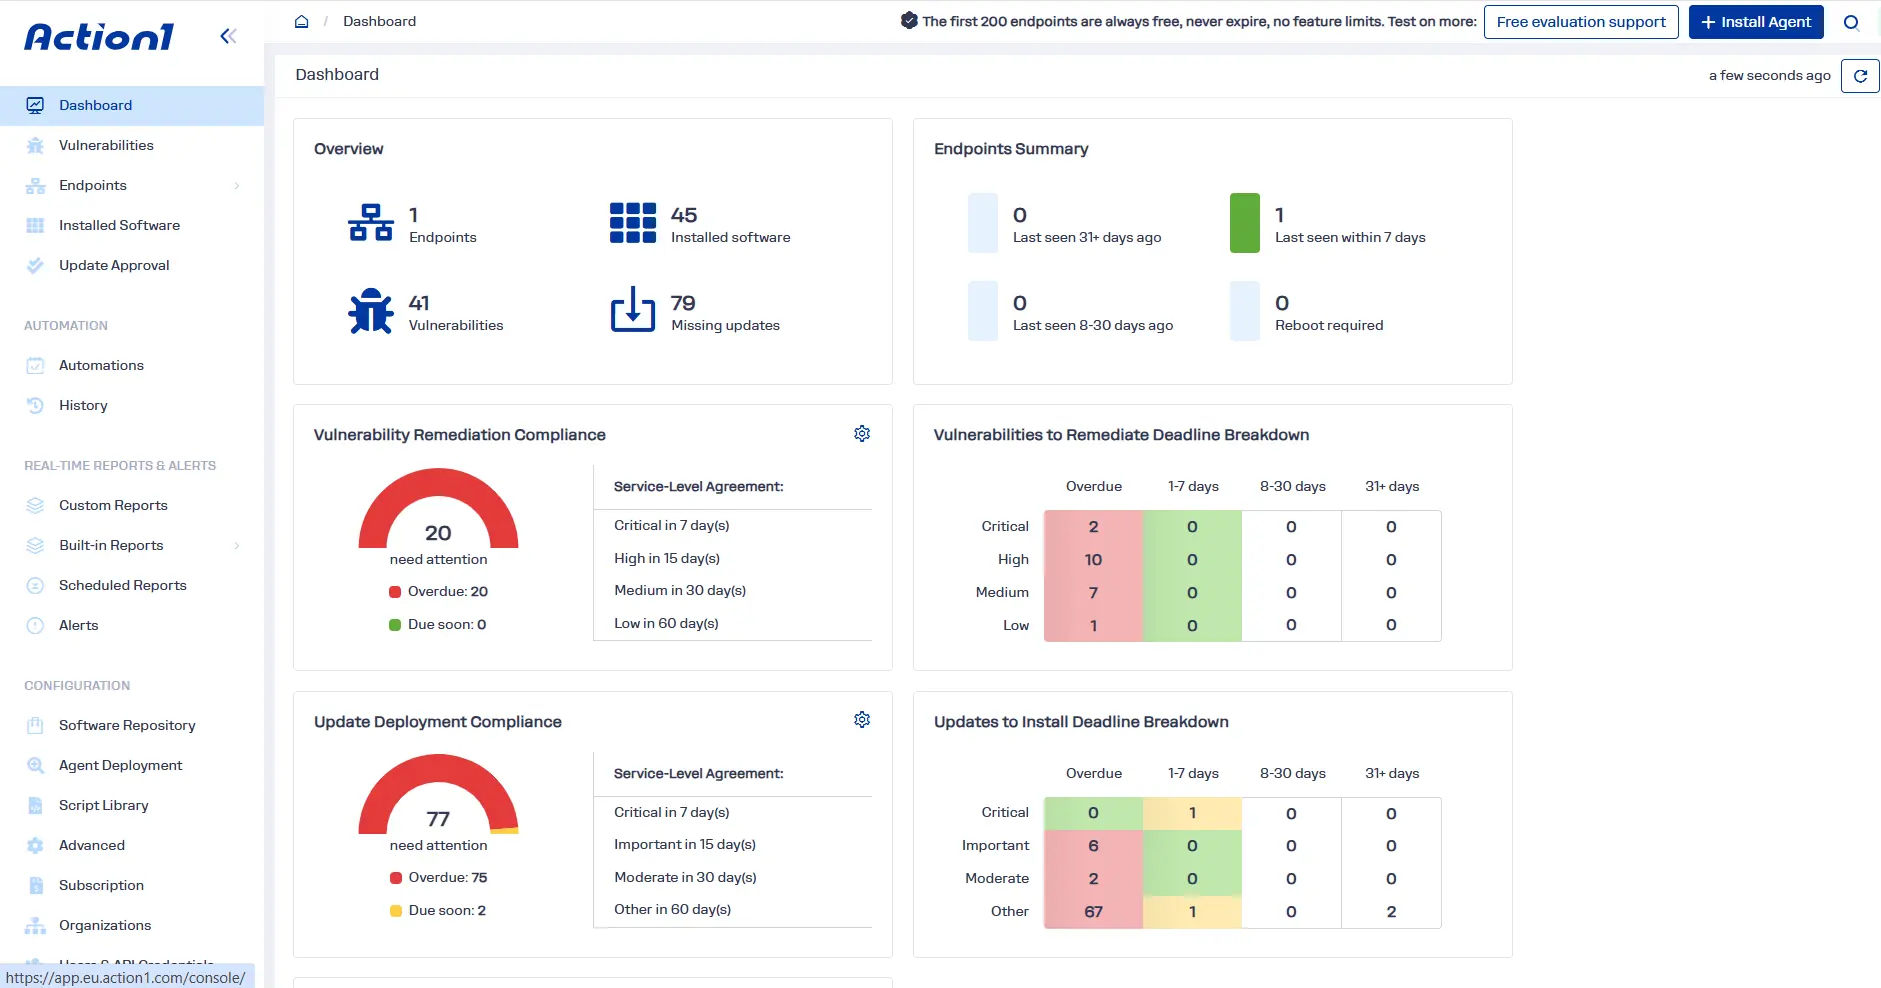
Automate the vulnerability management lifecycle with Action1. Find vulnerable software on your Windows and macOS endpoints, see which flaws attackers are already exploiting, and patch them in stages without a VPN. Sign up free for up to 200 endpoints, fully featured and forever, or request a demo to see how Action1 automates every stage of the lifecycle.
What is the Vulnerability Management Lifecycle?
The vulnerability management lifecycle is the repeatable process that security and IT teams use to identify, assess, prioritize, remediate, validate, and report on vulnerabilities across their organization’s IT assets. By addressing vulnerabilities as soon as possible, organizations improve their overall security posture and minimize the chance of experiencing data breaches, cyberattacks, regulatory penalties, and lost client trust by preventing vulnerability exploitation.
What are the Six Stages of the Vulnerability Management Lifecycle?
The six stages of the vulnerability management lifecycle are asset discovery and inventory, vulnerability identification and assessment, risk-based prioritization, remediation or mitigation, verification and monitoring, and reporting and continuous improvement. Before Stage 1, most teams also complete a planning and governance step, which this guide calls Stage 0.
| Stages | Key activities |
|---|---|
| Stage 0: Planning and governance | Define roles, scope, SLAs, and exceptions |
| Stage 1: Asset discovery and building a live asset inventory | Discover all your endpoints along with their operating systems and third-party applications |
| Stage 2: Vulnerability identification and assessment | Scanning, monitoring through agents, pen tests, and threat intelligence feeds |
| Stage 3: Risk-based prioritization using CVSS and business context | Rank by real risk using CVSS, EPSS, KEV, criticality, and exposure data |
| Stage 4: Remediation or mitigation | Patch, remove, mitigate, or accept the risk |
| Stage 5: Verification, validation, and continuous monitoring | Rescan, or check real-time monitoring results to confirm the fix worked on all endpoints. Monitor each system over the next 48 to 72 hours for any signs of instability |
| Stage 6: Reporting and continuous improvement | Generate reports, review metrics, and improve your policies where possible |
Stage 0: Planning and Governance
Define your scope and how you’ll measure asset discovery completeness. Be specific about which hybrid environments, like on-prem, cloud infrastructure, endpoints, or OT, along with which operating systems and third-party applications you’re going to include.
Next, focus your efforts on the key planning activities:
- Roles and responsibilities: Assign clear ownership to your security team, IT operations, and application owners. Make sure escalation paths for high-risk security issues are fully documented, so handoffs are clear and you’re less likely to run into human error or delays.
- Policy definitions: Plan your patch deployment windows (regular and emergency), maintenance schedules, and acceptable risk levels. Make sure to include all remote endpoints that are rarely on VPN or are used outside your office.
- Measurable KPIs: Set targets for Mean Time to Remediate (MTTR), Mean Time to Detect (MTTD), Mean Time to Contain (MTTC), the number of critical vulnerabilities older than 30 days, vulnerability recurrence rates, and SLA targets that follow both CVSS severity and business impact.
These are the basics, so structure them as clearly as possible to avoid any delays or misunderstandings that might slow down your process.
Stage 1: Asset Discovery and Building a Live Asset Inventory
Asset discovery builds a live inventory of every endpoint, server, virtual machine, cloud instance, and SaaS-connected device you need to protect, because you can’t fix vulnerabilities on devices you don’t know about. Missing even one device leaves a blind spot, and unmanaged devices and cloud workloads are easy targets for attackers.
Best practices for this stage:
- Use automated asset discovery: Use automated tools that can continuously scan or monitor your endpoints, and update your asset inventory, including cloud-native endpoint management platforms and cloud provider API integrations.
- Categorize and document assets: Categorize assets by type (workstations, servers, cloud workloads, network devices), ownership, location, and installed software to make sure you’re set up for reliable vulnerability assessment later.
- Map business impact: Map business impact to assets. A server processing payment data is way more important to your company than a test virtual machine, or a laptop that’s just used for playing music, for example. This will help you a ton with accurate risk-based prioritization.
- Find asset gaps: Identify all similar assets across locations, so you don’t have something covered in one office but missed in another.
The point of all this is that effective asset discovery reduces the chance of leaving blind spots, giving you, your security analysts, and your IT team a foundation you can trust for identifying assets across the whole IT environment they’re responsible for.
Stage 2: Vulnerability Identification and Assessment
Vulnerability identification and assessment finds known software vulnerabilities on every asset in your inventory. Tools do this in three main ways:
- Agent-based endpoint assessments: Lightweight agents, when installed on your endpoints, check software versions, identify vulnerabilities, find missing patches, and flag insecure configurations in real time, even if the device isn’t connected to your office network. The agent connects to the cloud platform whenever the device is online.
- Network-based vulnerability scanners: These probe open ports, services, and unpatched software from the network perspective. They’re great for on-premises infrastructure, but their downside is they can’t scan remote endpoints unless you put them on a VPN.
- Cloud configuration scanners: Identify misconfigurations in IAM, storage, and serverless workloads across your cloud services.
These tools find vulnerabilities by comparing the software versions on your endpoints against records from sources like CVE listings, the NVD, and vendor advisories. Many also pull exploitation data from CISA KEV and EPSS, which helps you prioritize the identified known vulnerabilities in the next stage. Agent based tools check continuously while your endpoints are online, so new vulnerabilities show up automatically. Scanners only check when they run, so you need to start them manually or schedule them. Otherwise, new vulnerabilities could go unnoticed between scans.
Best practices for this stage:
- Baseline scanning: Start with a baseline scan to understand your current security posture.
- Schedule recurring scans: Create a schedule for weekly or continuous scanning/monitoring to detect new vulnerabilities once they appear.
- Daily scans for internet-facing endpoints: Scan all your internet-facing endpoints daily.
Stage 3: Risk-Based Prioritization Using CVSS and Business Context
A risk-based assessment prioritizes vulnerabilities using multiple factors that shape your risk exposure, including exploitability, asset criticality, and the raw severity score from CVSS. This way, you can fix the most dangerous ones first instead of trying to fix everything at once. To prioritize effectively, combine these:
| Factor | What it tells you | How to use it | Source |
|---|---|---|---|
| CVSS (Common Vulnerability Scoring System) score | Technical severity on a 0 to 10 scale | Baseline only, never the sole deciding factor | FIRST, NVD, vendor advisories |
| EPSS (Exploit Prediction Scoring System) | Probability of exploitation in the wild in the next 30 days | Helps rank findings that aren’t yet in KEV | FIRST EPSS |
| CISA KEV (Known Exploited Vulnerability) catalog | Whether there’s reliable evidence of active exploitation in the wild | Moves a finding to the top of the queue | CISA |
| Asset criticality | How important the asset is to your operations, and if it contains sensitive data | Raises priority on critical systems | Your asset inventory |
| Network exposure | Whether the vulnerability is on an internet-facing or an internal-only endpoint | Prioritize internet-facing assets when exposure increases their risk, but make sure to consider actively exploited vulnerabilities on internal systems too, especially those that support critical business operations or store sensitive data. | Your asset inventory |
| Business impact | What exploitation would cost: data loss, downtime, safety, regulatory penalties | Sets how fast a fix is needed when the technical risk looks similar | Asset and business owners |
Best practices for this stage:
- Don’t use CVSS as the only factor: Take a multi-source approach based on exploitability, active threat intelligence, relevant threat detection, internet exposure, asset criticality, data sensitivity, and potential business impact.
- Comprehensive risk assessment: Perform a risk assessment that accounts for compensating controls and operational dependencies, then assign clear remediation deadlines by risk level, also adding business leaders when critical operations are affected.
- Leverage automation: Use automated patch or vulnerability management platforms that automatically prioritize vulnerabilities based on all the factors mentioned in the table. That saves you time and gives you way more accurate information on how to queue the identified flaws.
Stage 4: Remediation or Mitigation
Remediation or mitigation is where you act on each prioritized vulnerability. You have three options to address the software vulnerabilities across your endpoints:
- Remediation: Patch, upgrade, or remove the software. This will completely address the vulnerability and hackers won’t be able to exploit it.
- Mitigation: Apply WAF rules, use network segmentation, disable features, or restrict network access. When no patch is available, implementing compensating controls like these can make a vulnerability harder to exploit or help limit the damage even if you can’t fix the underlying flaw right away.
- Acceptance: If the vulnerability brings very low risk or is unlikely to be exploited, accept it, document the decision, name the approver, and set an expiration date so you can fully remediate it at some point or at least get alerted after review.
Best practices for this stage:
- Prioritize by business impact: Prioritize remediation efforts based on business impact and remediation SLAs, and always assign each finding to an accountable owner.
- Test and stage patch deployment: Don’t roll out patches in one big wave. Test them with a pilot group or use update rings before broader deployment and always have a rollback plan.
- Automate patching for all assets: Use tools that automate patching on Windows, macOS, Linux, and third-party apps, and that can reach remote endpoints without VPNs or manual intervention.
- Document mitigation and exceptions: If a patch can’t be applied, document your temporary mitigation actions, the risk owner, and an expiration or review date.
Set remediation SLAs by severity:
| Priority tier | Example target window | Escalation if at risk |
|---|---|---|
| KEV-listed or high EPSS on an exposed or business-critical asset | 3 days | Security lead and owner’s manager at 48 hours |
| Other KEV-listed vulnerabilities | 14 days | IT leadership at day 10 |
| Critical or high, no exploitation evidence confirmed | 30 days | IT management at day 21 |
| Medium | 30 to 60 days | Monthly risk review |
| Low | Next scheduled maintenance window | Only if it enters KEV or there’s an EPSS increase |
Stage 5: Verification, Validation, and Continuous Monitoring
Verification confirms that a fix actually worked before you close the finding. Remediation isn’t finished until the vulnerability no longer appears after a new scan or on your tool’s real-time monitoring dashboard. Continuous monitoring finds new vulnerabilities in real time, alerts you to emerging threats right away, and gives you a chance to improve your security posture with every cycle through those extra checks.
Best practices for this stage:
- Always run verification scans: Always rescan or use agent-based checks after remediation so you know the vulnerability is truly gone from every endpoint.
- Monitor for issues before closure: Closely monitor for failed deployments, service instability, or any unexpected issues before confirming the vulnerability is addressed or closing the ticket.
Stage 6: Reporting and Continuous Improvement
In the final stage, you must generate reports, measure key metrics related to the process, and see if you can improve something for the next lifecycle. This can easily be done through the tool you’re using, where you can create and export reports using built-in customizable ready-to-use templates. You can also track KPIs that are related to the process, and export that information for internal tracking or audit prep.
Once you’ve generated a report, you can track your progress and spot anything that needs to be corrected or improved for the next vulnerability management cycle. At a minimum, you should keep an eye on these metrics:
| Metric | Definition | How to calculate |
|---|---|---|
| Mean time to detect (MTTD) | Time from public disclosure to detection across your systems | MTTD = Total detection delay ÷ Number of findings |
| Mean time to remediate (MTTR) | Time from detection to verified fix | MTTR = Total days to verified fix ÷ Remediated findings |
| SLA compliance rate | Vulnerabilities remediated inside the target window | SLA Compliance (%) = (Closed within SLA ÷ All findings due) × 100 |
| Scan coverage | Known endpoints assessed in the period | Coverage (%) = (Systems assessed ÷ Assets in inventory) × 100 |
| Recurrence rate | Fixed findings that come back for any reason | Recurrence (%) = (Reappearing vulnerabilities ÷ Remediated ones) × 100 |
| Critical backlog age | How long open critical software flaws have waited | Median and maximum age in days |
Dashboards should also track vulnerability trends over time to reveal recurring issues and show whether process changes are working.
Best practices for this stage:
- Look a little closer at MTTR: An average can look great, but some critical vulnerabilities may sit open for weeks or even months. Pair MTTR with the age of your oldest open critical vulnerabilities and the percentage of fixes completed within SLA. Organizations with mature prioritization often achieve MTTR in hours, which always opens your eyes to where the real risk hides.
- Frequent team reviews: Organize monthly or quarterly meetings with your employees working on the vulnerability management process and discuss with them where the biggest issues come from, then look for ways to resolve them.
Why Does the Vulnerability Management Lifecycle Matter?
The vulnerability management lifecycle matters because it gives you a way to discover, assess, prioritize, remediate, and verify security weaknesses before cybercriminals can exploit them. This helps reduce breach risk, limit downtime and data loss, keep customer trust, and strengthen your company’s overall security posture by remediating identified vulnerabilities in a risk-based, prioritized way. You can focus your efforts where they matter most, since not all vulnerabilities pose the same level of risk to your company or its endpoints.
With more than 92,000 CVEs recorded in the NVD from January through October 2026, which is well above FIRST’s forecast of about 59,000 for the whole year, an efficient and automated vulnerability management lifecycle is a must if you want to protect your assets.
To be honest, that won’t make your system impenetrable, but it does lower the odds of experiencing a ransomware attack, unplanned downtime, or data loss, and helps to boost your business continuity. It reduces risk, improves resource allocation, and keeps you aligned with standards and regulations like ISO 27001, PCI DSS, HIPAA, and NIST SP 800-40.
What are the Common Challenges in the Vulnerability Management Lifecycle?
The most common challenges in the vulnerability management lifecycle come from:
| Common pitfall | Fix |
|---|---|
| An incomplete inventory that leaves shadow IT, remote laptops, and cloud workloads untracked | Keep a continuously updated inventory that covers every endpoint and cloud workload, with a named owner for each. When there’s a new employee, add their device. When someone leaves, remove their device from the network. |
| Prioritizing by CVSS score alone | Add exploit evidence using CISA KEV and EPSS, asset criticality, and network exposure. |
| Rare scans or missing real-time monitoring | Scan your network at least once a week, and scan internet-facing assets daily. Make sure authenticated scans actually log in. To automate this, use agent-based tools that monitor endpoints in real time. |
| Patching some endpoints by hand because your tool doesn’t cover every OS or third-party app | Find a tool that patches every operating system and third-party app you use across your endpoints. Look for one that automates rollouts, reboots, real-time monitoring, risk-based prioritization, and patches offline devices as soon as they reconnect. |
| Closing tickets early | Verify every fix with a rescan or agent check. Reboot the endpoint, confirm everything works as expected, and make sure the vulnerability is gone before closing the ticket. |
| Holding back patches because the last one broke something | Test on a small pilot group first, then roll out in stages. This way, a bad patch never hits everyone. |
| Users or employees who won’t reboot, so patches sit installed but never take full effect | Use platforms that show warnings after each patch deployment, with an option to delay reboot for a few hours. After that, the system reboots automatically, with or without the end user’s consent. |
| The scanner flags apps you already updated because old files or registry entries got left behind | Always investigate suspected false positives before excluding anything. When you find leftover files or old versions, remove them where it makes sense, then run another scan to be sure everything’s clean. |
| Remote laptops that rarely connect to the office network, or don’t use VPN continuously | Use cloud-native, agent-based patching platforms. They install updates whenever endpoints reconnect directly through the installed agent. |
| Leaders or IT teams panicking when vulnerability counts spike after Patch Tuesday | Report trends and KEV exposure on critical systems, not just raw counts that jump every month. Use tools with risk-based prioritization to queue the most severe vulnerabilities first, which lowers the pressure across the team. |
| Security and IT working from different data | Share one dashboard and agree on ownership and SLAs before the first scan. |
| Risk acceptances that never expire and become permanent | Set review dates and revisit every acceptance when they come up. |
| Alert fatigue from too many low-priority findings | Use risk-based dashboards or automated filtering to suppress duplicates and false positives so the critical issues stand out first. |
| Resource and skill gaps | Automate low-risk, high-volume patching. Manual efforts must be used only for exceptions and complex fixes. |
| Scanner limits | Use agents where possible, monitor credentialed-scan success rates, and schedule network scans outside peak hours. |
Which Parts of the Vulnerability Management Lifecycle Should You Automate?
It’s best to automate almost every stage of the process and keep the complex decisions for yourself or your team. Vulnerability management tools can successfully automate asset discovery, assessment, prioritization, remediation, verification, and reporting. Of course, you’ll still need to generate audit-ready reports, set up automation workflows, and add human expertise, but that’s just a small part of the entire process.
- Asset discovery: Automate device discovery, inventory updates, and new device alerts. Assigning owners and setting criticality should always be done by people.
- Assessment: Scheduled scans can easily be automated and will group all the findings from every system in one place. Someone from your team should validate high-impact findings before you start remediation.
- Prioritization: The right tool can prioritize security flaws based on multi-source data like CVSS, EPSS, KEV status, and asset tags. You or your team only need to take matters into your own hands when business context changes and the score no longer fits.
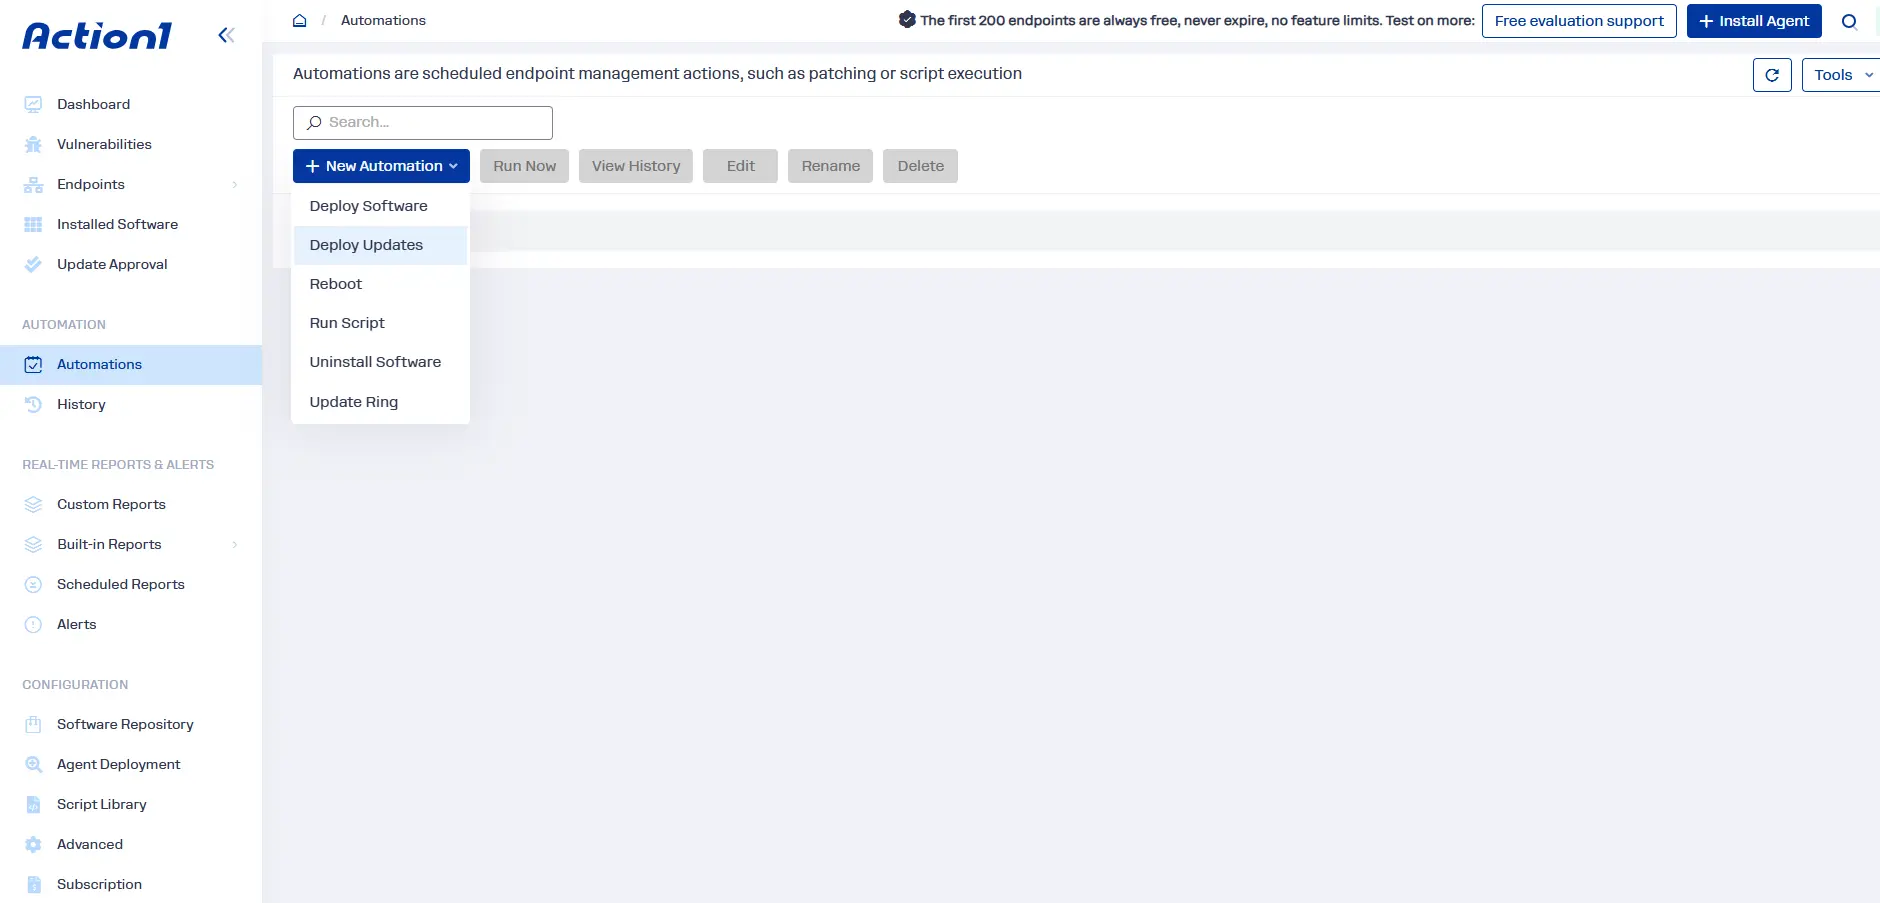
- Remediation: You can automate ticket creation, approval rules, scheduled staged patch deployments, and reboots. However, you still need to keep an eye on the process, especially if you’re concerned about possible dependency issues when remediating or when deciding to accept risk.
- Verification: Rescans and real-time monitoring run automatically, along with patch status checks, compliance checks, and ticket reopening, though reopening tickets may sometimes need API integration. If a fix keeps failing or recurring vulnerabilities show up again, you’ll need to step in for some manual troubleshooting.
- Reporting: Dashboards can display key performance indicators like MTTR and SLA compliance automatically. Audit-ready report generation will always need your review. Use built-in templates to speed up reporting, but keep in mind this part is still the hardest to automate completely.
One last thing to remember is that automation can only be applied to endpoints it can actually reach. That’s why cloud-native agent-based tools are so convenient for remote and hybrid teams. They don’t need a VPN to patch, monitor, or report on endpoints, because all of that happens through the agent to cloud connection. There’s no need for extra hardware or software, which makes these tools cost-effective too. They’re easier to manage and you don’t have to spend more than the license itself.
What Should You Look for in Vulnerability Management Tools?
The right vulnerability management tool for your company should shorten the time from detection to verified fix through automation. It must to give you complete asset coverage, real-time monitoring, risk-based prioritization, built-in remediation, mitigation options, ready-to-use report templates, and integration capabilities. The tool should fit your company’s needs, help you solve daily challenges, and let your team do more with less manual effort to boost productivity and improve your overall security posture. Look for verification and reporting that let you measure remediation effectiveness, not just deployment activity. Before you pick anything on the market, check the following.
- Architecture: On-premises gives you more control over your infrastructure but means investing in hardware, software, and maintenance. Cloud-native agent based SaaS solutions cover more ground, don’t need VPNs or appliances, scale easily, and manage both on-prem and remote systems just as well.
- Asset coverage: Look at which endpoint types, operating systems, and third-party apps it supports. Check how it finds systems, whether through scanning or agent deployment.
- Monitoring method: For remote or hybrid environments, choose agent based monitoring. Agents report continuously over the internet. Network based scanners only see devices when they are on your network, so they are a good fit for on-premises environments. Agentless tools can cover cloud workloads on platforms they support. Also, check how the tool manages offline devices.
- Risk-based prioritization: Find a solution that uses CVSS, EPSS, and KEV status, and lets you add asset criticality, business impact, and exposure. That will make your prioritization truly risk based and effective.
- Built-in remediation: Make sure it can automate staged patch deployments end to end and give you approval controls, peer to peer distribution for updates, reboot control, and the freedom to shape the process as you want it. The tool should also allow software uninstallation in bulk.
- Compensating control management: Check that the tool lets you apply compensating controls, like running a script to disable a service, block a port, or isolate the vulnerable asset from the network and then document it with an owner, expiration date, and an alert when the deadline comes or a patch appears.
- Reporting and audit ready documentation: You should have access to real-time dashboards for patch status, compliance, SLA tracking, and other endpoint details. The reports should be fully customizable and let you generate audit ready documentation after each cycle, with all the detail auditors and regulators expect.
- Integrations: Look for APIs and connectors that support integrating data across ticketing, SIEM, XDR, EDR, CI CD, or any other tools you use in your environment.
FAQs
How Often Should You Run Vulnerability Scans?
Weekly scanning is a good starting point for most organizations. Mission-critical systems and internet-facing assets should be monitored in real time or scanned daily. You can use agent-based monitoring and another tool for scheduled scans. Scan frequency should go up when critical new vulnerabilities are disclosed, like high-profile remote code execution flaws in widely used software. The goal is to minimize the window between a vulnerability appearing and your team discovering it.
Is CVSS Enough to Prioritize Vulnerabilities On Its Own?
No, since CVSS is just a helpful baseline and doesn’t capture current exploit activity, active ransomware campaigns, or your business context. For efficient vulnerability prioritization, use CVSS scores with threat intelligence, including known exploits and campaigns, plus asset criticality, data sensitivity, and network exposure. Many vulnerability management tools use that multi-source approach and rank system weaknesses automatically. You just have to group your endpoints by business context and tag internet-connected ones so the tool can prioritize accurately.
What’s the Difference Between Patching and Mitigation in Vulnerability Management?
Patching means applying a software update or config change that permanently fixes the security weakness in the operating system or third party application. Mitigation is when you use compensating controls like firewall rules, access management, endpoint isolation, or blocking a port because there’s no patch yet. Mitigation is a temporary fix that buys you time until a permanent solution is available. It does not resolve the vulnerability for good.
How does Vulnerability Management Apply to Remote and Hybrid Workforces?
Remote endpoints are a real problem for any company using network based scanning, because scanners can’t reach devices that aren’t on the corporate network. Cloud-native vulnerability management platforms like Action1 use agents installed on each endpoint, so whenever the system is online, it gets checked in real time, and vulnerabilities get discovered, assessed, and patched over the internet without VPN or any local appliances. So remote and hybrid workforces need such platforms to keep every on-premise and remote endpoint up-to-date, secure, and compliant.
Is There Free Software that Can Automate the Vulnerability Management Lifecycle?
Yes, Action1 is free for your first 200 endpoints, fully featured, with no time limits. The platform is cloud native, agent based, and automates most of the lifecycle from vulnerability detection and risk-based prioritization to patching, verification, and reporting. It supports Windows, macOS, Linux, and more than 360 third-party applications. It also offers a private and secure software repository, peer to peer patch distribution, update rings, MFA, RBAC, and many other features to automate the entire process with less downtime risk and almost no manual effort.
Action1 is compliant with SOC 2 Type II, ISO/IEC 27001:2022, GDPR, HIPAA and HITECH, NIST SP 800-171, and CISA Secure by Design, and supports or aligns with PCI DSS, SOX, ACSC Essential Eight, TX-RAMP, CSA CAIQ, and HECVAT.
Which Frameworks Cover the Vulnerability Management Lifecycle?
The main frameworks that cover the vulnerability management lifecycle are the CIS Critical Security Controls, ISO/IEC 27001:2022, NIST SP 800-40 Rev.4, and the NIST Cybersecurity Framework 2.0. Industry rules add their own requirements as well, like PCI DSS for payment card data and CMMC for US defense contractors. Each of these expects you to find vulnerabilities, fix them on a defined schedule, and have documentation that proves your actions.
When Should an Organization Move from Manual Processes to Automated Vulnerability Management Tools?
Organizations outgrow manual spreadsheets and ad-hoc patching once they manage more than a few dozen endpoints or face frequent audit and compliance requirements. Warning signs include a growing backlog of unpatched systems, long MTTR, repeated audit findings, and an inability to keep an accurate asset inventory. Adopting an automated, cloud-native tool early prevents these issues from compounding and provides a scalable foundation for a mature vulnerability management lifecycle. FIRST projects CVE counts will exceed 50,000 annually by 2027, making manual approaches increasingly untenable.
What Happens When a Vulnerability Has No Available Patch?
The vulnerability stays open and actively managed, but you can reduce the risk by applying a vendor workaround, a configuration change, endpoint isolation, access restrictions, or uninstalling the software at least temporarily. If any of those take place, or you decide to accept the risk that comes with the vulnerability, you have to document that with an owner and expiration date. Once a patch gets released, remove the compensating control and deploy the patch for permanent remediation.
Does a Vulnerability Count as Remediated if a Compensating Control is Applied?
No, because compensating controls only mitigate the risk. They aren’t applying the software code fix or configuration change to address the vulnerability permanently. Compensating controls only buys you time until a patch is released. That’s why you have to track mitigated vulnerabilities as a separate status, keep them in risk reports, and review the control until a patch, upgrade, or uninstall fully remediates the vulnerability.
What is the Difference Between Vulnerability Management and Patch Management?
Patch management is one remediation method inside the vulnerability management process. It finds, tests, deploys, and verifies software updates, so it’s tightly focused on the patching workflow. Vulnerability management, on the other hand, also covers asset discovery, assessment, risk-based prioritization, mitigation, risk acceptance, verification, reporting, and continuous improvement, including vulnerabilities that no patch can fix.
Automate Your Vulnerability Management Lifecycle with Action1
Action1 is a cloud-native AEM platform with built-in vulnerability and patch management capabilities that can automate your vulnerability management lifecycle. It offers cross-OS platform support and a private software repository with more than 360 third-party applications. In just five minutes, you can create your account, install the agent, and start remediating vulnerabilities. Action1 uses real-time monitoring to identify security weaknesses across your on-premises and remote endpoints, then prioritizes them by risk with multi-source data, finds the missing patches, and lets you deploy them autonomously in stages to minimize manual work, reduce downtime risk, and accelerate deployment.
If there’s no patch available, you can apply compensating controls and document them. With over 100 built-in customizable report templates, you can generate audit-ready reports in minutes to keep your company compliant with the regulations you’re required to follow. Action1 gives you the ability to shape the entire process just the way you envision it, with plenty of scheduling flexibility options that let a single administrator easily manage thousands of endpoints. The AEM platform is free for your first 200 endpoints, fully featured, forever, and it’s highly scalable for seamless growth.
All of that is possible through the following features:
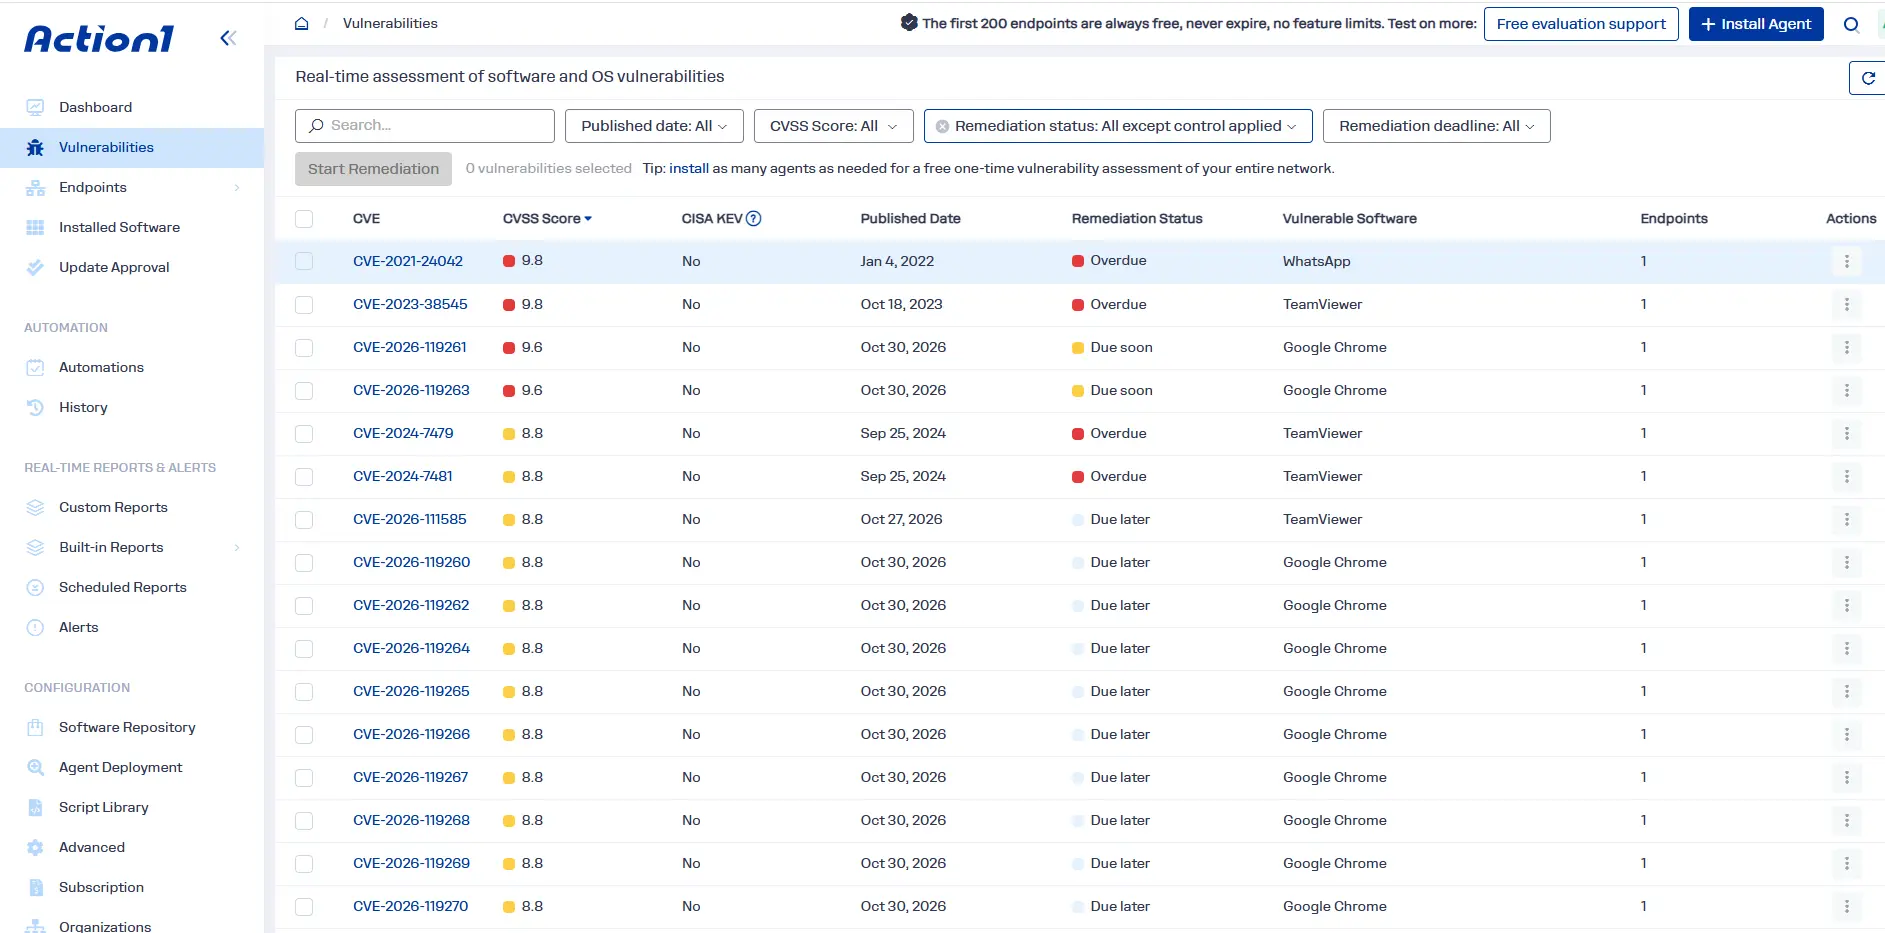
- Risk-based vulnerability management: Detects vulnerable operating systems and third-party apps on your Windows and macOS endpoints in real time. Every finding shows its CVE number and CVSS score, whether it’s actively exploited based on CISA KEV, and whether it’s been used in known ransomware campaigns, so you know what to fix first. Linux vulnerability assessment is coming soon.
- Multiple vulnerability intelligence sources: Action1 doesn’t rely on a single database like NIST NVD. It pulls from VulnCheck NVD++, NIST NVD, CISA KEV, Microsoft Security Response Center, vendor release notes, and more.
- Built-in vulnerability remediation: Fix vulnerabilities right where you find them. Deploy available patches, remove unsupported or legacy software, or document compensating controls for vulnerabilities you can’t patch yet.
- Autonomous patch management: Patches Windows, macOS, Linux, and over 360 third-party applications through one workflow, so OS and third-party updates follow the same rules.
- Update rings for faster and safer rollouts: Patches move from the test ring to the next rings only when your predefined success metrics are met. Patches that miss them won’t move forward, which limits downtime risk.
- Approval and reboot control: Approve patches automatically, with an optional delay after release, or choose manual approval for critical systems. You also decide when endpoints restart, with custom user prompts and postponement deadlines.
- Offline endpoint catch-up: If an endpoint is offline during a scheduled deployment, it gets patched as soon as it reconnects, from anywhere.
- Cloud-native, agent-based architecture: Endpoints connect outbound over port 443, so you don’t need a VPN, appliances, or open firewall ports to manage office and remote devices.
- Bulk software uninstall: Remove unauthorized or legacy software in bulk, whether that’s one version, all versions, or every version below the one you choose. You can also schedule uninstalls to run automatically.
- SLA-based dashboards and real-time reporting: Track active vulnerabilities and patch compliance against your SLAs in real time, and report on all documented compensating controls. Over 100 built-in customizable reports cover patching, vulnerabilities, software and hardware inventory, and security configuration, so audit-ready reports take minutes.
- Real-time asset inventory and alerts: See every endpoint’s installed applications, versions, and hardware in real time, and get alerts when software or hardware changes or when an endpoint goes offline.
- Dynamic endpoint groups and custom attributes: Group endpoints by OS, model, IP range, AD OU or security group, or up to 30 custom attributes like BitLocker status or warranty date. Use these attributes to target remediation and build reports.
- Software and script management: Deploy or remove prepackaged and custom apps remotely in a few clicks, including packages up to 32 GB. Run built-in or custom PowerShell, CMD, and Bash scripts across your fleet.
- Private software repository and P2P distribution: Third-party patches come from Action1’s privately maintained repository, not community-managed ones like Chocolatey or Winget. Peer-to-peer distribution shares large updates across endpoints on the same network, cutting bandwidth use with no cache servers needed.
- Multi-tenancy for MSPs and enterprises: Create multiple organizations under one account, each with its own endpoints, data, settings, and update approval process.
- Enterprise-grade access security: Customizable role-based access control, mandatory MFA, and single sign-on through Entra ID, Okta, Google, or Duo protect every account.
- Audit trail: Filter by organization, event type, and date range to see who did what, and when.
- REST API and SIEM/XDR integration: Full API access for patching, vulnerability management, scripting, and reporting, with OAuth 2.0 and the PSAction1 PowerShell module. Audit data can be sent to SIEM and XDR tools through the API.
- Browser-based remote access: Take control of an endpoint’s screen, mouse, and keyboard from your browser, without a VPN, any time a fix needs a hands-on look.
- Free for up to 200 endpoints: Fully featured, with no functional limits, forever.
- Free one-time vulnerability assessment: Install the agent and assess an unlimited number of endpoints at no cost.