Windows Firewall allows you to restrict outgoing/incoming network traffic for a specific application or TCP/IP port. It is a popular means of restricting network access to/from user workstations or servers. Windows Firewall rules can be configured individually on each computer. Or, if your computer is in a Windows domain, the administrator can manage the settings and rules of Windows Firewall using group policies. In large organizations, port filtering rules are usually brought to the level of a router, L3 switches, or dedicated firewalls. However, nothing prevents you from spreading your Windows Firewall network access restriction rules to Windows workstations or servers.
How to Configure Windows Firewall Settings
You can configure Windows Firewall settings (block or open port in Windows 10/8/7) according to your needs and restore the default settings if required. To do this, simply navigate to the Advanced Settings of the firewall. Start by opening up the control panel and typing ‘Firewall’ into the search box type. Then, open Firewall and click on the ‘Advanced Settings’ link.
Read on for detailed instructions on how to block or open a port in Windows 10/8/7 Firewall.
How to Block or Open a Port in Windows 10/8/7 Firewall
1. Open Windows Firewall and find the Advanced Settings. To open Windows Firewall, type ‘firewall.cpl’ into the search bar and press the Enter key.
When ‘Advanced Settings’ opens, click the Advanced Settings link in the left-hand pane of the main firewall dialog box. This will bring up the ‘Windows Firewall with Advanced Security’ window.
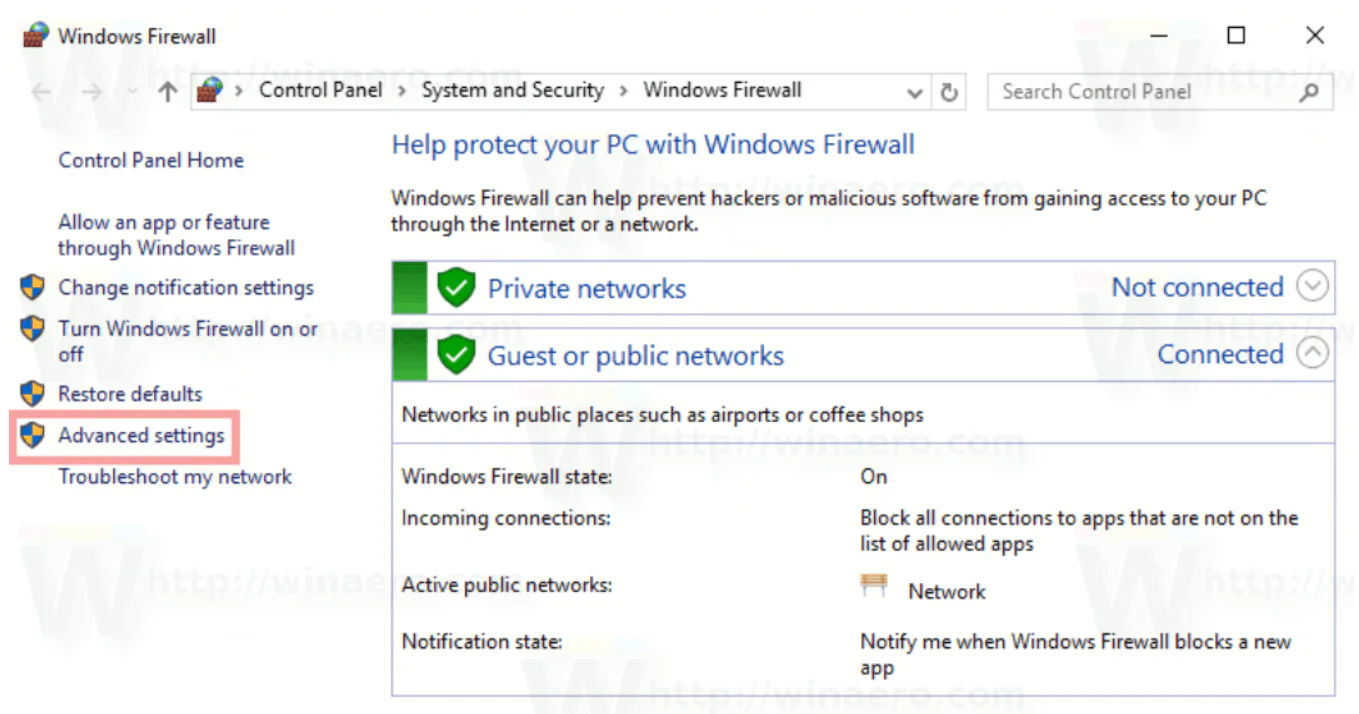
2. Open the List of Inbound Rules.
On the left-hand pane of the window, click on ‘Inbound Rules‘ to bring up the list of rules.
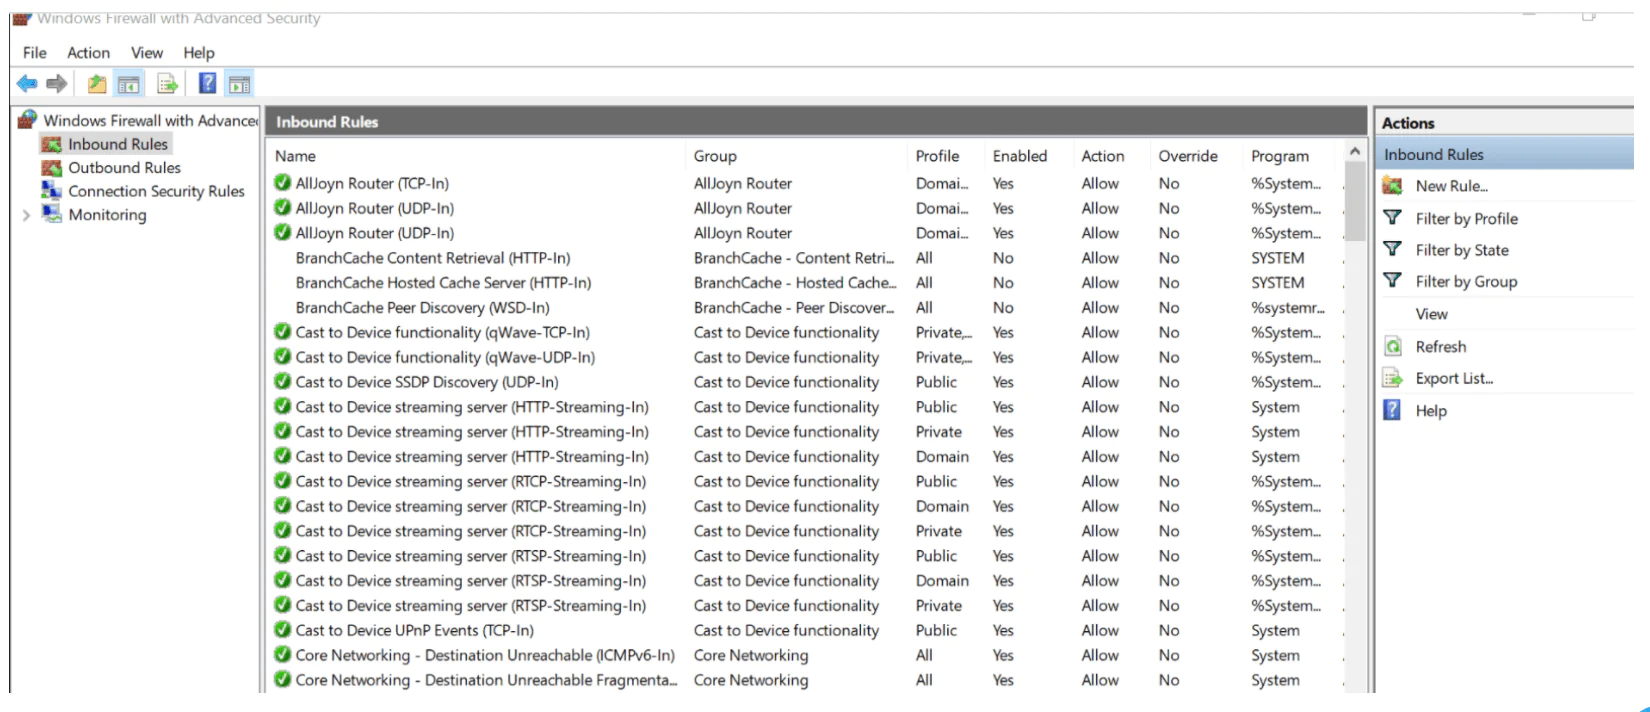
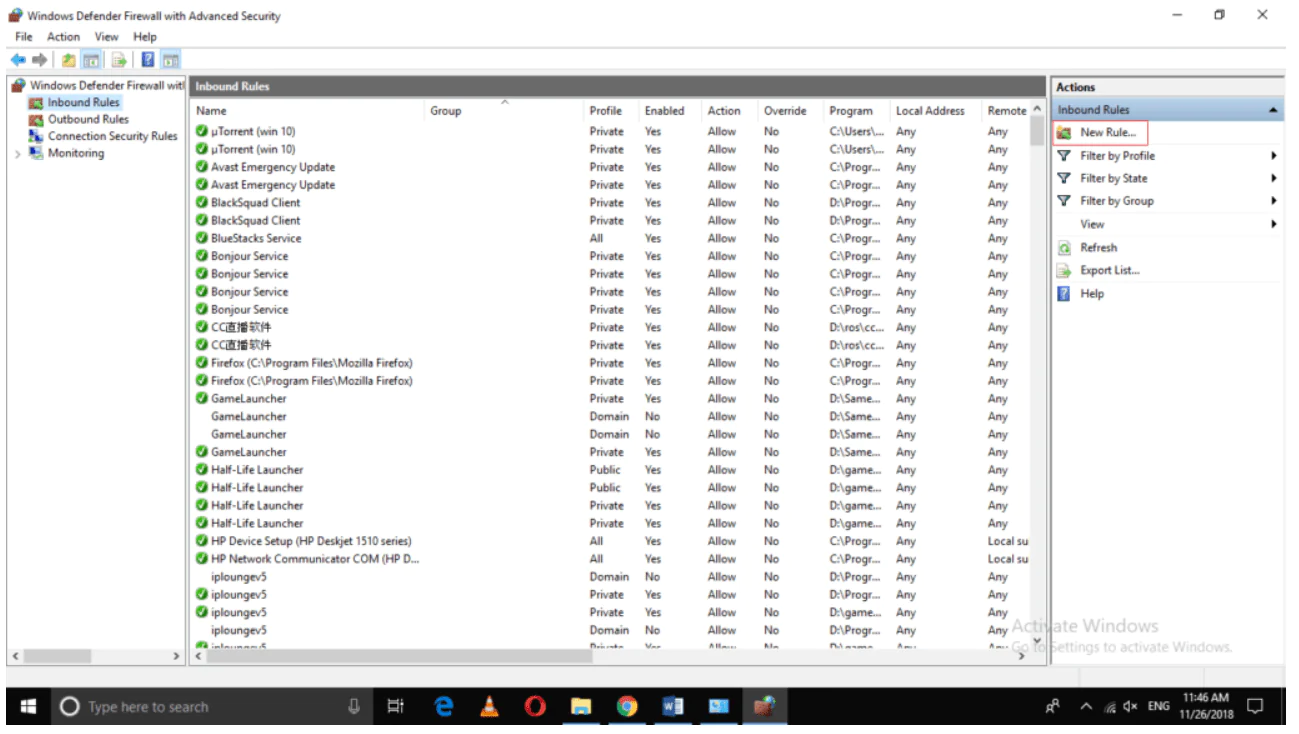
3. Set up a New Rule.
From the Actions pane on the right-hand side, select ‘New Rule…’
4. Open the New Inbound Rule Wizard.
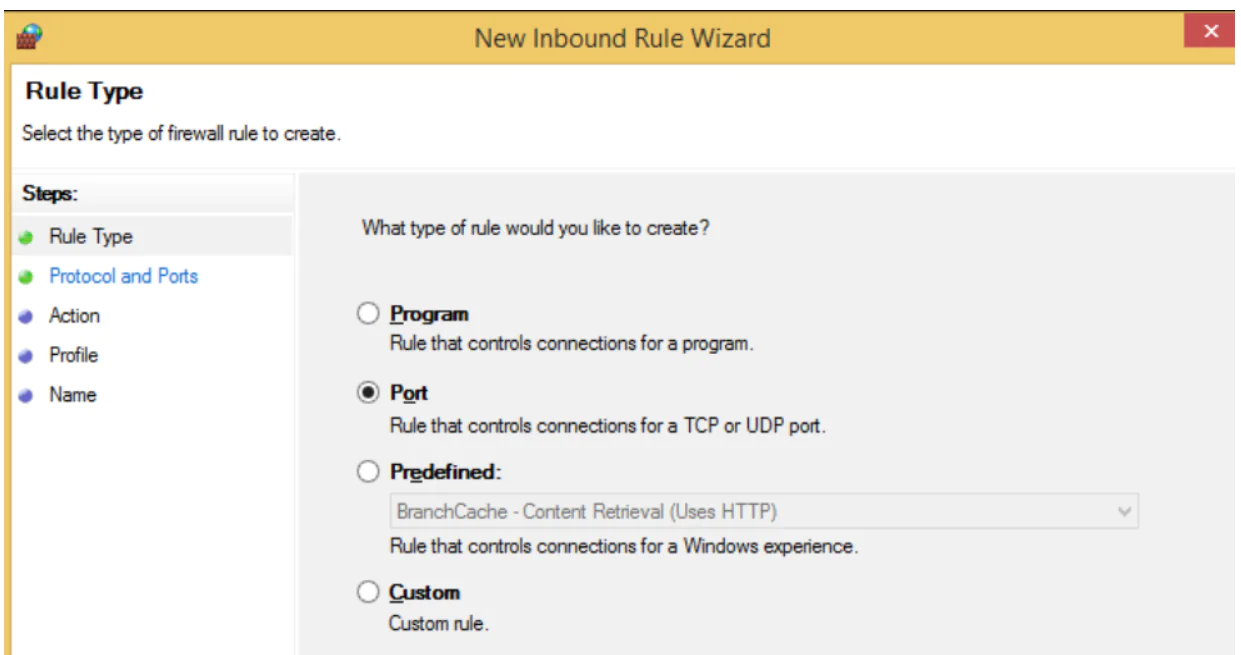
Select ‘Port‘ and then click ‘Next.’ This will open the ‘New Inbound Rule Wizard’ window.
From there, select ‘Port’ as the new Rule Type and click ‘Next.’
Click on ‘Specific local ports.’ Then choose a port number (e.g., 80).
Click ‘Next‘ to continue.
5. Block the Connection.
In the Action window, select ‘Block the connection’ and click ‘Next.’
6. Apply Your New Rule to Each Profile Type.
In the Profile window, tick the boxes to apply your rule to each of the three profile types: Domain, Private, and Public. Click ‘Next‘ to continue.
7. Name Your Rule and Configure the Settings.
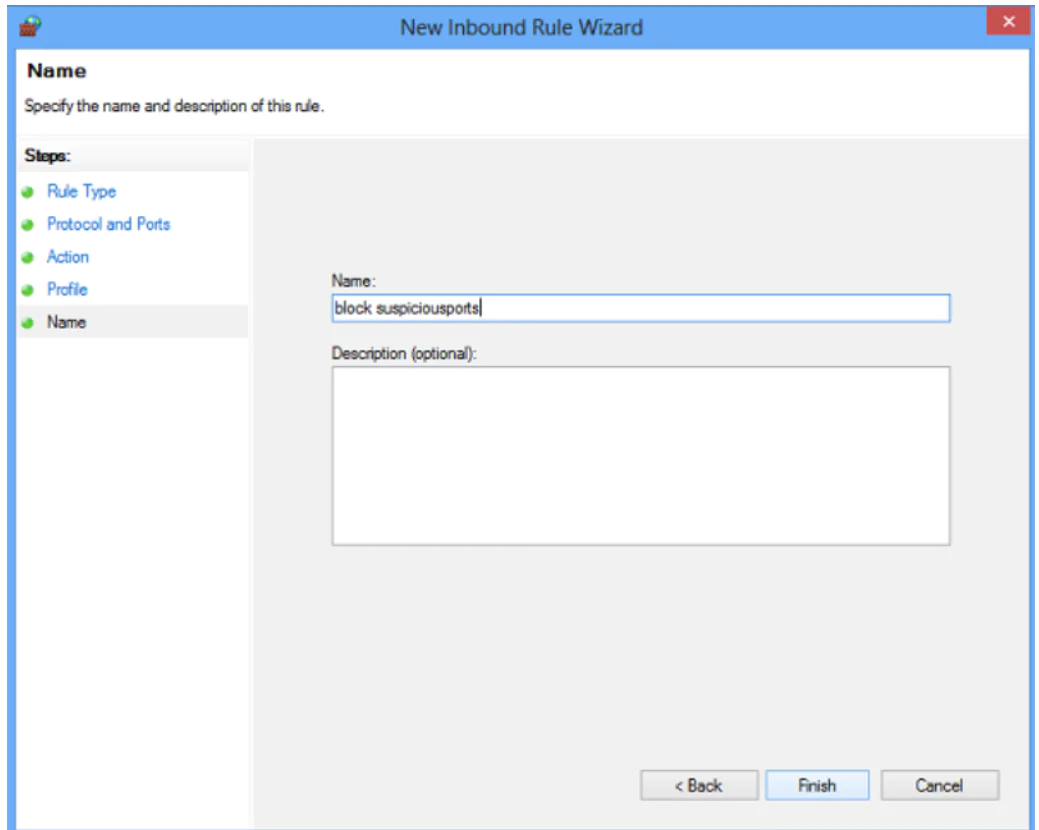
Choose a name for your new rule, e.g., ‘block suspicious ports.’
If you want, you can also add an optional description to your rule.
When you’re done, click ‘Finish‘ to configure the settings.
How to Open a Port in Windows Firewall
You may want to open a port in the Windows Firewall in order to let a specific IP address communicate with your computer (e.g., when you’re playing games). The procedure to open a port remains more or less the same. All you need to do is follow the instructions in the New Inbound Rule wizard, specify the Port, and select ‘Allow the connection.’
How to Turn off TCP/IP Port in Windows Firewall with Action1
Follow the steps below to turn off the TCP/IP Port in Windows Firewall:
1. Log in to the Action1 dashboard.
2. In the menu on the left-hand side, select ‘Managed Endpoints.’
3. Mark the endpoint for the port you want to block.
4. Click the ‘More Actions‘ button and then select the Run Command option.
5. In the window that opens, enter the command netsh advfirewall firewall add rule name=”BlockAIM” protocol=TCP dir=out remoteport=4099 action=block. (In this case, we’re blocking port 4099).
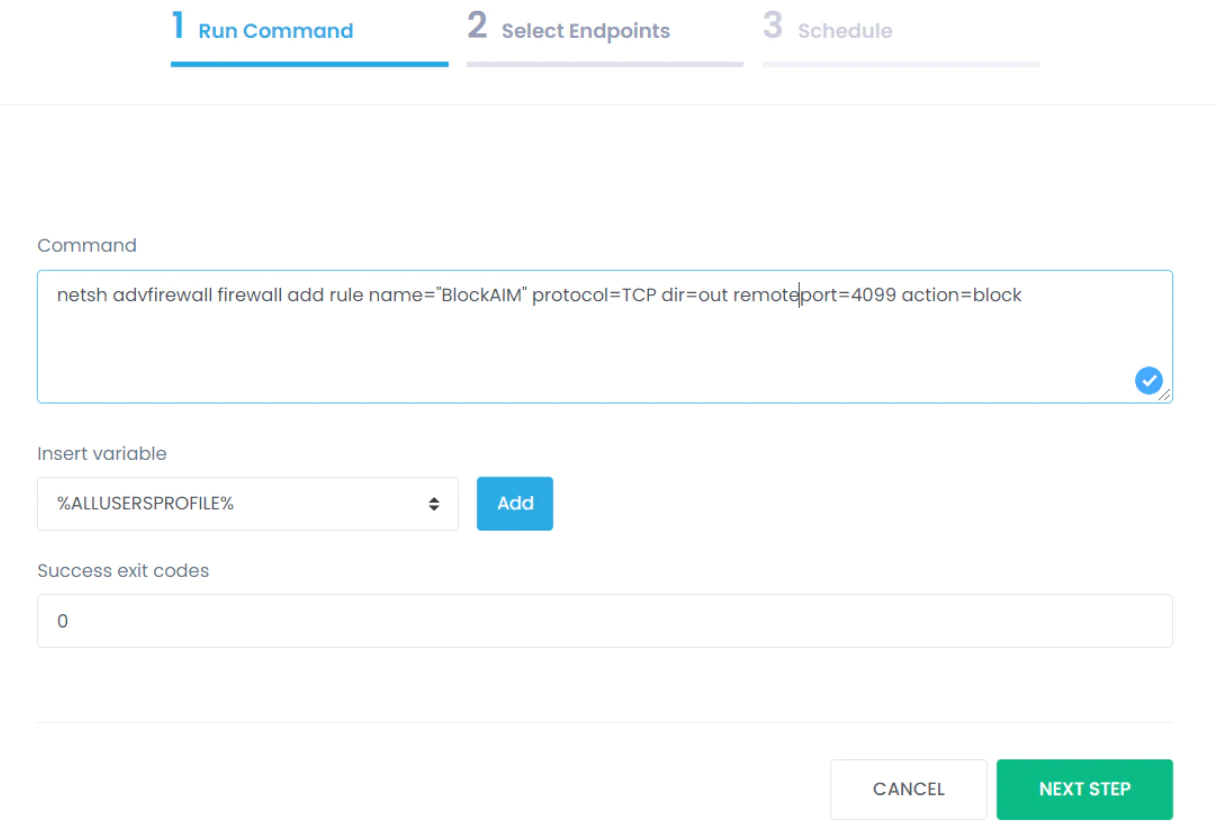
6. Click ‘Next Step.’
7. Click ‘Add Endpoints‘ and then select the endpoints to which you will apply this blocking rule.
8. Click ‘Next Step‘ and schedule the execution time of your command.
9. Click ‘Finish.’
Get Started with Action1 Cloud Patch Management Solution
Action1 allows IT professionals to efficiently manage configurations for remote computers within and outside the local network. In addition, the platform offers total control of patch management, OS and application upgrade distribution, software deployment, remote access, as well as many other features to run your IT security and administration as seamlessly as possible.


