By default, Windows 10 automatically checks for update, downloads and installs them, and it becomes more difficult to disable windows auto updates than in previous versions of the operating system. However, it is possible to do this: using the OS administration tools or third-party programs.
Windows Update is an important component and part of the Windows operating system. He regularly checks Microsoft servers for available updates, patches and device drivers. If they are found, he reports this and offers to download and install them. This is very important because updates improve system performance, reliability, stability and security.
It’s no secret that Windows XP, Vista, 7 and 8 / 8.1 allow you to customize the behavior of Update Center: you can download and install updates either automatically or manually, you can choose which updates should be installed and which should not; You can even completely turn off the check for updates. This allows you to make a decision about the feasibility of installing certain updates and at the same time makes it possible not to clog the bandwidth of the Internet channel once more when it comes to slow connections.
However, with Windows 10, Microsoft left users without any choice — Pro Edition allows you to postpone the installation of updates only for a while, while users of Windows 10 Home are not allowed to disable Windows auto update.
In other words, the new version of the operating system downloads and installs updates automatically and without notice. It would seem that there is nothing bad in this, but in reality this is not at all the case, because updates are often the cause of various problems. Sometimes it even comes to the point that after installing the next portion of patches, the system simply stops loading.
Whenever you are faced with Windows 10 automatic update notification like:
- Install updates automatically
- Download Updates but choose when to install them
- Check for updates but let me choose whether to download and install them
What would you do? Here, we have the following solutions.
In the instructions below you will find how to completely disable Windows auto update.
Solution 1. Disable Windows Update Service with Action1
1. Log in to the Action1 Platform.
Sign up with Action1 for your first 200 endpoints – absolutely free!
2. Connect endpoints
Secondly, add endpoints into your network to be able to manage them remotely. To do this, you need to install agents on the endpoints you wish to manage via Action1. The app allows you to add up to 200 endpoints into your network free of any charges and commitments.
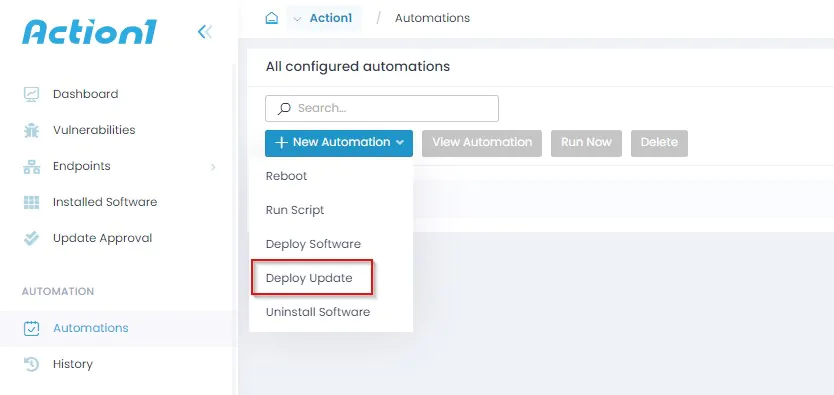
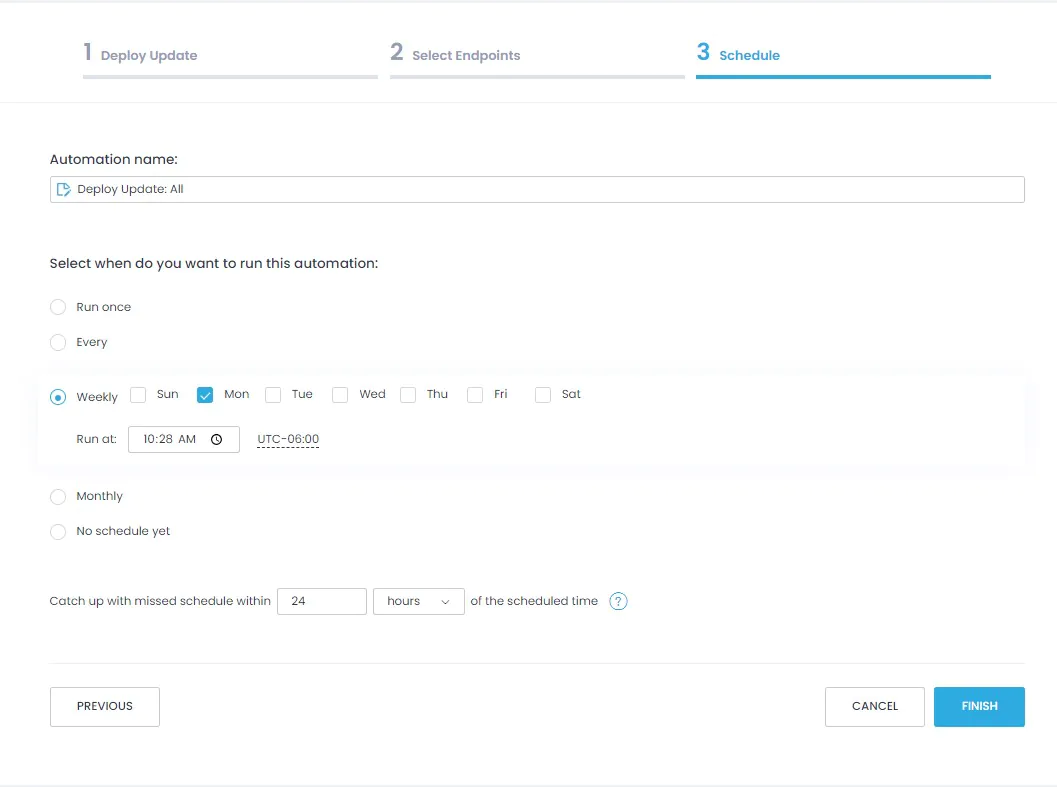
3. Set up a deploy update automation
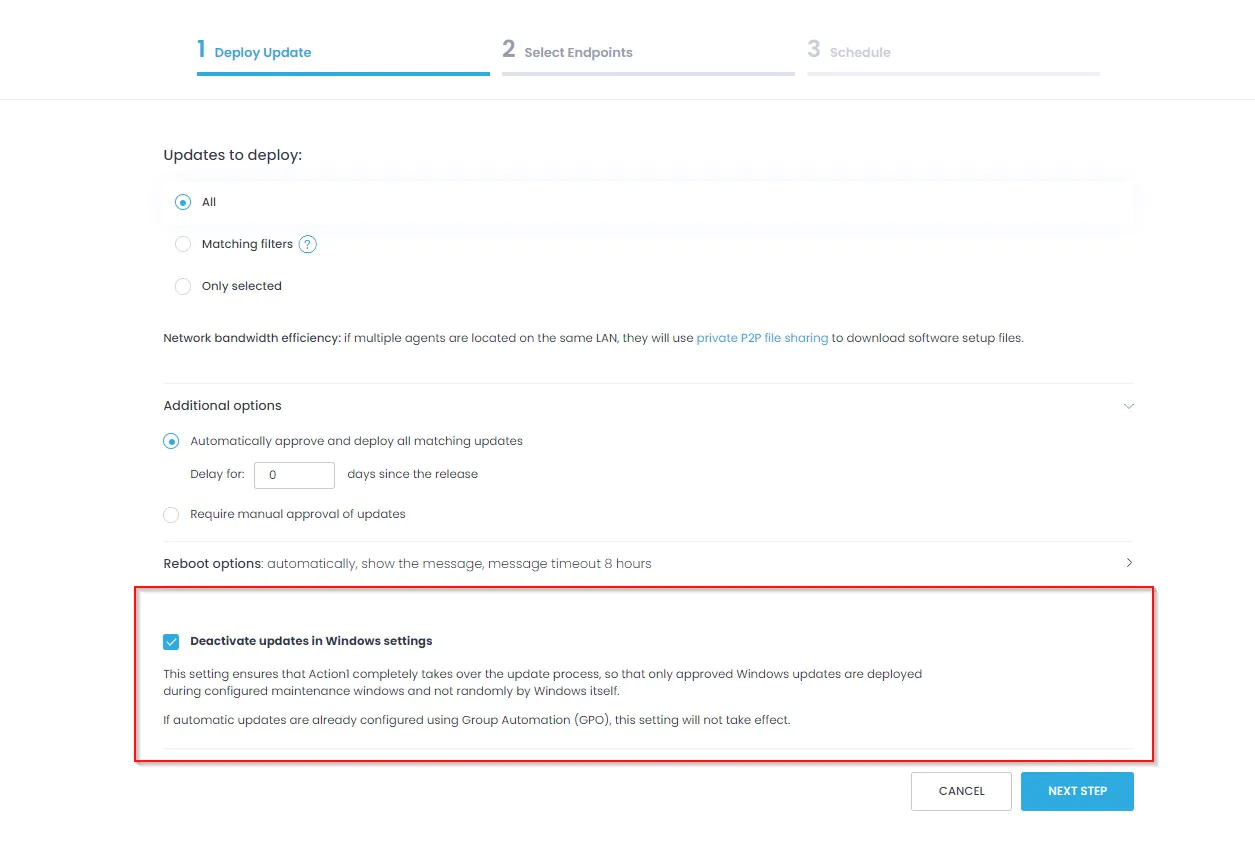
4. From here you can configure how you want updates deployed, but the setting that will handle if Automatic Updates are enabled is the checkbox below.
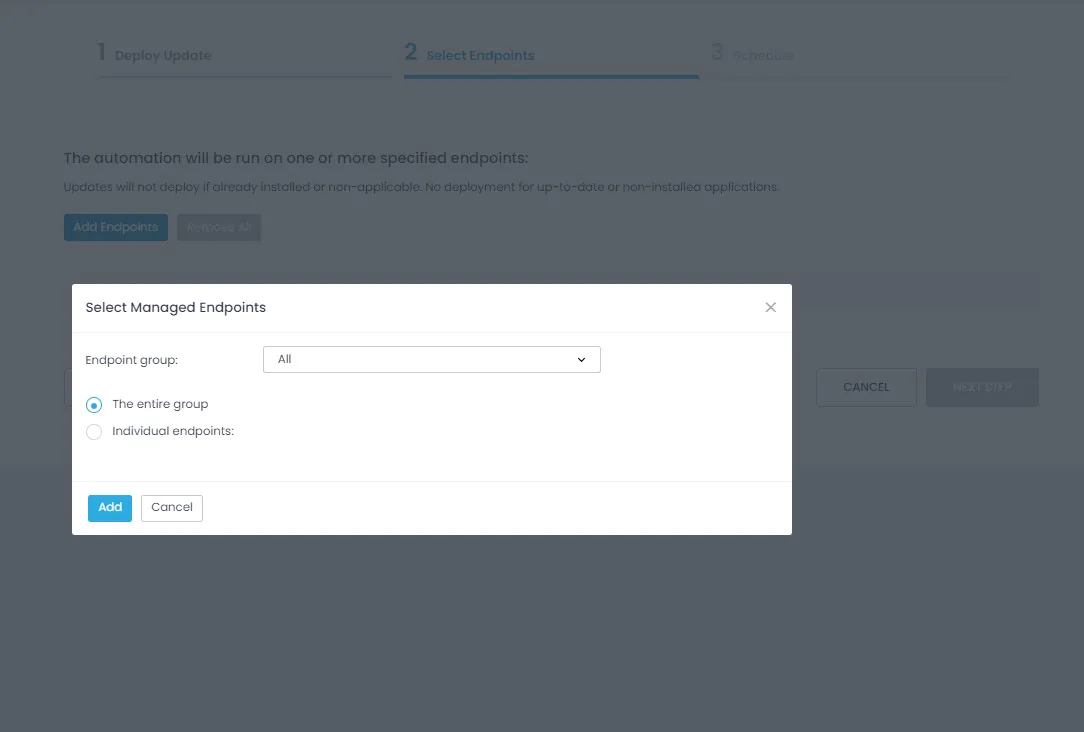
5. Target All endpoints, Groups, or individual systems.
6. Put the automation on schedule and the next time it runs the requested updates will be applied and Automatic updates will be turned off.
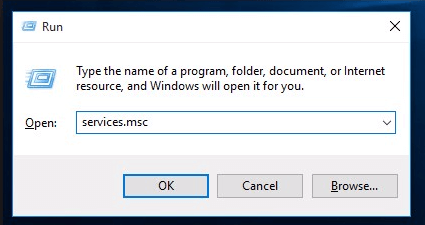
Solution 2. Disable Windows Update Service. Open Services.Msc
Press the Windows logo key + R at the same time to invoke the Run box. Type services.msc and press Enter.
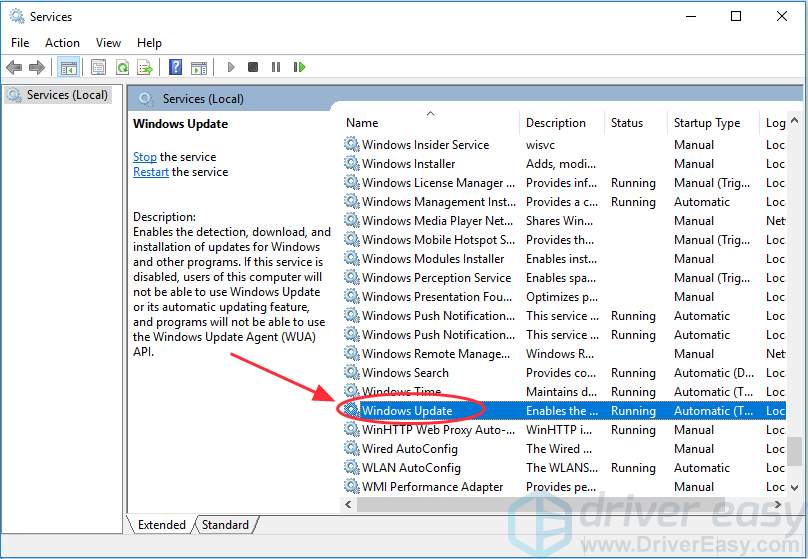
Double-click on Windows Update Service
Scroll down the service list to Windows Update and double-click it.
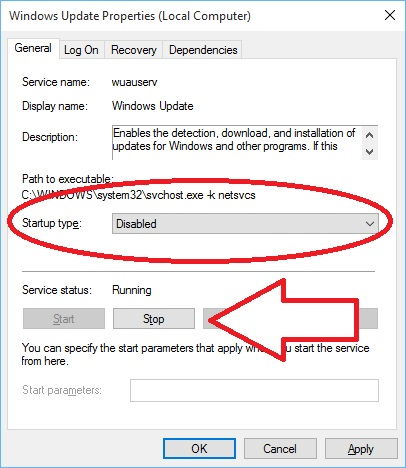
In Window with Startup Type Select Option Disabled
In Startup type window select Disabled. Then click Apply and OK to save the settings.
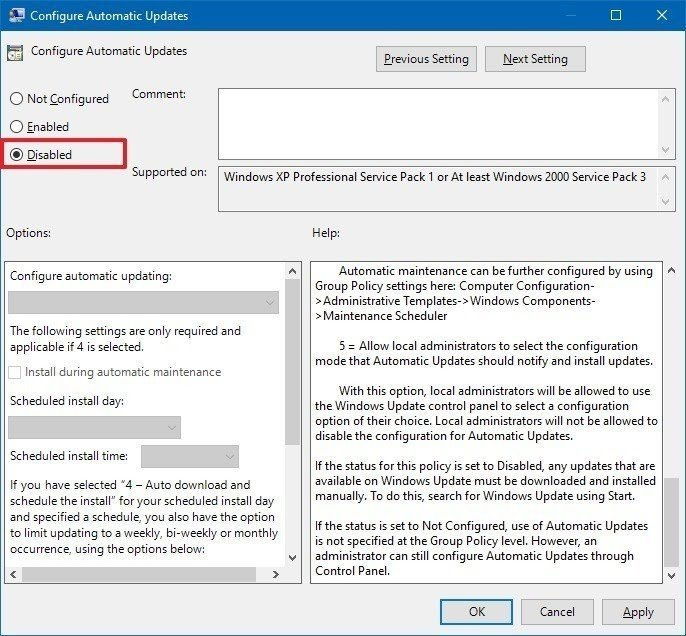
Solution 3. Change the Setting of the Group Policy Editor
The Group Policy feature is not available in the Home edition. So, only when you run Windows 10 Professional, Enterprise, or Education, you can use the Group Policy Editor to change the settings to prevent Windows 10 from automatically updating. The local group policy editor will notify you of new updates without automatically installing them.
- Press the Windows logo key + R then type gpedit.msc and click OK.
- Go to Computer Configuration > Administrative Templates > Windows Components > Windows Update.
- Double-click Configure Automatic Updates.
- Select Disabled in Configured Automatic Updates on the left, and click —Apply and OK to disable the Windows automatic update feature.
Note: If you need to update your Windows version later, you can repeat the steps above, then select Enabled to turn on this feature, so that you can continue to download the updates.
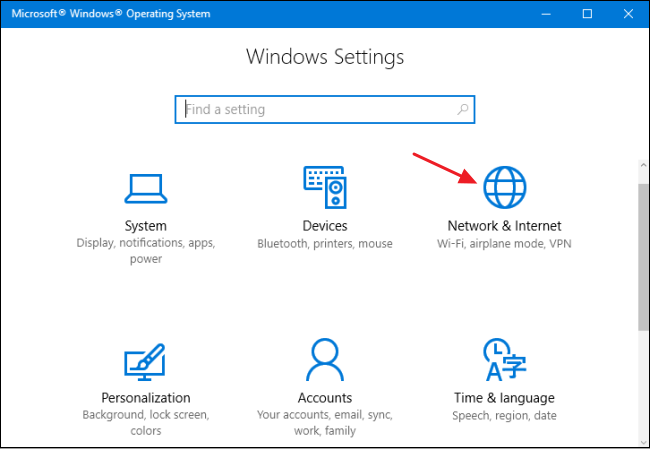
Solution 4. Meter Your Network Connection
- Click the Start button at the bottom left on your desktop, then click the Settings app.
- Click Network & Internet.
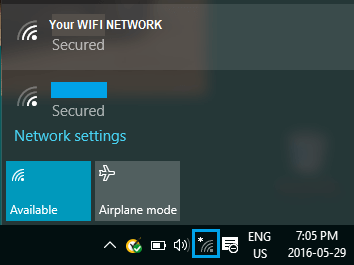
Click Wi-Fi Icon in the Windows Taskbar
Click Wi-Fi in the left pane, then click the name of your Wi-Fi connection.
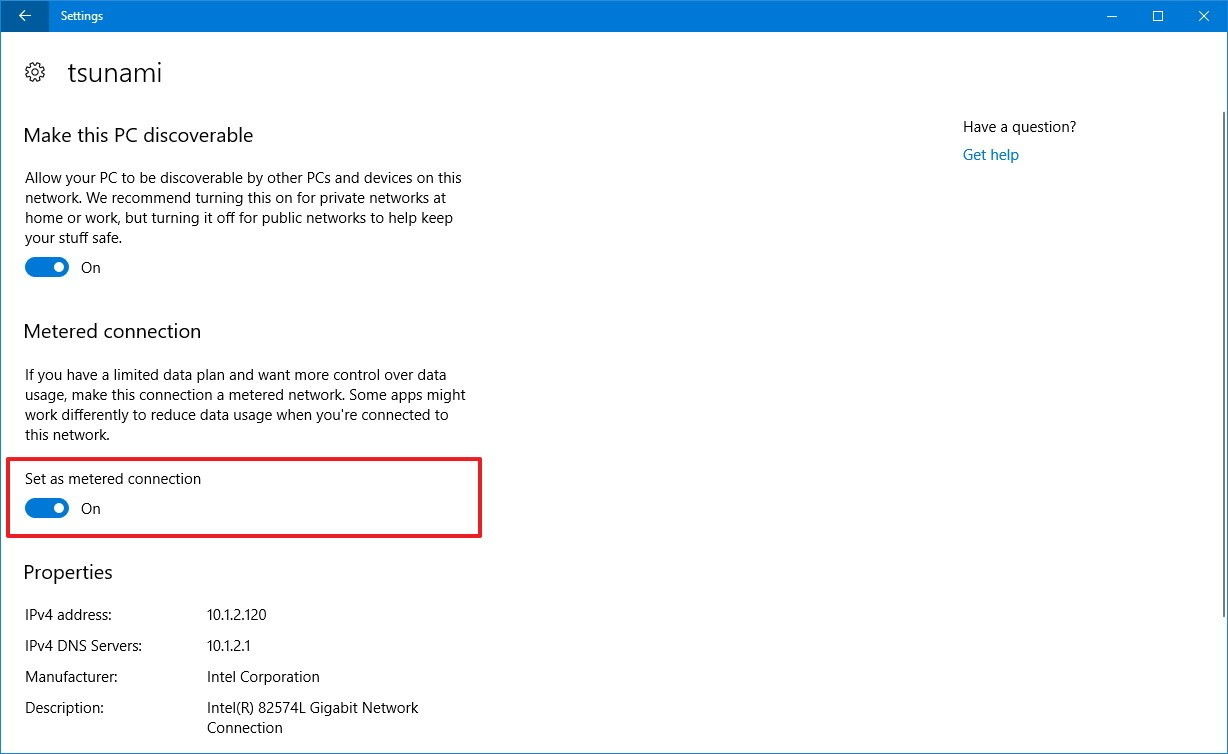
Click to Turn on Set as Metered Connection
Toggle on the option Set as metered connection and click to turn on.
Solution 5. Change the Way of Windows 10 Updates Using Registry
- Use the Windows key + R keyboard shortcut to open the Run command.
- Type regedit, and click OK to open the Registry.
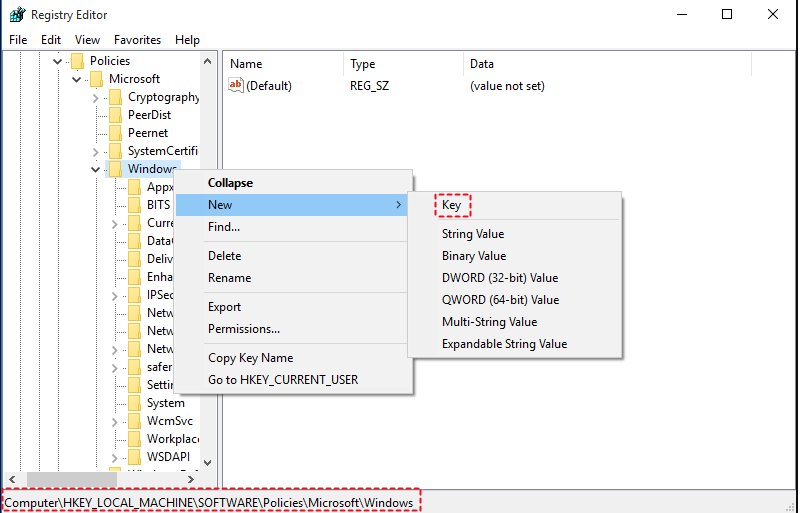
- Browse the following path: HKEY_LOCAL_MACHINE\SOFTWARE\Policies\Microsoft\Windows
- Right-click the Windows (folder) key, select New, and then click Key.
- Name the new key WindowsUpdate and press Enter.
- Right-click the newly created key, select new, and click Key.
- Name the new key AU and press Enter.
- Inside the newly created key, right-click on the right side, select New, and click on DWORD (32-bit) Value.
- Name the new key AUOptions and press Enter.
- Double-click the newly created key and change its value to 2. It’s for “Notify for download and notify for install”. Click OK.
- Close the Registry to complete the task.