
If you have an unnecessary account on your computer, you can delete or disable it. Also, If you delete it — then all data from it will be lost and it can not be restored. If you disable an account, you can enable it in the future without losing any data. A disabled account disappears from the login screen and from switching to the Start menu. In today’s article we will look at various ways to disable (enable) an account in Windows 10. To disable user accounts, the user under which you are logged in must have administrator rights.
1. Enable or Disable an Account on the Command Line
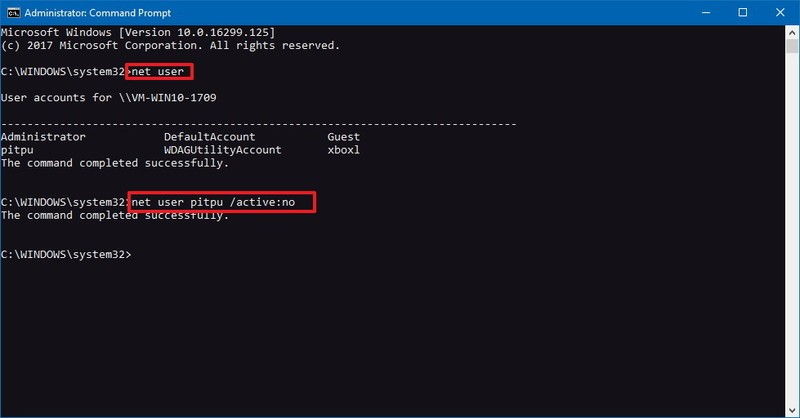
- Open a command prompt on behalf of the administrator: one of the ways is to right-click on the “Start” menu and select “Command Prompt (Administrator)” from the menu that opens.
- To disable the local account, enter the command
Net user “account name” /active: noreplacing the highlighted red with your own and press the Enter key. For example, we need to disable the Sa account — the command to enter will look like this:Net user “Sa” /active: no - If you need to disable a domain account you need to use the command
Net user “username” /active:no /domain
- To enable a local account, type the command
Net user “account name” /active:yesreplacing the highlighted red with your own and press the Enter key. For example, we need to enable the account Sa — the command for input will look like this:Net user “Sa” /active:yes - If you need to enable a domain account you need to use the command
Net user “username” /active:yes /domain - After the caption “Command completed successfully” you can close the command line.
2. Enable or Disable an Account in Local Users and Groups
The Local Users and Groups tool is available only in Windows 10 Pro, Enterprise, and Education.
- In the search bar or in the menu to execute (execute is called with the Win + r keys) type
lusrmgr.mscand press Enter. - Go to “Users” ⇨ right-click on the user whom you want to disable (enable) and select “Properties.”
- In the “General” tab, check the “Disable account” field and click “OK.” If you need to enable an account — uncheck the box “Disable account” and click “OK”.
3. Hide Account in Registry Editor
After completing the instructions below, you will not see a hidden account on the login screen and in the switching of the Start menu, but the account will appear as enabled in the Local Users and Groups.
Before editing the registry, it is recommended to create a system restore point.
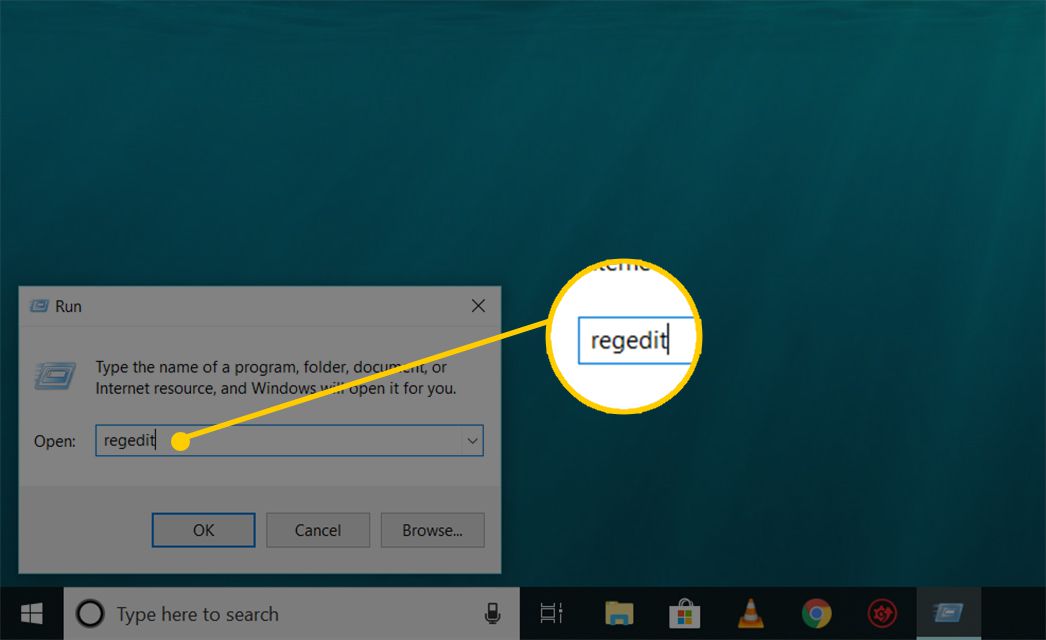
- Open the registry editor: in the search bar or in the menu to execute (run with the Win + R keys) enter the
regeditcommand and press the Enter key.
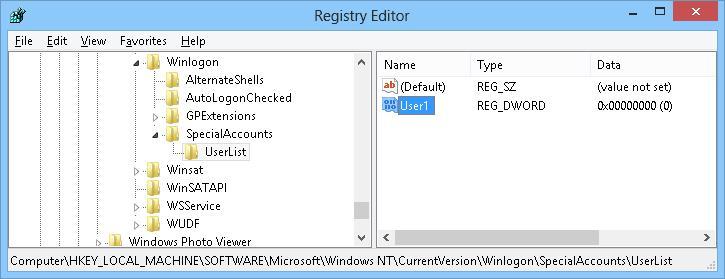
- In the left column, go to HKEY_LOCAL_MACHINE\SOFTWARE\Microsoft\Windows NT\CurrentVersion\Winlogon. In the Winlogon section you need to go to SpecialAccounts and select UserList, if you don’t have data partitioning — right-click on Winlogon and select “New” ⇨ Section ⇨ name it SpecialAccounts
- Click on SpecialAccounts with the right mouse button and select “Create” ⇨ Section ⇨ name it UserList

- Click on the UserList section with the right mouse button and select “New” ⇨ DWORD Parameter (32 bits)
- Name the new parameter the name of the user you want to hide. For example, we want to hide the user User1, which means we call the parameter User1.

- You can close the registry editor, now the hidden user will not be displayed on the lock screen. If you want to return its display — delete the created parameter with the username (in our example, we click on the Sa parameter in the UserList section with the right mouse button and select “Delete”, accept the deletion and close the registry editor).
Consider using Action1 to disable the local account if:
- You need to perform an action on multiple computers simultaneously.
- You have remote employees with computers not connected to your corporate network.
Action1 is an IT solution for cloud patch management, software deployment, remote desktop, software/hardware inventory, and endpoint management.


