Today we will talk about how to install and configure the WSUS role on Windows Server 2019, this process has become much simpler and easier, and WSUS is now fully integrated into the system.
Windows Server Update Services (WSUS) is an update service that allows administrators to centrally manage the distribution of patches and security updates for Microsoft products.
Starting with Windows Server 2008 R2, WSUS was included in the OS as one of the roles, therefore, despite the fact that we will consider the Windows Server 2019 platform, all the above, with minor amendments, will be true for Server 2008 R2.
Of the third-party packages, you only need to install Microsoft Report Viewer 2012 Runtime, but it is not mandatory and does not affect the operation of the service, but is required only for generating reports. Therefore, even if you forget to install it, nothing bad will happen, the first time you access the reports, the system will notify you of this and provide a download link.
Important! There are a number of limitations to installing WSUS role services. A WSUS database server cannot be a domain controller; a WSUS server cannot be a Remote Desktop Services terminal server at the same time.
Install WSUS Update Server on Windows Server 2019
To install WSUS, open Server Manager and go to Management — Add Roles and Features. In the wizard that opens, add the Windows Server Update Services role.
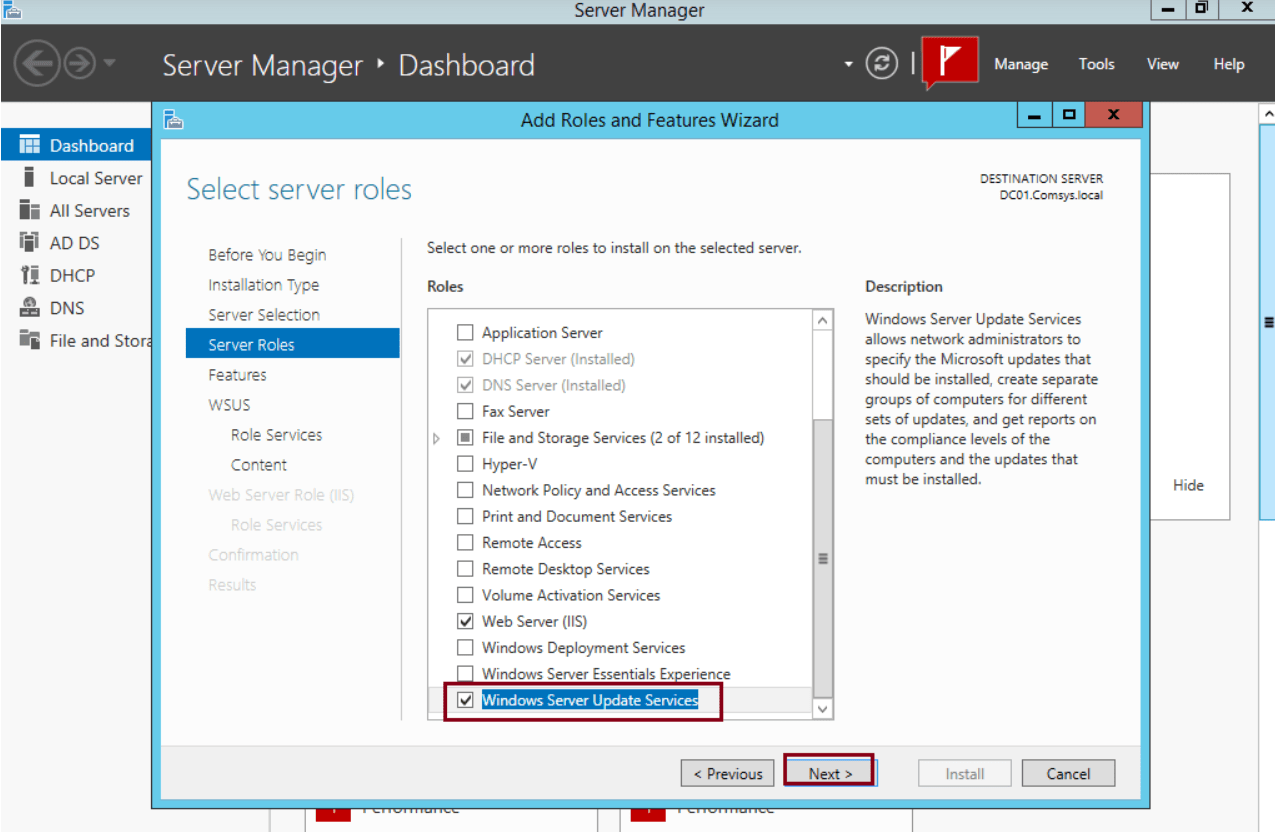
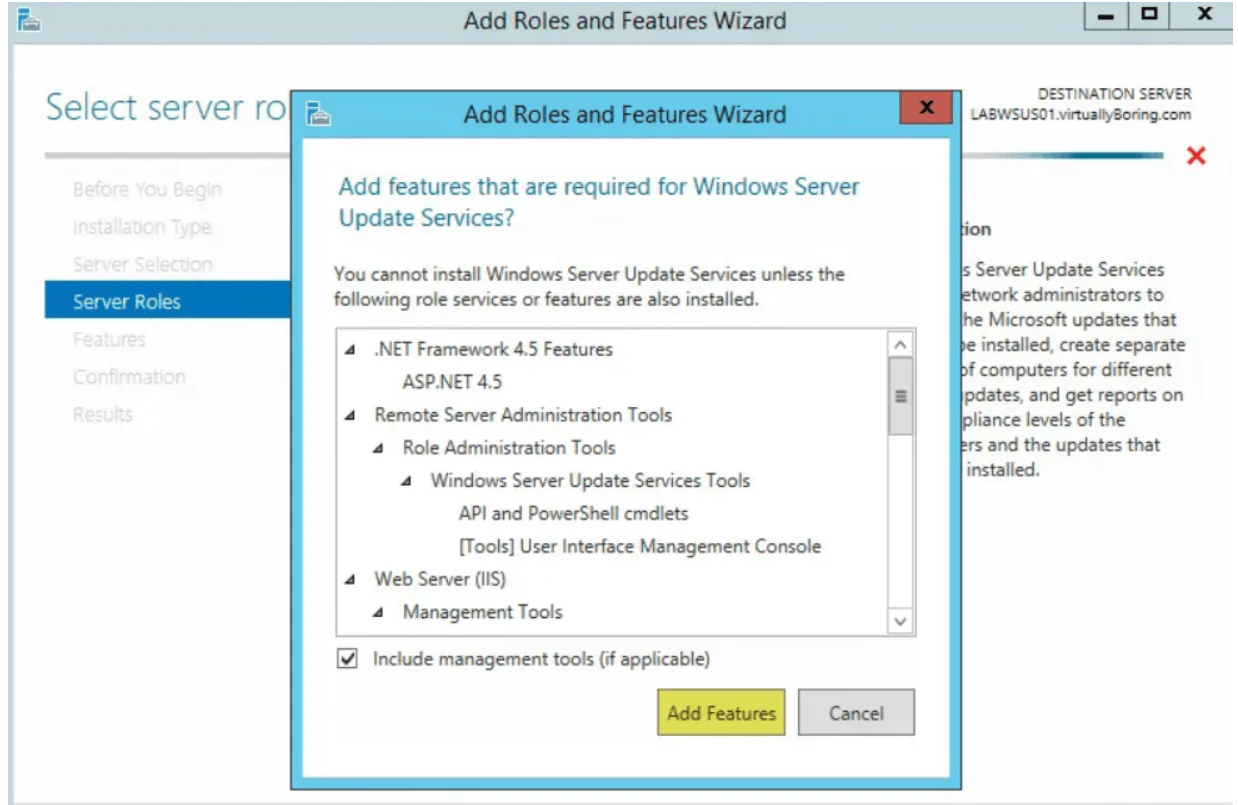
The next step will add all the necessary roles and components, so you won’t have to configure anything else separately.
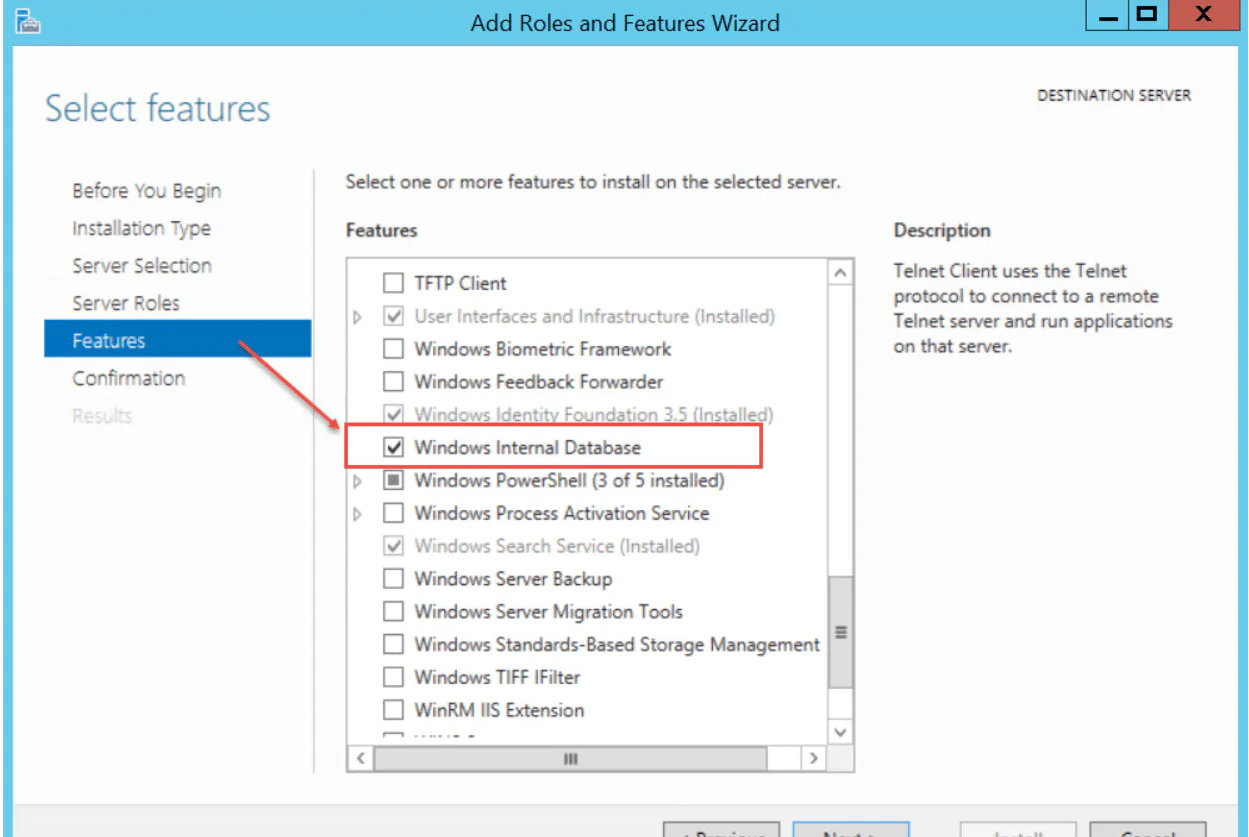
WSUS suggests using the Windows Internal Database (WID) as the default storage. For small implementations, we see no reason in installing a separate SQL server; this will not give any significant advantages.
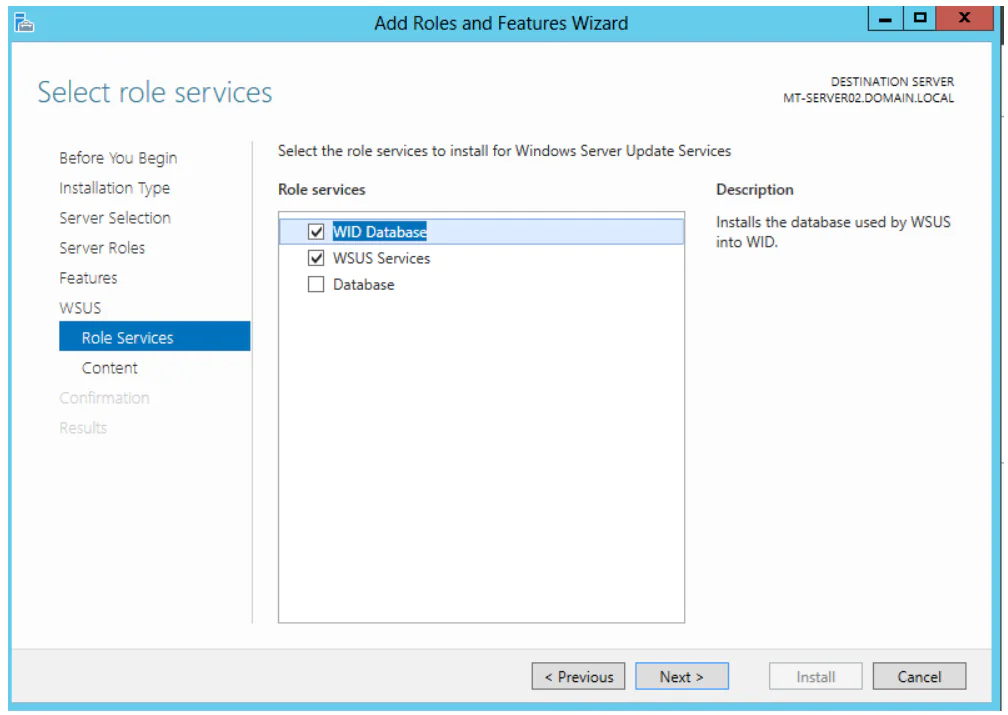
The next step goes to the basic settings of the role services. In our case, you will need to select the WID Database and WSUS Services options, if you intend to use SQL server, then instead of the WID Database you should select the Database option. The database server itself should already be deployed to your network by this point.
The next step is to indicate the location of the update repository, we recommend that you allocate a separate hard disk or disk partition for these purposes.
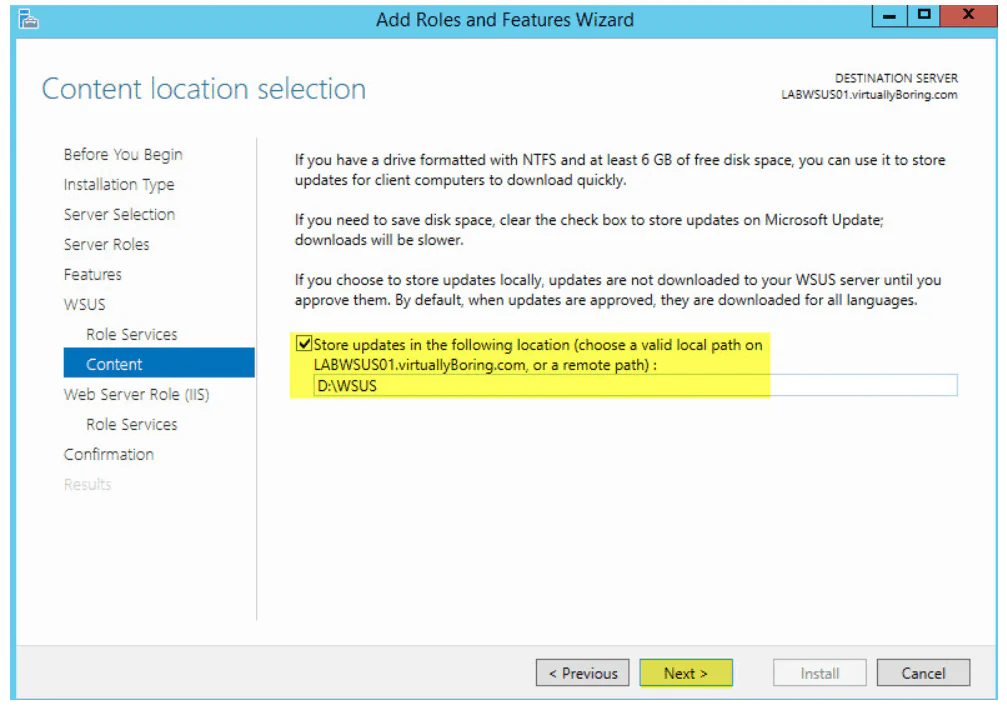
It is also possible that only information about updates will be stored on the WSUS server, the update packages themselves, after they are approved and appointed by the administrator, will be downloaded from Microsoft servers. In our opinion, such a scheme will be convenient for small companies with a good Internet channel; indeed, for the sake of a dozen machines, organizing local storage does not make much sense, especially if WSUS is not the only role of this server.
If you selected an external database, you will also need to specify the parameters for connecting to the SQL server. After which you can proceed to install the role, a reboot is not required. After installation, click on the flag with a yellow exclamation mark in the Server Manager and click Run after installation tasks, wait for the procedure to complete (the exclamation mark will disappear).
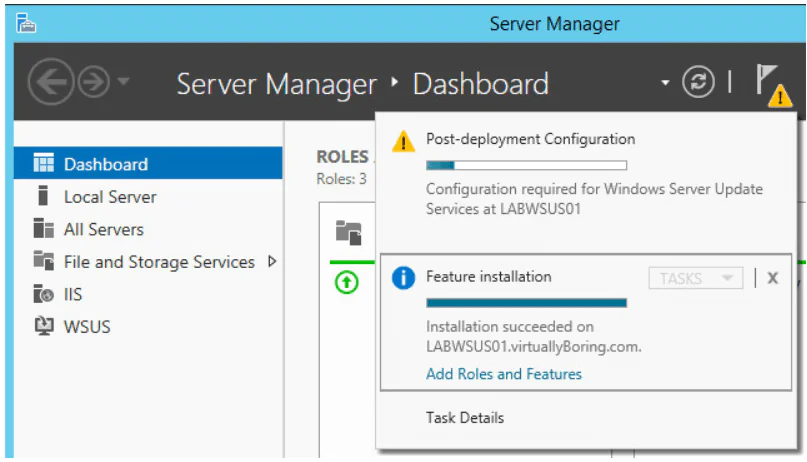
On this, the role installation can be considered complete and proceeds to the WSUS configuration.
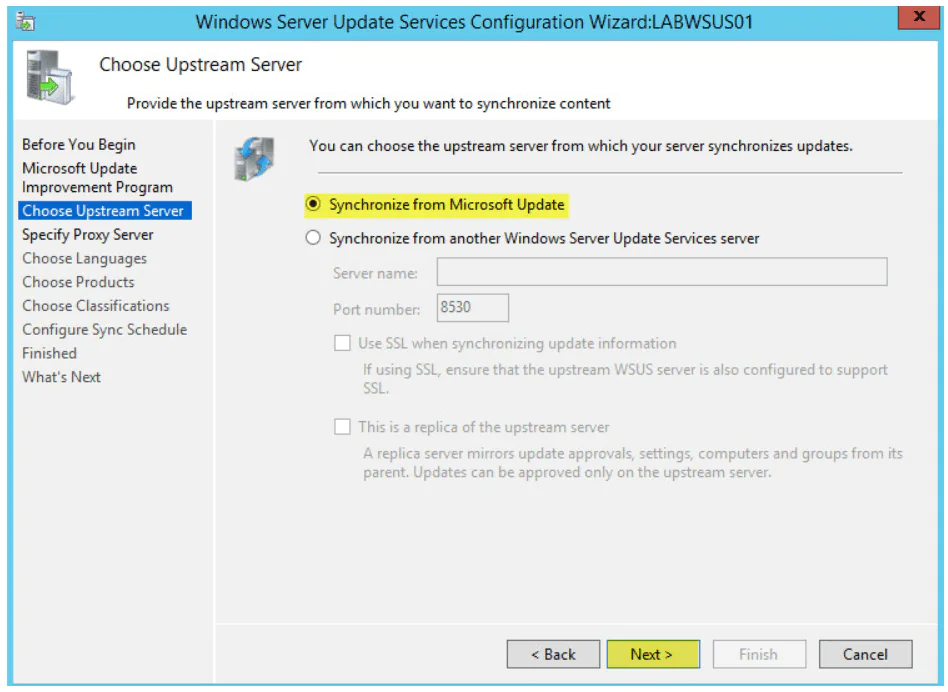
In short, you first need to choose the source of synchronization: the Microsoft server or the upstream WSUS server.
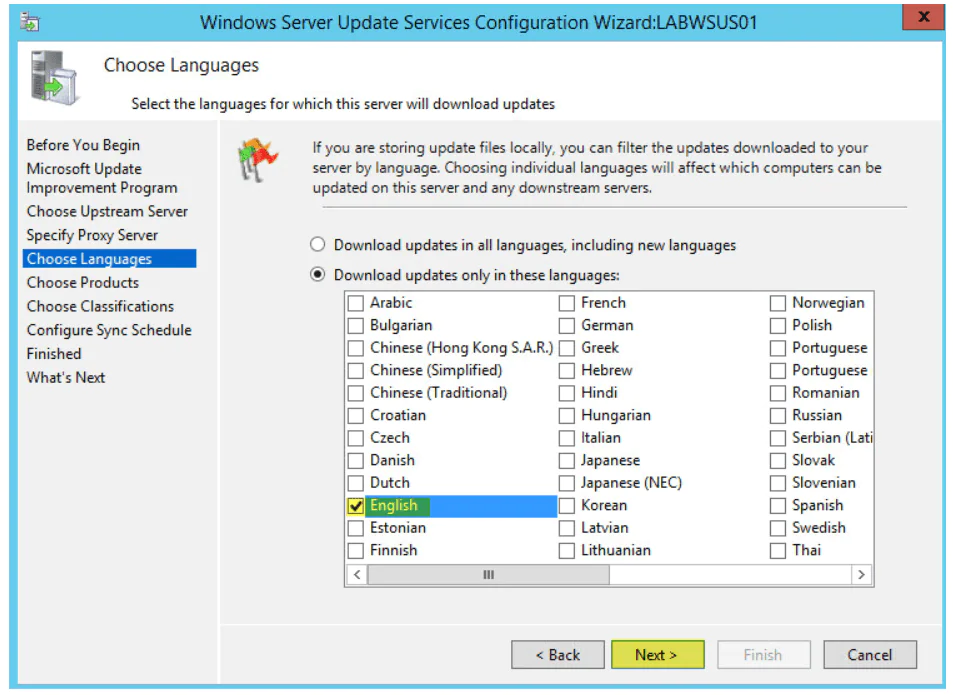
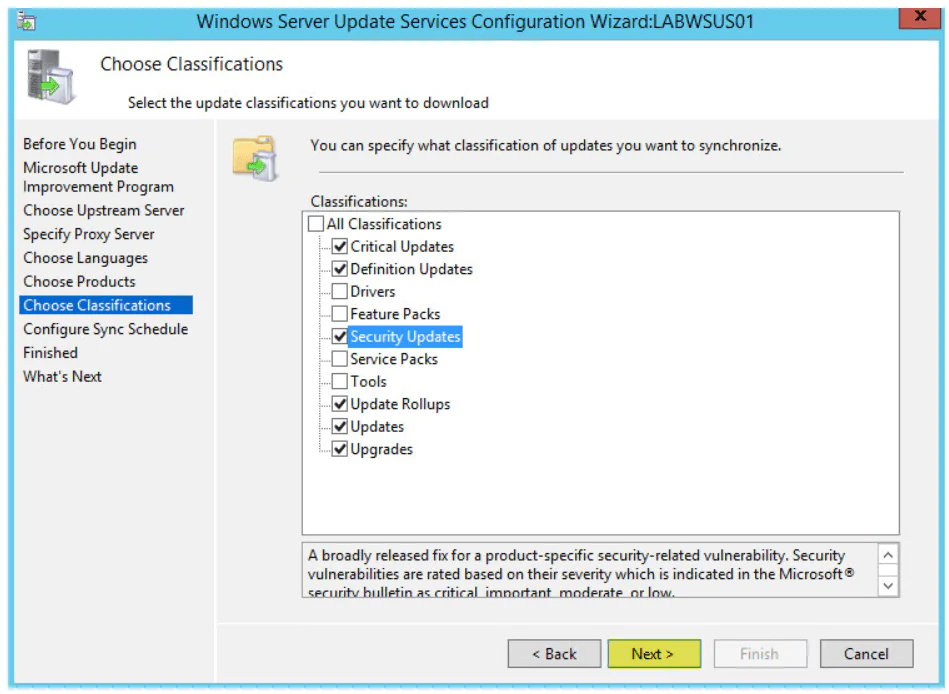
Then choose languages and products.
Choose Classifications
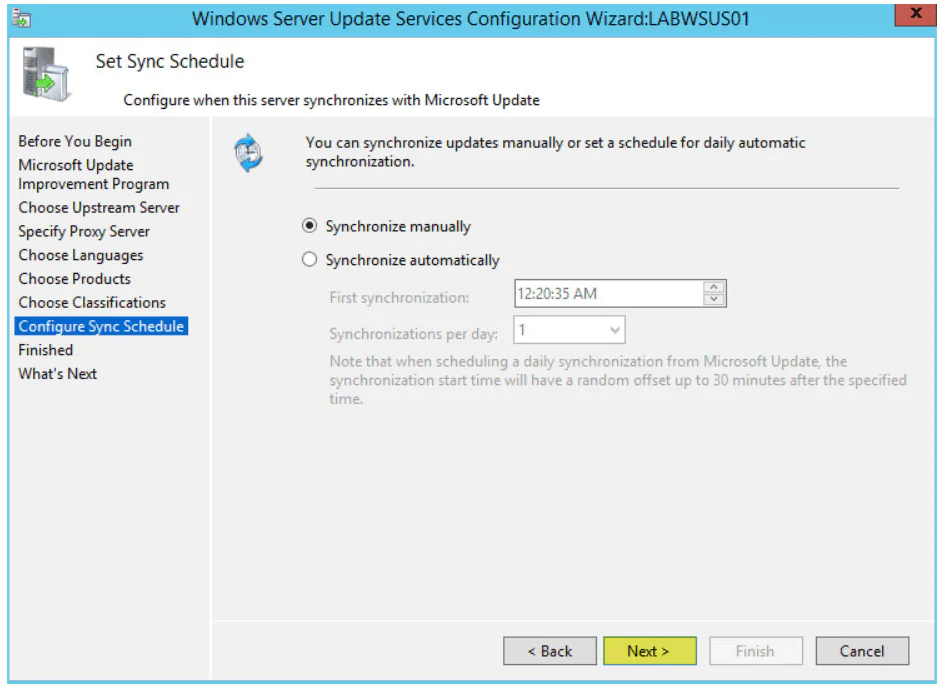
And set the parameters for automatic synchronization.
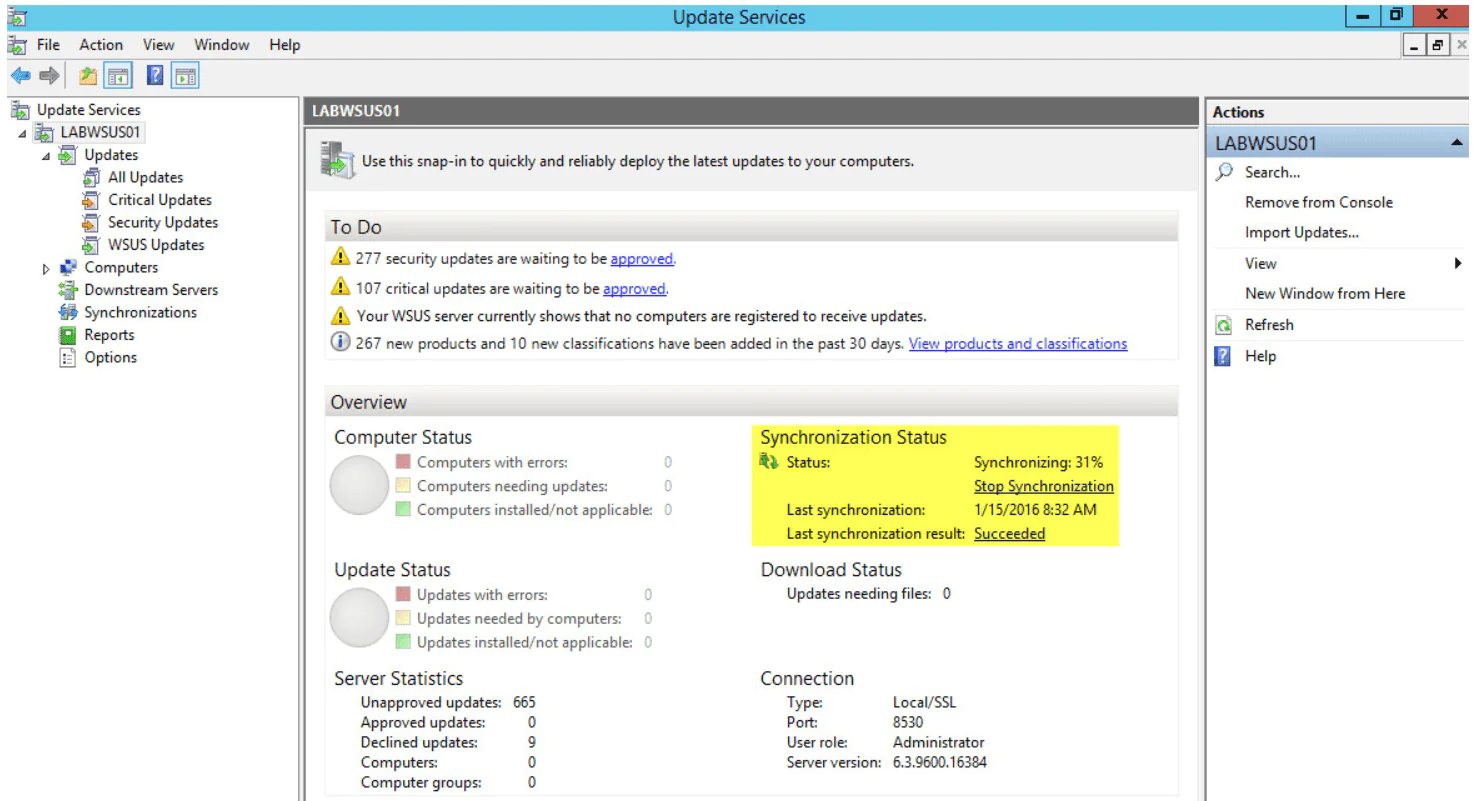
The initial synchronization process may take a long time, depending on the selected set of products and classes, as well as the speed of your Internet channel.
Do not forget to specify the rules for automatic approval and approve already downloaded updates.
After which you will need to tell clients the location of your WSUS server, this can be done via Group Policies: Computer Configuration — Policies — Administrative Templates — Windows Update — Specify intranet Microsoft update service location.
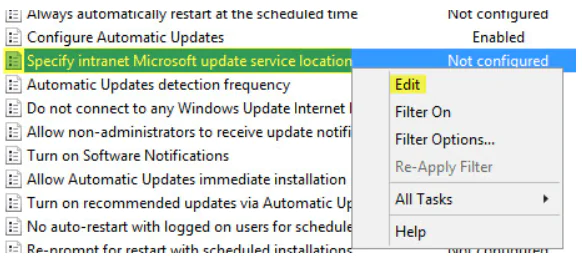
The path to the server should be written as https: // SERVER_NAME: 8530, while we recommend that you explicitly specify the service port. After some time, computers will begin to receive updates and appear in the server console, where you can get detailed information on already installed and required updates.
Microsoft has done a great job to improve WSUS, now it is one of the roles of the system and its installation and configuration should not cause difficulties even for beginners.
Consider using Action1 to Install Windows Updates if:
- You need to perform an action on multiple computers simultaneously.
- You have remote employees with computers not connected to your corporate network.
Action1 is an IT solution for cloud patch management, software deployment, remote access, software/hardware inventory, endpoint management.


