The basis of a networked Windows environment functioning smoothly and flawlessly is Windows Time Service (W32Time) processes, e.g. time synchronization (one of the most crucial). In this article we’ll go through the main facets of working with NTP via PowerShell in Windows server 2012.
How Does Time Synchronization Work in a Domain Environment?
The time synchronization process has the following characteristics:
- The nearest domain controllers set up the time for their registered users.
- All the domain controllers send a request to the DC (Domain Controller) with the Primary Domain Controller Emulator role.
- The PDC emulator, in turn, is synchronized with a more authoritative time source.
In practice, the PDC emulator is usually synchronized with the organization’s NTP server, the provider’s NTP server, or with an external source of time.
How to set up a Domain Controller with the PDC Emulator Role
To configure, we need the PowerShell console running as administrator.
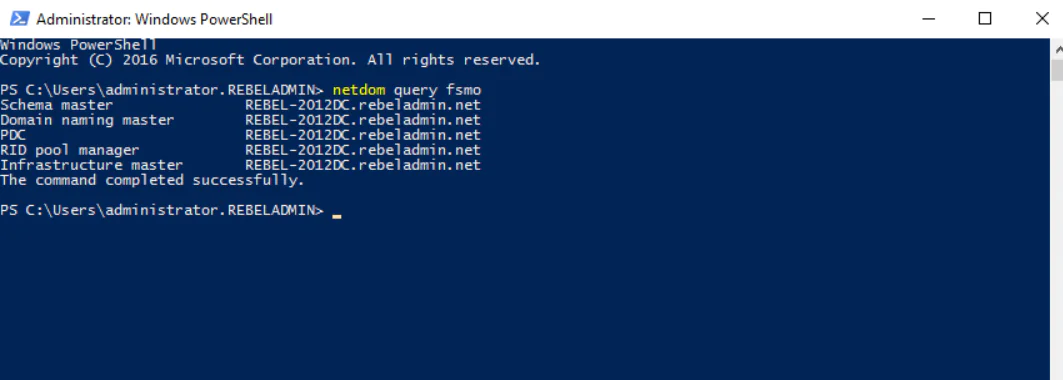
STEP 1: Define the PDC emulator name — the easiest way to execute the command in the PowerShell console you should

Once we’ve connected to the DC with the PDC role, we can come to configuration.
STEP 2: Synchronize the PDC with external time sources:
w32tm /config /syncfromflags:manual /manualpeerlist:”nodes”
Where:
- / syncfromflags: manual is synchronization with nodes from a manually specified list.
- manualpeerlist: nodes is a list (DNS addresses or IP addresses) of time sources.
NOTE:The name of each time source (if there are several) must be separated by a space. And on the firewall, UDP traffic on port 123 in both directions must be allowed.
STEP 3: Authenticate PDC Emulator setting it as a reliable time source for clients:
w32tm /config /reliable:yes
STEP 4: After making the changes, restart the time service:
Restart-Service W32Time
Or update the configuration with the command:
w32tm / config / update
NOTE: If you passed the PDC emulator role on to another domain controller, the old DC would be still an authoritative time-server for the entire domain, which could cause errors in the system debug log. Fix it running the command:
w32tm /config /syncfromflags:domhier /reliable:no /update
Useful Commands to Work with NTP via Powershell
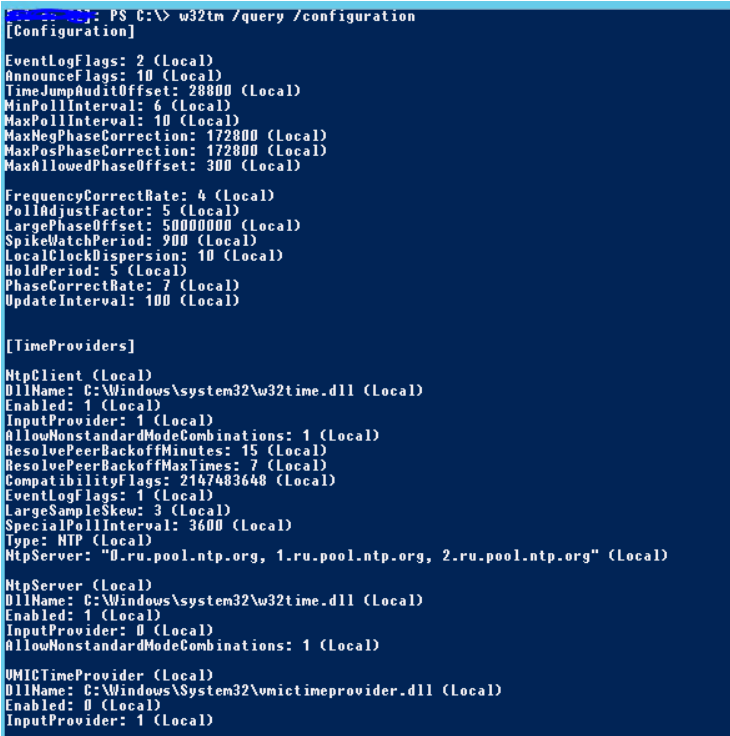
w32tm / query / configuration is to view current time service settings:

Where:
- SpecialPollInterval: 3600 stands for synchronization interval in seconds. Synchronization is held once a day.
- NtpServer indicates the server which the computer synchronizes the time with.
- Type: NTP stands for the type of time synchronization.
The Type parameter can have the following outcomes:
- NoSync — the time service is not synchronized.
- NTP — the time service is synchronized with the servers specified in the NtpServer parameter.
- NT5DS — the time service is synchronized within a domain hierarchy.
- AllSync — the time service successfully uses all possible methods for synchronization.
- w32tm / monitor displays the current domain hierarchy-based time synchronization;
- w32tm / resync is to force the computer to synchronize with the time-server it uses;
- w32tm / unregister removes the time service from the computer;
- w32tm / register registers the time service on the computer;
To set up an NTP server through the registry, then use this thread:
HKLM \ System \ CurrentControlSet \ services \ W32Time \
How to Synchronize System Time with Domain Controller Effortlessly
Action1’s intuitive dashboard helps optimize routine tasks, significantly scaling up IT productivity.
Step 1: After logging into the Action1 dashboard, in the Navigation panel (the left column), select Managed Endpoints and mark the endpoint to set the time remotely.
Step 2: Then click on the More Actions menu and select Run Command.
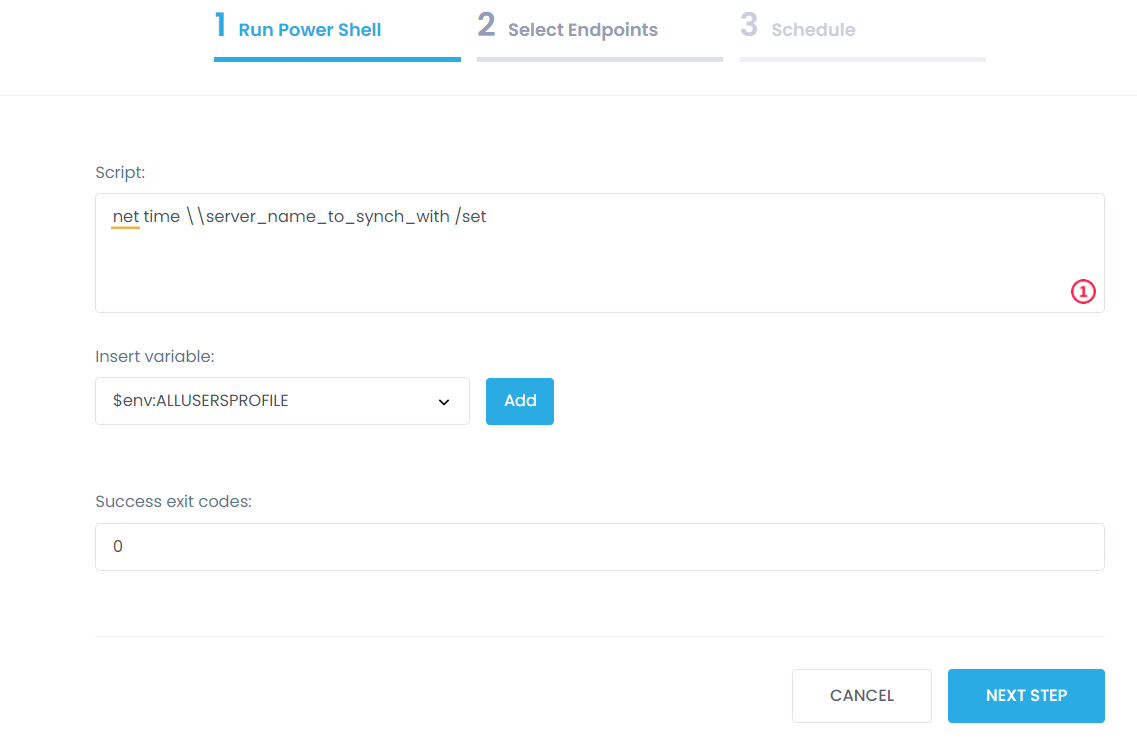
Step 3: In the box, type the script :
net time \\server_name_to_synch_with /set

Step 4: In the Select Managed Endpoints window, you mark those endpoints on which you are going to change the time zone. You can add all the available endpoints or mark them one by one.
Step 5: Schedule the action (Run now/ No schedule yet/ At specific time/ Repeat) and Finish.
Consider Using Action1 Solution
Staying competitive in the market is always a challenge, and loud words don’t do wonders for optimizing administrative tasks and scaling up IT productivity. But actions do! With Action1’s cloud-based patch management solution, your IT department will timely deliver patches and updates, manage IT assets, maintain remote assistance, and run many other complex tasks.
Read the TechRadar review of our product or be the judge — get your free trial.


