This guide discusses how to disable shared access to folders in Windows 10, including disabling file sharing to disks or specific folders.
On most computers running Windows operating systems, the Users folder could be open for public viewing. Attackers can take advantage of this loophole and get full access to your confidential information. When someone allows sharing of any network resources, the system creates Users folder, through which remote users can view your desktop and the My Documents folder. To avoid this undesirable phenomenon, you must revoke the permission to share the Users folder.
Consider several ways to close public access to folders. For example, using the fsmgmt.msc snap-in, Windows Explorer or cmd. In Windows 10, using the fsmgmt.msc snap-in, you can not only close the shared access to drives and individual folders, but also get information about shares, active sessions, and open files. This article shows how to disable File Sharing on Windows 10 using built-in tools, a well as how to stop file-sharing on multiple computers at a time using Action1.
Using Builtin Tools to Stop File Sharing on Windows
Solution 1. Disable File Sharing Using Fsmgmt.Msc
Using the fsmgmt.msc snap-in, you can view all public folders of the system, as well as add or remove a public folder. You can also configure access settings for public folders or view the currently open public resources and connection sessions.
Execute these steps to stop file sharing on Windows 10:
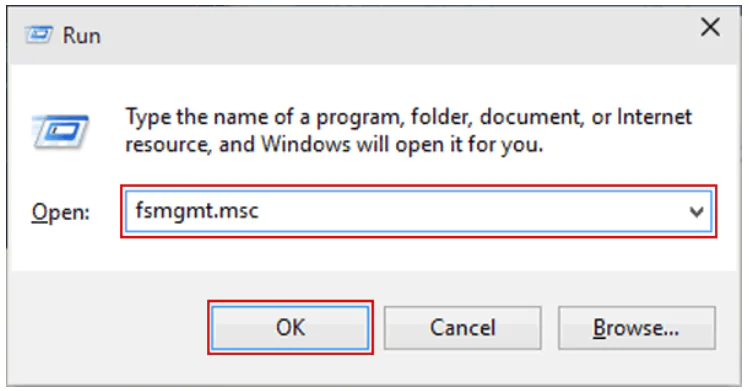
1. First, you should open a snap-in fsmgmt.msc in Windows 10. To do this, press the Win + R key combination, type fsmgmt.msc and click the OK button.
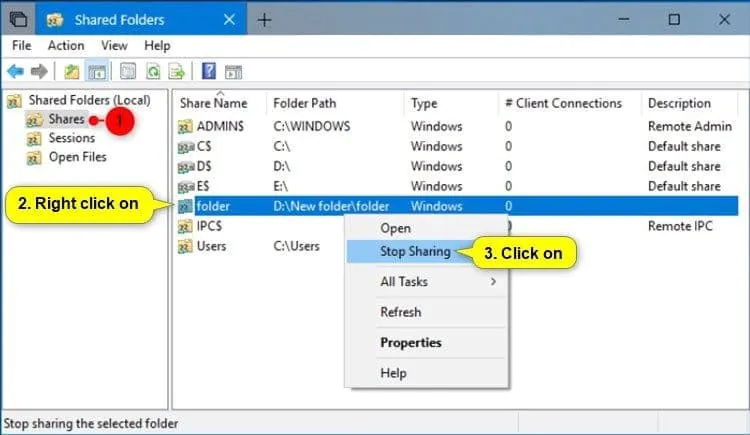
2. In the “Shared Folders” window, in the left menu, select “Shares” (see Screen 2), and on the right, select the shared folder to which you want to close sharing, right-click on it and click the “Stop Sharing” button in the context menu (see Screen 3). When you close the shared access to the folder, it will disappear from the list of shared resources.
Solution 2. Disable File Sharing Using File Explorer
File Explorer is a Windows tool that allows you to work with files and folders: view them, search them on a computer, create, copy, move, open, rename, delete. It also helps to change the properties of a folder or a single file.
In order to stop the file sharing you need to do the following:
1. To open Explorer, press “WIN + R” and enter the explorer command, then press “ENTER” or the “OK” button to confirm.
2. Find the folder, access to which you want to close.
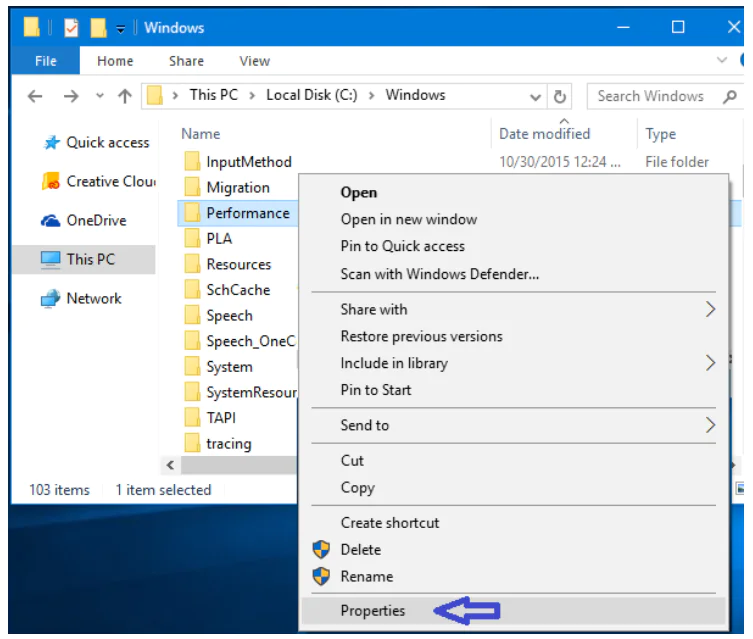
3. Click on it with the right mouse button and select “Properties“
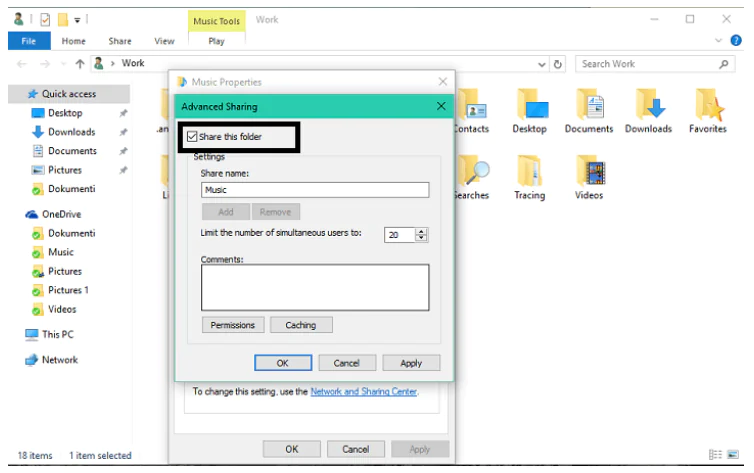
4. Open the “Sharing” tab and click the “Share” button as shown in the picture below
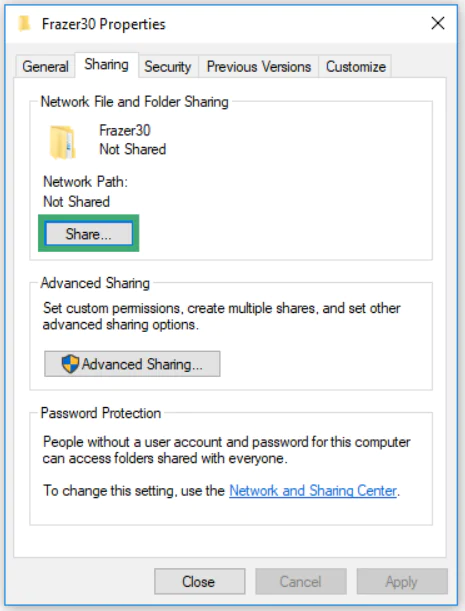
5. Then uncheck the box “Share this folder.” If you now click on “OK” — the shared access to the folder will be closed.
Soltion 3. Disable Sharing the Windows 10 Folder via Command Line
The windows command line is a separate software that is part of the Operating System and provides the relationship between the user and the OS. You can produce MS-DOS commands and other computer commands using the console.
File sharing can be configured much faster if you use the command line (console, cmd.exe). Only 2 steps you need to perform:
1. Open a command prompt. The simplest way is to press WIN + R, type cmd and click Ok.
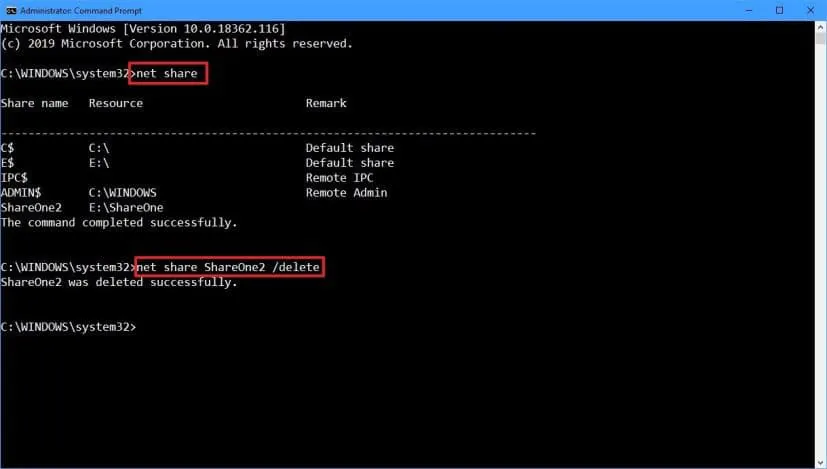
2. After that just one command should be executed in the console:
net share ShareOne2 /delete
This command deletes the network (public) ShareOne2 folder. The ShareOne2 folder of course remains in place.
How to Stop File Sharing Using Action1:
Step 1: Sign-up for Free
Step 2: Enter AD Domain in Discovery Settings

Step 3: See All Managed Computers
Action1 will automatically find all domain computers and show them in the list of managed endpoints:
Step 4: Execute Command Remotely to Stop Sharing
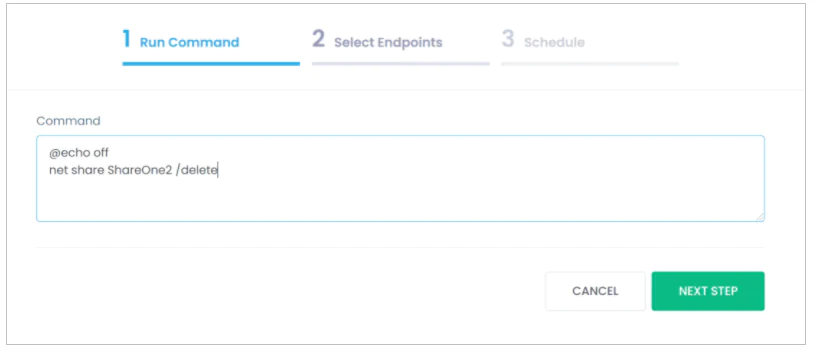
Select one or more endpoints in the list of managed endpoints (see above), select Run Command from the list of actions and then enter net share {sharename} /delete on Step 1:
Step 5: Select Computers
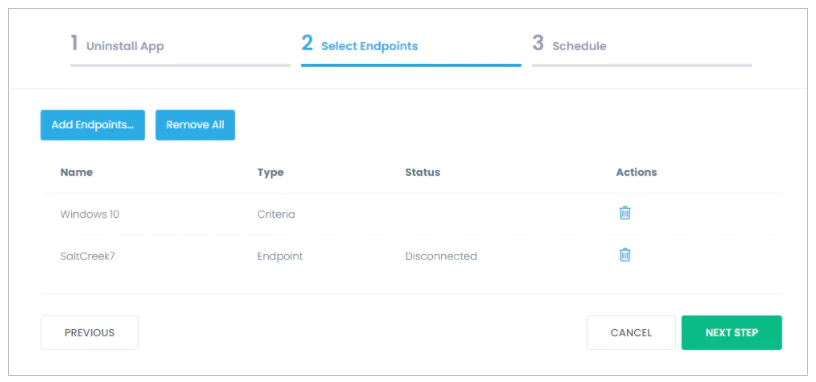
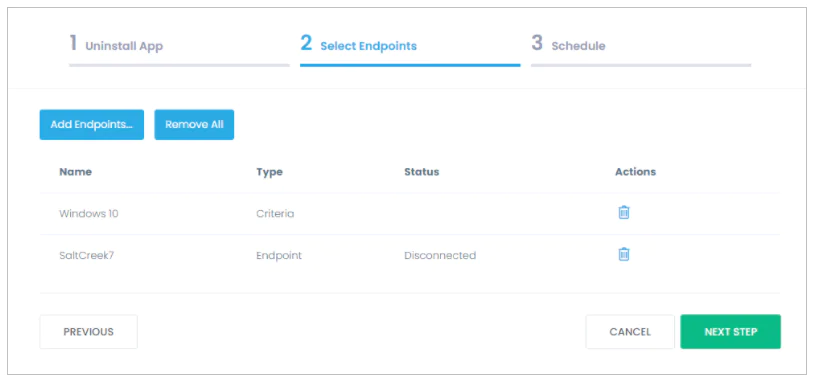
Select the individual computers or groups or computers from which you want to remove the apps and click Next Step:
Consider Using Action1 to Disable File Sharing if:
- You need to perform an action on multiple computers simultaneously.
- You have remote employees with computers not connected to your corporate network.
Action1 is a cloud-based platform for patch management, software deployment, remote desktop, software/hardware inventory, endpoint management and endpoint configuration reporting.


