Creating a script to list of installed software on multiple computers is the first important step in implementing centralized software inventory for your network. Also, this method of building a list of installed programs in the system can be useful before reinstalling the system when you need to find unwanted software. Information about installed applications should include product name, vendor, version, install path and some other data. This guide describes how to create a script to list installed software on multiple computers and save the list of installed programs to CSV file.
How to List Installed Software on Multiple Computers Manually:
1. Execute WMI Query in ROOT\CIMV2 Namespace:
– Launch WMI Explorer or any other tool which can run WMI queries.
– Run WMI query: SELECT * FROM Win32_Product
2. Open WMIC Command-line Interface:
– Press WIN+R
– Type “wmic”, press Enter
– In wmic command line tool type: /node:RemoteComputerName product
3. Run This Simple Windows Powershell Script:
– thru WMI object: Get-WmiObject -Namespace ROOT\CIMV2 -Class Win32_Product -Computer RemoteComputerName
– thru Windows Registry: Get-ItemProperty HKLM:\Software\Wow6432Node\Microsoft\Windows\CurrentVersion\Uninstall\* | Select-Object DisplayName, DisplayVersion, Publisher, InstallDate
– thru Get-RemoteProgram cmdlet: Get-RemoteProgram -ComputerName RemoteComputerName
4. Use Following Code to Select Specific Columns:
– execute: Get-WmiObject -Namespace ROOT\CIMV2 -Class Win32_Product -Computer RemoteComputerName | Select-Object Name, Version, PSComputerName
5. Sort the Results Using the Line Below:
– invoke command: Get-WmiObject -Namespace ROOT\CIMV2 -Class Win32_Product -Computer RemoteComputerName | Select-Object Name, Version, PSComputerName | Sort-Object Name
6. The Next Code Helps to Filter Results:
– use it: Get-WmiObject -Namespace ROOT\CIMV2 -Class Win32_Product -Computer RemoteComputerName | Select-Object Name, Version, PSComputerName | Where-Object -FilterScript {$_.Name -like “Microsoft*”}
7. Save Results to CSV File:
– run: Get-WmiObject -Namespace ROOT\CIMV2 -Class Win32_Product -Computer RemoteComputerName | Select-Object Name, Version, PSComputerName | Export-CSV “c:\file.csv” -Append -NoTypeInformation
8. The Next Step Is to Query Multiple Computers:
How to List Installed Software with Action1:
Action1’s intuitive dashboard helps optimize routine tasks, significantly scaling up IT productivity.
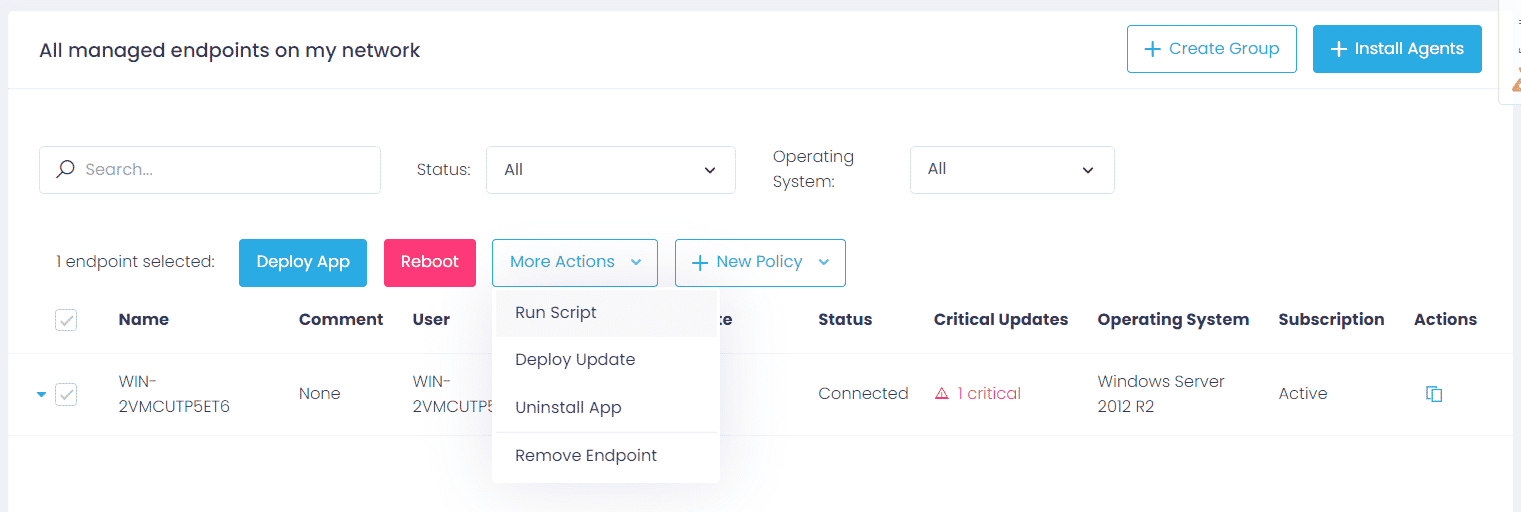
Step 1: After logging into the Action1 dashboard, in the Navigation pane (the left column), select Managed Endpoints and mark the endpoint to get a list of installed software.
Step 2: Then click on the More Actions menu and select Run Script.
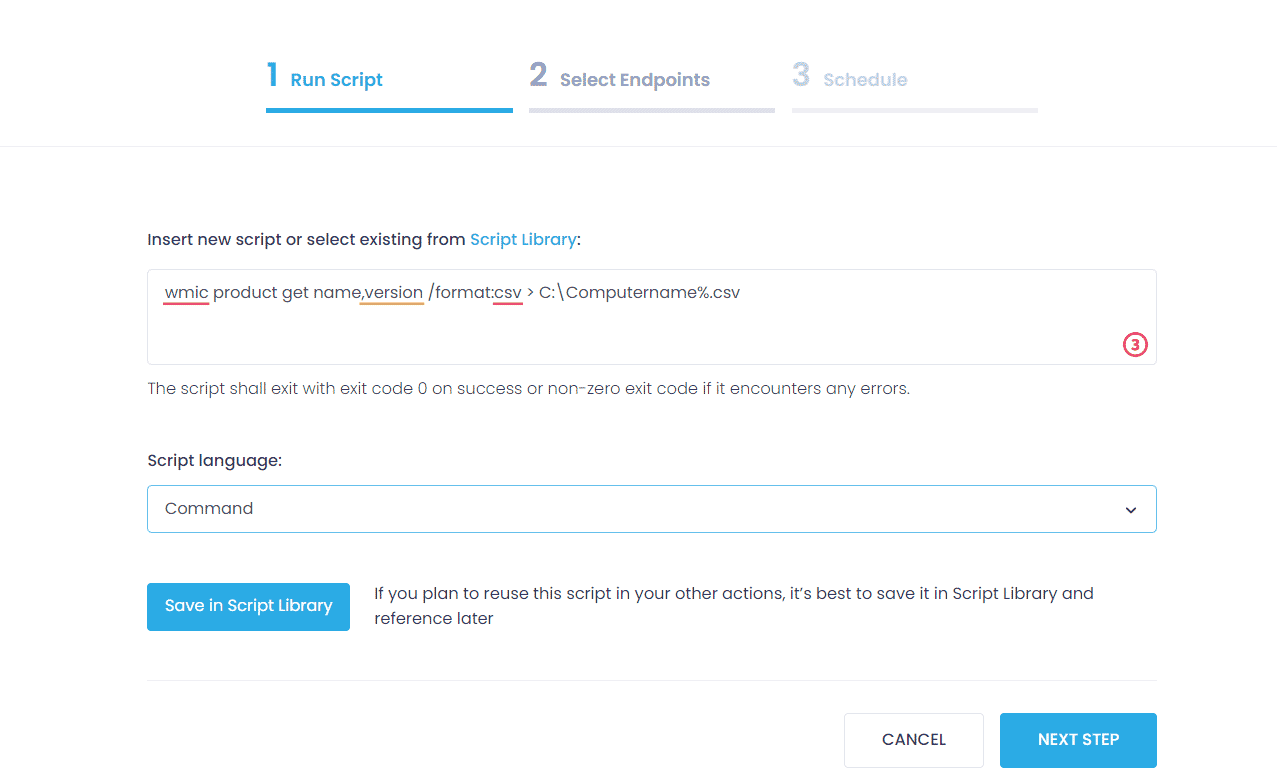
Step 3: Choose Script language and type this command to get a list of installed software:
wmic product get name,version /format:csv > C:\Computername%.csv
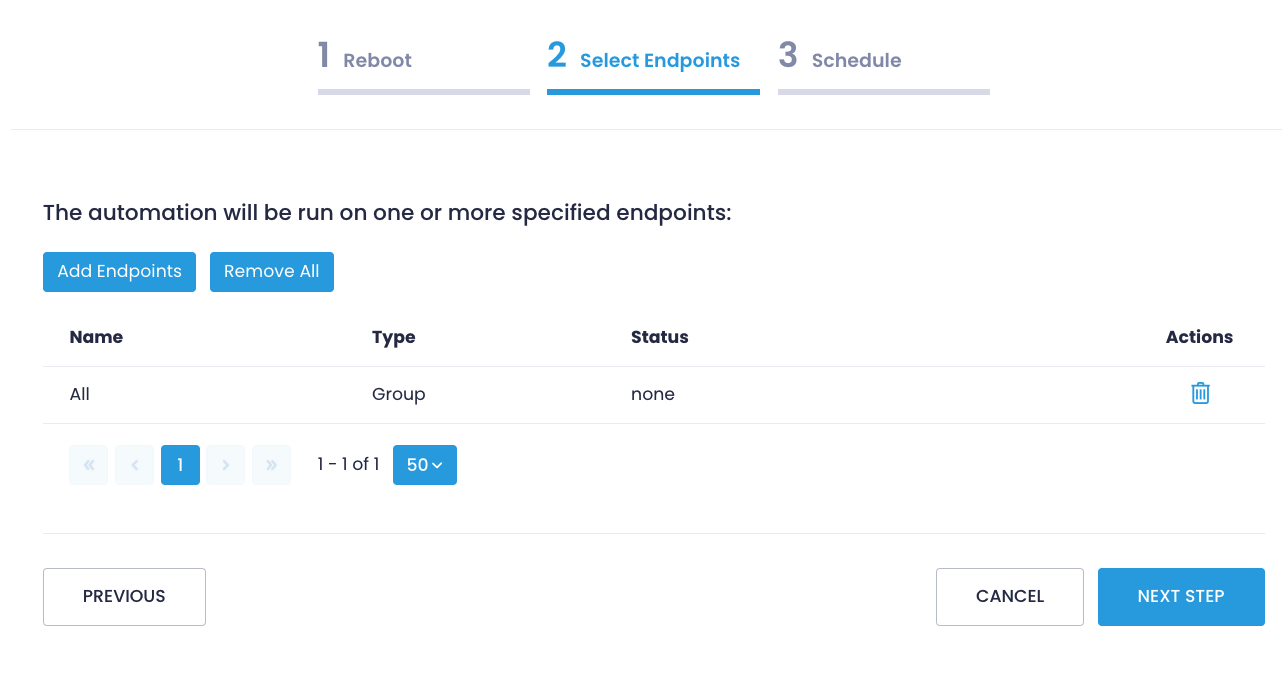
Step 4: In the Select Managed Endpoints window, mark endpoints from which you are going to get a list of installed software. You can add all the available endpoints or mark them one by one.
Step 5: Schedule the action (Run now/ No schedule yet/ At specific time/ Repeat) and Finish.
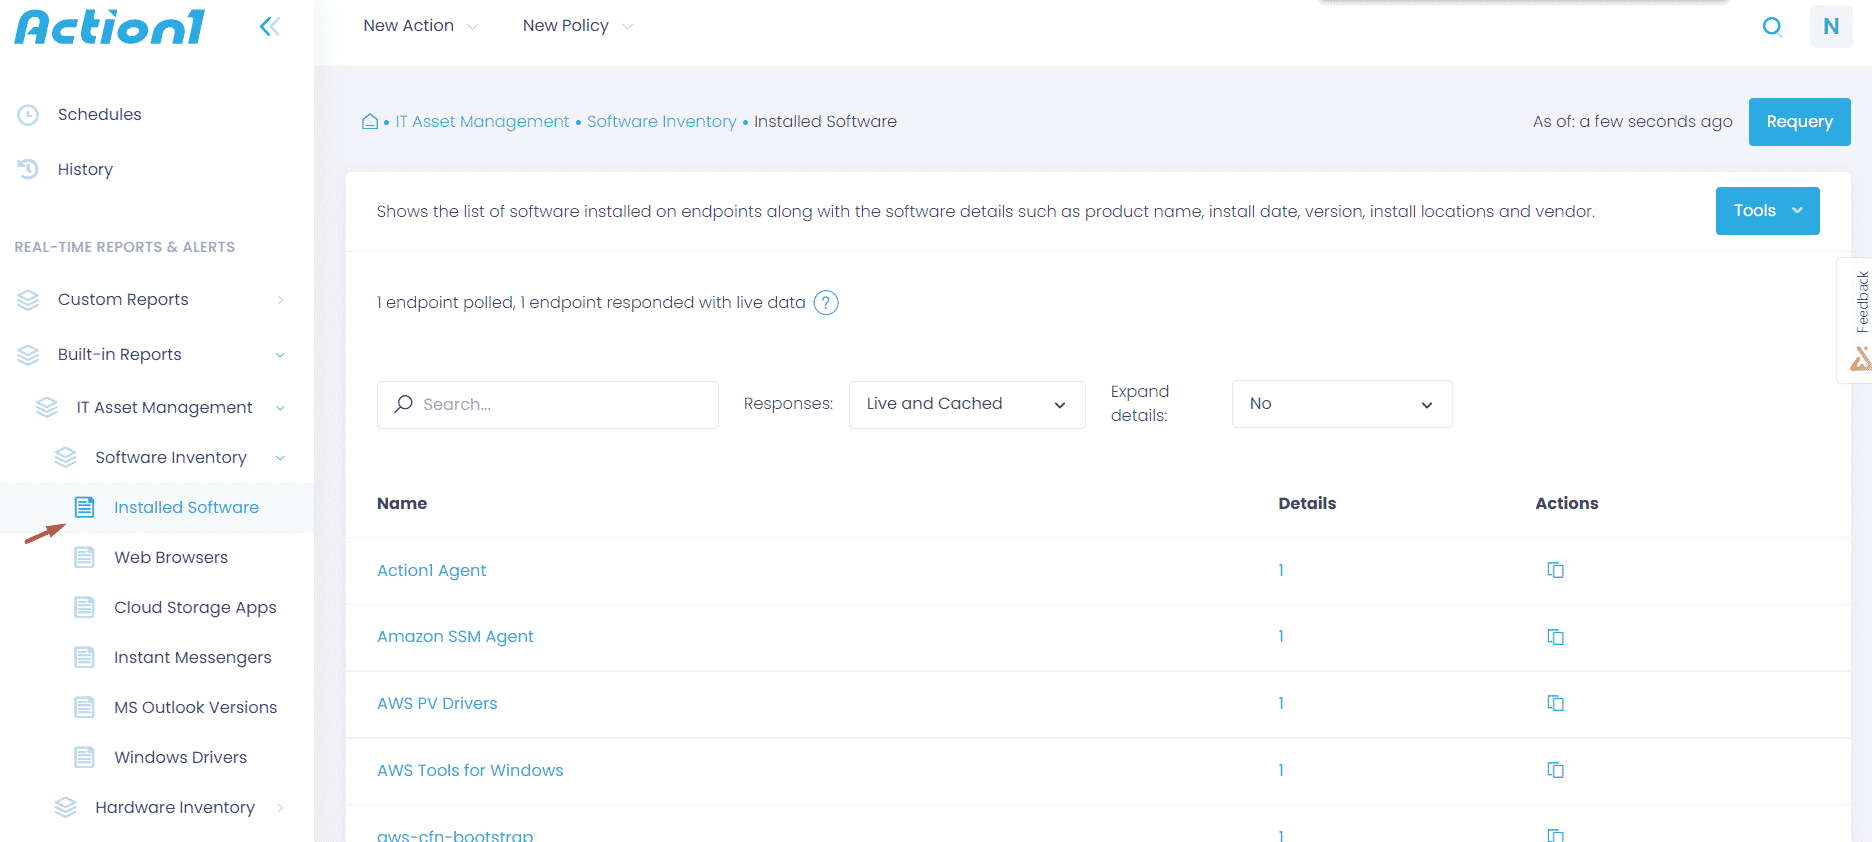
You can use Built-in Reports/Installed Software to get a list of installed software as well.


