Disable or enable the network adapter in network connections
Disable or enable the network adapter in device manager
Disable or enable the network adapter using the Wmic command
Disable or enable the network adapter using the Netsh command
Disable or enable the network adapter with Action1
1. Disable or Enable the Network Adapter in Network Connections
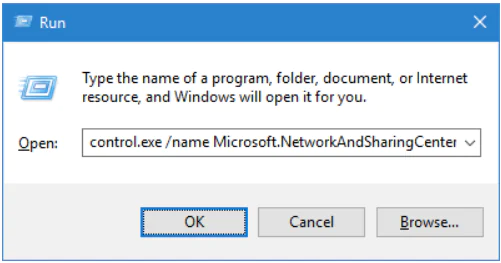
In the search bar or in the Run, type control.exe /name Microsoft.NetworkAndSharingCenter and press the Enter key (or go to the Start menu ⇨ Settings ⇨ Network and Internet ⇨ Status ⇨ Adapter Settings).
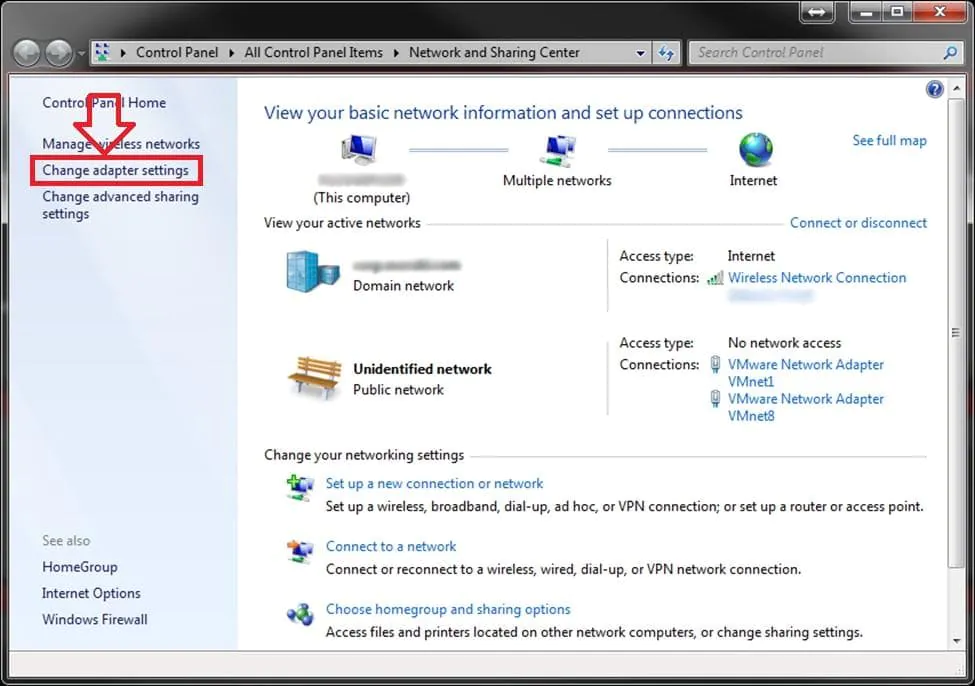
On the left side, click on “Change adapter settings“.
To disconnect the network connection: select the network adapter that you want to disconnect and click on “Disconnect the Network Device” (or right-click on the network connection and select Disconnect).
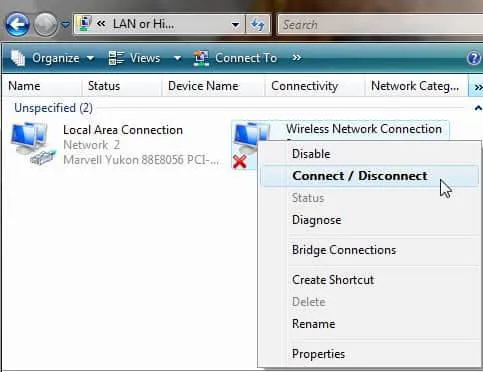
2. Disable or Enable the Network Adapter in Device Manager
Open the “Device Manager“: one of the ways is to execute in the search bar or in the menu (execute is called with the Win + R keys) enter the command devmgmt.msc and press the Enter key.
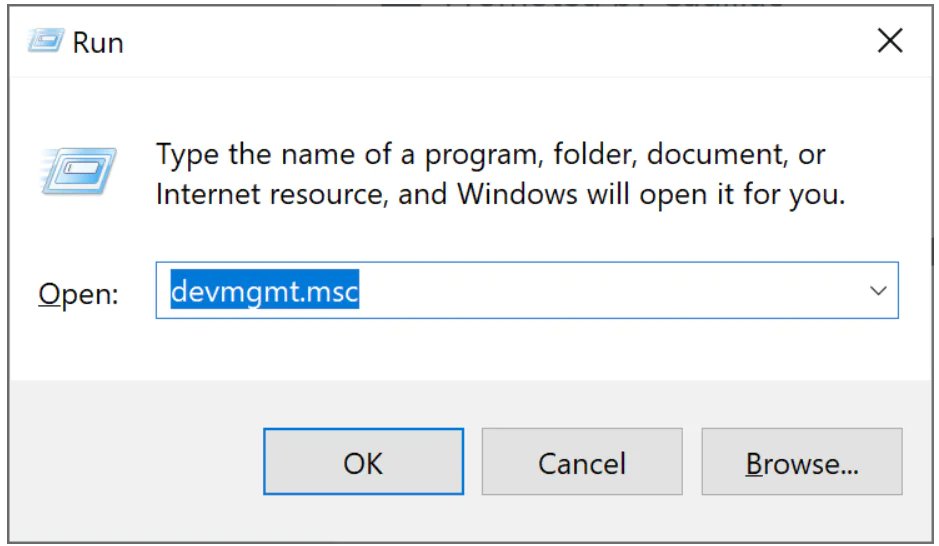
To disconnect the network connection: open “Network adapters“, right-click on the one you want to disconnect, and click on “Disable device“. In the window that appears, click on “Yes.”
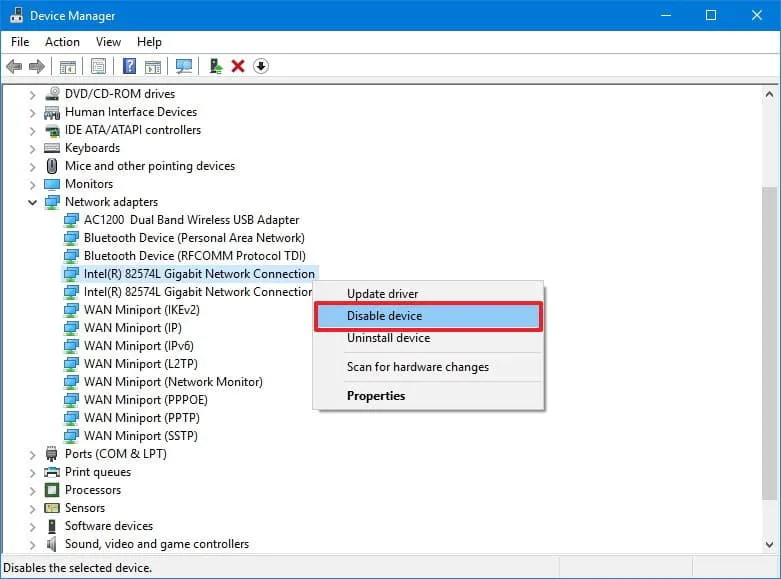
3. Disable or Enable the Network Adapter Using the Wmic Command
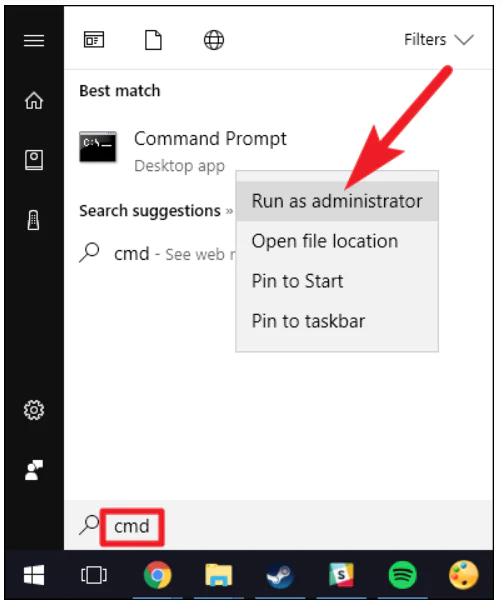
Open a command prompt as an administrator: one way is to enter cmd in the search bar and right-click on the result found, select “Run as administrator“.
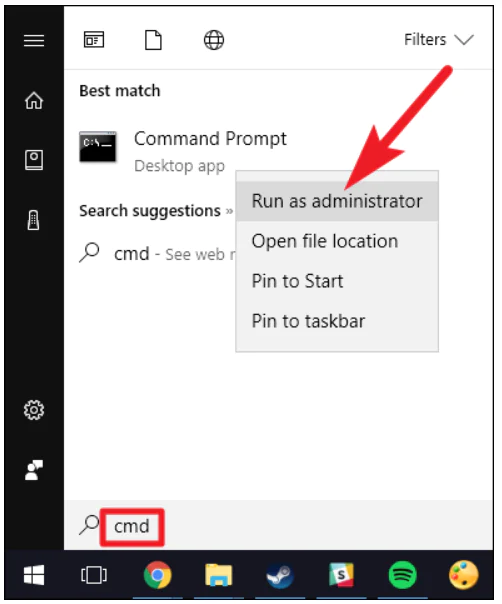
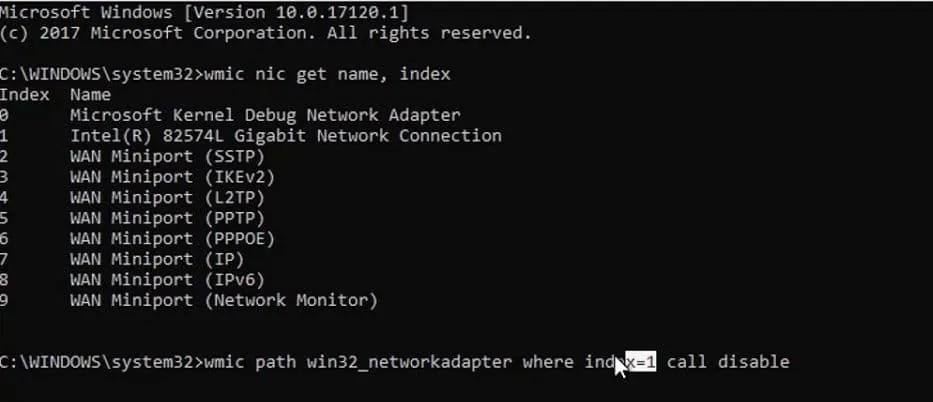
Type wmic nic get name, index and press Enter. Opposite the name of the network adapter that you need to enable or disable is the index that you need to remember.
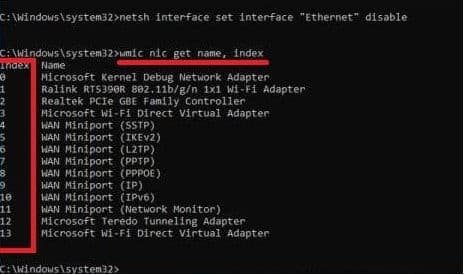
To disable the network adapter, use the command wmic path win32_networkadapter where index = 1 call disable (the number must be replaced with the index of the network adapter)
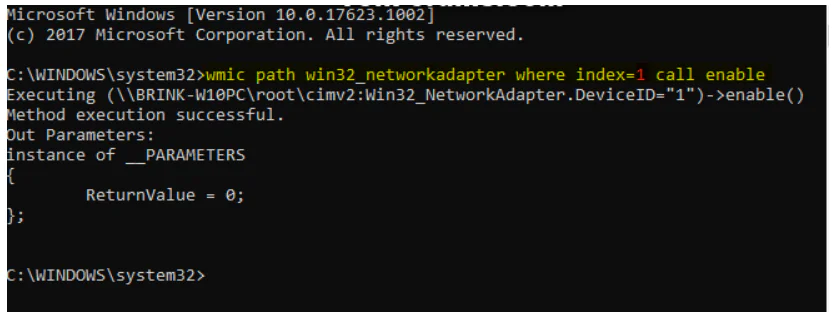
To enable the network adapter, use the wmic path win32_networkadapter command where index = 1 call enable
4. Disable or Enable the Network Adapter Using the Netsh Command
Open a command prompt as an administrator: one way is to enter cmd in the search bar and right-click on the found command line, select “Run as administrator“.
Type netsh interface show interface and press Enter. Remember the interface name of the network adapter you want to disable or enable.
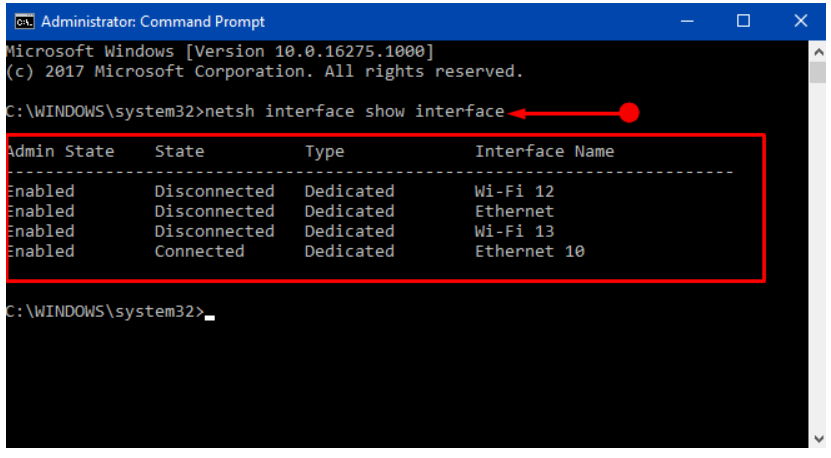
To disable a network connection, use the netsh interface set interface “Wi-Fi 12” disable command (replace the one highlighted in red with the name of the network adapter interface).
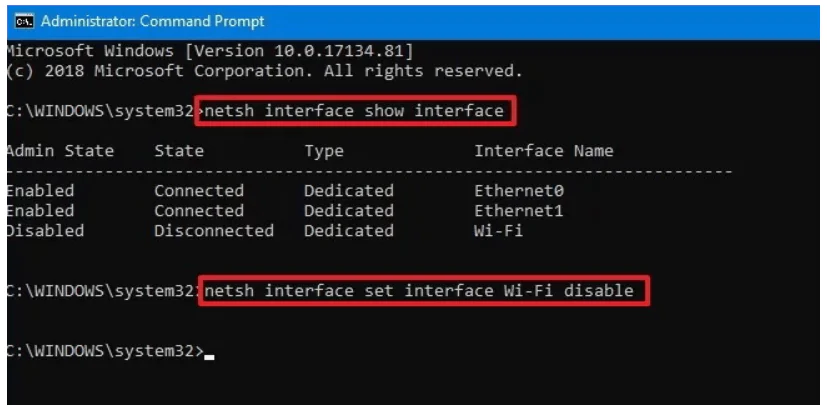
To enable a network connection, use the netsh interface set interface “Wi-Fi 12” enable command (replace the highlighted red with the name of the network adapter interface).
5. Disable or Enable the Network Adapter with Action1
Action1’s intuitive dashboard helps optimize routine tasks, significantly scaling up IT productivity.
Step 1: After logging into the Action1 dashboard, in the Navigation pane (the left column), select Managed Endpoints and mark the endpoint to delete the user profile remotely.
Step 2: Then click on the More Actions menu and select Run Command.
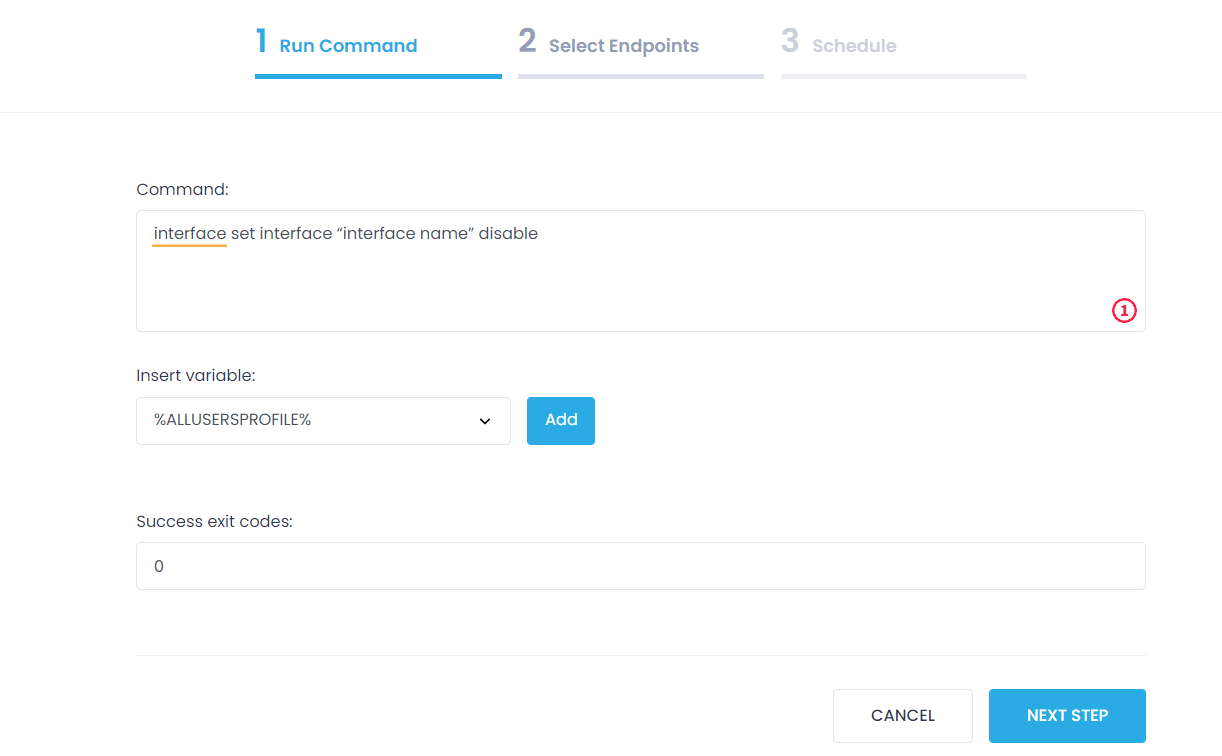
Step 3: In the box, type this command to disable adapter:
interface set interface “interface name” disable
or this one to enable adapter:
interface set interface “interface name” enable
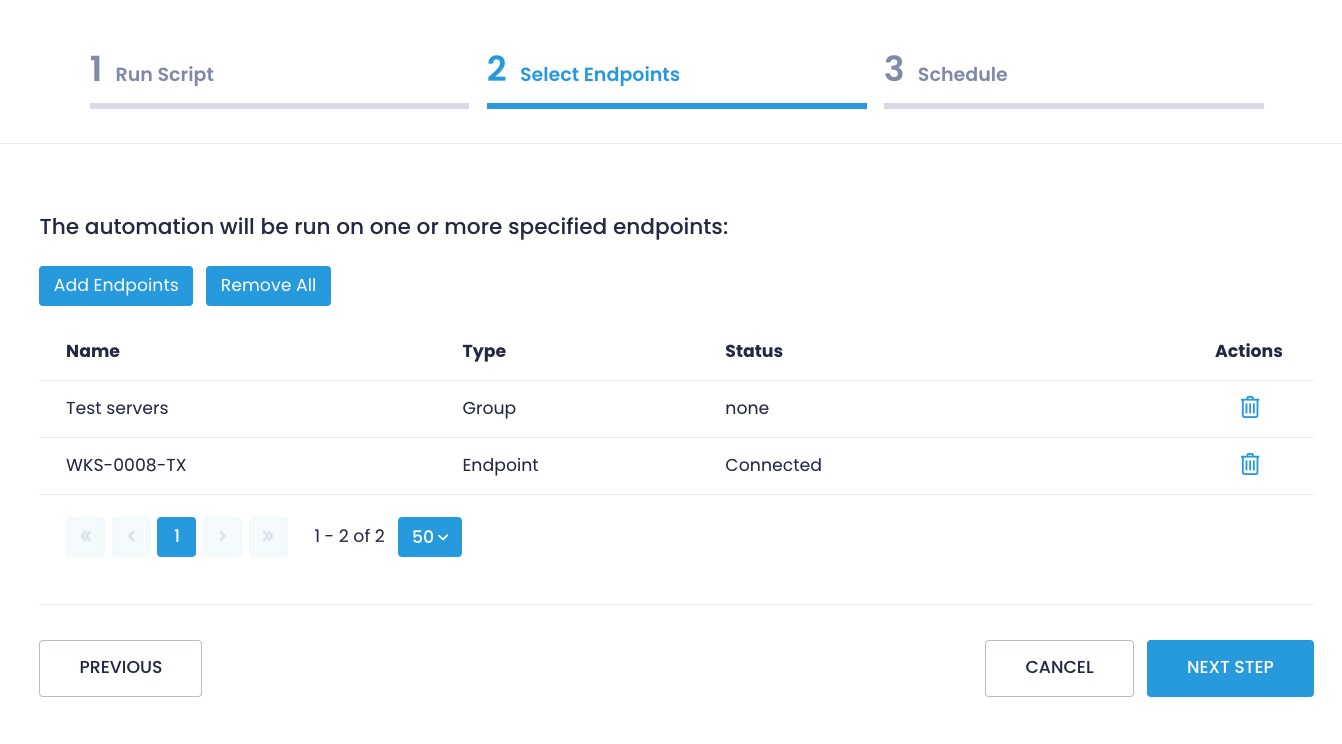
Step 4: In the Select Managed Endpoints window, you mark those endpoints on which you are going to disable or enable network adapter. You can add all the available endpoints or mark them one by one.
Step 5: Schedule the action (Run now/ No schedule yet/ At specific time/ Repeat) and Finish.
Consider Using Action1 to Disable or Enable Network Adapter if:
- You need to perform an action on multiple computers simultaneously.
- You have remote employees with computers not connected to your corporate network.
Action1 is a cloud-based platform for patch management, software deployment, remote desktop, software/hardware inventory, and endpoint management.
